Tag Archives: daring bakers

Seedy Crisps (Crackers)

Our July 2012 Daring Bakers’ Host was Dana McFarland and she challenged us to make homemade crackers! Dana showed us some techniques for making crackers and encouraged to use our creativity to make each cracker our own by using ingredients we love.

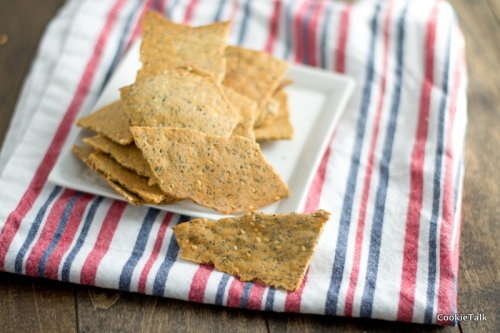
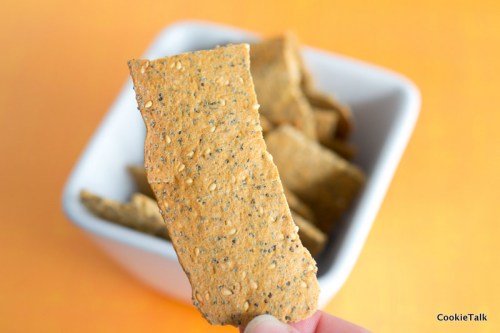
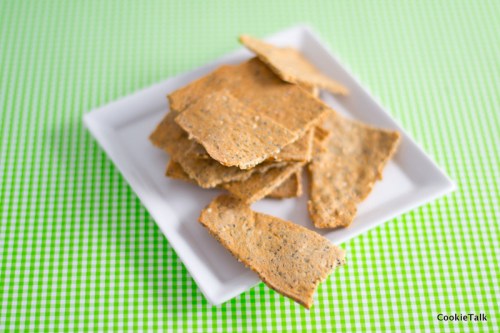
I know I just did  Parm Herb Crackers, but can you really have too many cracker options? Nope, I didn’t think so either. This dough is very easy to roll out nice and thin with very little muscle involved. That makes me happy. These are also crackers that you can just break into random pieces. Fun, right? Oh, and they go great with cheese, which is a requirement for a good cracker. If a cracker can’t hold a piece of cheese and taste good, that cracker is failing in its cracker duties. What’s that? I’m not making sense? Well, blame that on too much coffee and not enough wine. Oh, look, a cracker!

I used White Wheat flour again but otherwise didn’t change the recipe at all. These come together in no time at all. You’ll definitely spend more time standing around the oven waiting for them to cook. Or maybe don’t stand around the oven. It’s hot out, after all. Go hang out by the freezer.

On a side note, I do not like taking pictures of crackers. I don’t think they are photogenic. Good thing they are tasty.

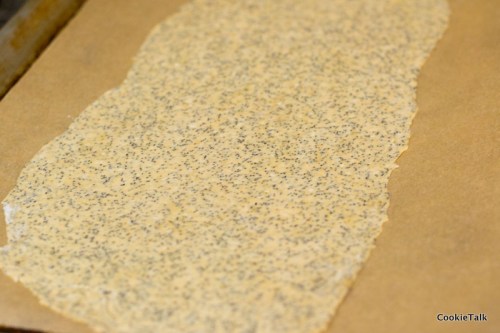
Here’s what they look like before baking:

In the time I spent writing this post, I could have made another batch of crackers. So, what are you waiting for?

Seedy Crisps

One year ago: Homemade Oreos

Yield: A lot of crackers

Difficulty: Easy

Time: 10 minutes to prep and roll; 15 minutes to rest;  30 minutes to bake

  • Ingredients
  • 2 cups (280 grams) White Wheat Flour (or split half wheat and half AP)
  • 1/3 cup (50 grams) poppy seeds
  • 1/3 cup (50 grams) sesame seeds
  • 1 1/2 tsp salt
  • 1 1/2 tsp baking powder
  • 3 TB olive oil
  • 3/4 cup + 1 TB (6 1/2 oz) water

Directions

1. Preheat oven to 450F. Line four sheet pans (or just work in batches) with silpat or parchment. Note: My oven takes forever to preheat, but if yours doesn’t, you can wait until the dough is finished before you turn on the inferno.

2. Mix together flour, seeds, salt, and baking powder. Stir in the olive oil. Then stir in the water slowly until a dough forms. You may not need it all, you may need more. I needed all the water, but not more. Knead a few times on the counter to form a smooth ball. Should come together fairly quickly. Cover with a towel and let rest for 15 minutes.

3. After resting, diving into four pieces. Roll each piece thin. It should be about the length of the sheet pan. Don’t worry about the shape – you will just be breaking it into pieces later.

4. Bake each pan for about 7 minutes, flip, then 7 minutes more. At this point, break into pieces and bake for another five minutes if needed. These crackers are supposed to be crispy.

5. Let cool completely and store in an airtight container for up to 2 weeks.

Eat and enjoy!

11 Comments

Filed under cracker, savory

Easy Challah Bread

May’s Daring Bakers’ Challenge was pretty twisted – Ruth from The Crafts of Mommyhood challenged us to make challah! Using recipes from all over, and tips from “A Taste of Challah,” by Tamar Ansh, she encouraged us to bake beautifully braided breads.

I was pretty excited about this month’s challenge. My hubby and I love challah and I love any excuse to make it!

Challah bread is definitely a bread that anyone can make. It’s pretty forgiving and easy to shape. I have no idea just how traditional this particular recipe is (not much challah bread up in North Dakota where I grew up), but it is tasty. This could also be easily made into rolls for those summer time burgers now that grilling season is here with Memorial Day.

Thank you to all who serve on this Memorial Day! Thanks to my grandfather who served 23 years in the Air Force, my father-in-law who served 20 years, and my brother-in-law who also served 20 years. And especially to my wonderful hubby who is still serving – you make me proud every day!

Challah Bread

From Professional Baking by Wayne Gisslen

Yield: 2 loaves

Difficulty: Intermediate

Time: 30 minutes hands on; additional 2 to 3 hours for baking and proofing.

  • 8 oz water (temperature will vary depending on your kitchen – warm kitchen equals cool water)
  • 1 TB + 2 tsp instant yeast
  • 20 oz bread flour
  • 4 oz egg yolk (about 6 to 8 eggs)
  • 1.5 oz sugar
  • 2 tsp salt
  • 2 oz oil
  • egg wash

1. Put all the ingredients into a mixing bowl starting with the water. If using a stand mixer, mix on speed 2 for 4 minutes (using your dough hook) or until all the ingredients come together into a ball, or use a wooden spoon to mix until it is ready to knead. At this point I like to finish kneading by hand, but feel free to finish in the mixer on speed 3. Knead until smooth.

2. Form into a ball and place in a greased bowl. Cover and let rise until about double, about 1 to 2 hours.

3. Gently deflate and cut six equal strands. Roll each strand to the length of your sheet pan. Place three strands on each sheet pan and braid. Pinch the ends and tuck under. Brush with egg wash and let rest for another hour or until about double again. Preheat oven to 400F.

4. Brush with egg wash again. Bake about 25 minutes, rotating half way through. Loaves should be golden brown. Check temperature if needed – bread should be no less than 180F in the center.

Let cool completely (it will be tough!) before enjoying! This bread makes a fantastic french toast, but it is also great all by itself! Enjoy!

Note: I know there are no pictures of the process and the instructions might be a bit vague for those who haven’t made bread before. Please shoot me an email or comment below if you need further clarification! It really is an easy bread to make!

Check out more bread ideas at Yeast Spotting

9 Comments

Filed under bread

Spice Coffee Cake

The Daring Bakers’ April 2012 challenges, hosted by Jason at Daily Candor, were two Armenian standards: nazook and nutmeg cake. Nazook is a layered yeast dough pastry with a sweet filling, and nutmeg cake is a fragrant, nutty coffee style cake.

While the Nazook looked utterly amazing and mouthwatering, I had no time to make it this month due to my crazy busy schedule right now. (This is the part where you pity me, of course). Thankfully, the nutmeg cake rocked and I’m so glad Jason introduced us to it! It’s incredibly easy and quick to make and tastes delightful, especially with a cup of coffee (huh, wonder if that’s why it’s called a coffee cake?). It  has a crust like a cheesecake and texture like well, a dense cake. No icing or glaze needed but I’m sure that wouldn’t hurt things. Don’t let it’s simple exterior fool you. The flavor is quite complex.

This cake would be easy to personalize to meet your taste buds. I didn’t find the nutmeg overwhelming but I do love nutmeg. I also added a pinch of cinnamon. Nutmeg and cinnamon are just meant to be together, in my humble opinion. But if they aren’t your favorite spices, just add whatever suits you. This cake has a beautiful caramel taste. The edges get a little more done than the center but that was actually my favorite part. A little bit chewier and caramel-y.

Did I mention it was quick? Less than 20 minutes, maybe closer to 10 but I wasn’t really counting, to pull together and about 40 minutes to bake. I love quick recipes that taste awesome, don’t you?

Nutmeg Cake

  • 1 cup milk
  • 1 tsp baking soda
  • 2 cups (280 gm/10 oz) AP Flour
  • 2 tsp  baking powder
  • 2 cups  (400 gm/14 oz) brown sugar, firmly packed
  • 3/4 cup (170 gm/6 oz) butter, unsalted, cubed
  • 1/2 cup walnut pieces, or any nut of your choosing. I used pecans.
  • 1 to 1-1/2 teaspoons ground nutmeg
  • 1 tsp cinnamon
  • 1 egg

1. Preheat your oven 350°F.
2. Mix the baking soda (not baking powder) into the milk. Set aside.
3. Put the flour, baking powder, and the brown sugar into your food processor (mixer will work too). Pulse until uniformly mixed.
4. Toss in the cubed butter. Pulse until uniformly mixed into tan colored crumbs.
5. Pour HALF of the crumbs into your springform (9”/23cm) pan. Press out a crust using your fingers and knuckles.
6. Mix in the nutmeg and cinnamon
7.  Add the egg, mix until combined.
8. Pour in the milk and baking soda mixture. Continue to mix until a slightly lumpy tan batter is formed.
9. Pour the batter over the crust in the springform pan.
10. Gently sprinkle the nut pieces over the batter.
11. Bake in a preheated oven for 30-40 minutes. It’s ready when the top is golden brown, and when a toothpick comes out clean. It took 40 minutes in my oven, but I started checking at 30 minutes.
12. Let cool for a minute or two, then run a knife around the pan. Remove the outer part and let cool. If you let it cool in the pan it may stick. Make coffee and enjoy!

8 Comments

Filed under baking, breakfast, cake, Daring Bakers

Lemon Blueberry Ricotta Muffins

The Daring Bakers’ February 2012 host was – Lisa! Lisa stepped in last minute and challenged us to create a quick bread we could call our own. She supplied us with a base recipe and shared some recipes she loves from various websites and encouraged us to build upon them and create new flavor profiles.

I’m having a love hate relationship with these muffins. My favorite muffin forever has been blueberry. So of course, I decided to make blueberry muffins for this challenge, but work towards developing my own. I started with this recipe from King Arthur Flour. I modified it quite a bit before actually making the original recipe. Not always the best idea, but well, I was in a hurry. At first I hated them and almost threw them all in the garbage. After sitting, however, I liked them again.

I think the issue is that these are slightly healthier muffins. Not a health food, but healthier than say, a Starbucks muffin. There isn’t much fat, not much sugar, and flax for that I-feel-less-guilty-when-eating-these. I’m trying to add more flax to our baked goods, since it has so many health benefits, particularly all those Omega-3s. But when eating a muffin, most of the time we expect it to be sweet. These aren’t overly sweet, so once I got past that, I really liked them. My taste buds just needed a moment to adjust. I didn’t particularly care for the whole flax seeds, but the flax meal was not noticeable.

All that being said, these are a work in progress. But for now, they are a decent muffin, quite good with coffee. I used Meyer lemons since they are in season but traditional lemons will work fine. I’m posting two recipes: one with the healthier additions (which is the one I made) and the less healthier muffin for those days when you just need a muffin.

Lemon Blueberry Flax Muffins

Yield: 12 to 15 muffins

Time: Less than one hour including bake time

Difficulty: Very Easy

One Year Ago: Leaning Tower of Red Velvet

Modified from King Arthur Flour

  • 2 Cups AP Flour
  • 1/4 cup flax meal
  • 1/4 cup flax seeds (optional)
  • 1 1/2 tsp baking powder
  • 1/2 tsp baking soda
  • 1/2 tsp salt
  • 4 TB butter, room temp
  • 1/2 cup brown sugar
  • 4 TB lemon juice (juice of 1 lemon)
  • zest of 2 lemons
  • 2 eggs
  • 1 cup ricotta (or 3/4 cup milk)
  • 1 1/2 cup blueberries, fresh or frozen
  • Sanding (coarse) sugar for sprinkling

1. Preheat oven to 375F. Line a muffin pan with papers or grease.

2. Whisk together dry ingredients: flour, flax, baking powder, baking soda, and salt. Set aside.

3. Cream together the butter, sugar, lemon juice, and lemon zest until light and fluffy, 3 to 5 minutes.

4. Add the eggs, one at a time, scraping the bowl after each addition. Add the ricotta, mix until just combined. Add the dry ingredients and mix untilalmostcombined. The key to tender muffins is to not over mix!

5. Remove the bowl from the mixer and fold in the blueberries. Continue folding gently if needed until all flour is mixed in.

6. Fill muffin tins 2/3 full, sprinkle with sugar,  and bake in preheated oven for 15 to 18 minutes, or until toothpick comes out mostly clean. Let cool completely – they taste better after sitting for a while.

Lemon Blueberry Less Healthy Version

  • 2 Cups AP Flour
  • 1 1/2 tsp baking powder
  • 1/2 tsp baking soda
  • 1/2 tsp salt
  • 8 TB butter, room temp
  • 1/2 cup brown sugar
  • 4 TB lemon juice (juice of 1 lemon)
  • zest of 2 lemons
  • 2 eggs
  • 1 cup ricotta (or 3/4 cup milk)
  • 1 1/2 cup blueberries, fresh or frozen
  • Sanding (coarse) sugar for sprinkling

Follow the same instructions as above.

Enjoy with coffee!


5 Comments

Filed under Daring Bakers, muffins

Spicy Cheddar Buttermilk Biscuits

Audax Artifex was our January 2012 Daring Bakers’ host. Aud worked tirelessly to master light and fluffy scones (a.k.a biscuits) to help us create delicious and perfect batches in our own kitchens!

At first I was a little annoyed at this months Daring Bakers Challenge. Biscuits? Please. I’ve made those so many times I can do that in my sleep. (insert pretentious snort here)

But my biscuits have never been this light and airy, which certainly have their place. However, when making sweet scones (my favorite being cranberry orange), this recipe wouldn’t work for me. I need my scones to have a little more muscle so they survive the multiple dips in coffee. These are not meant for coffee. They are meant just as a delicious snack, or as a side to dinner. They shine all by themselves.

The moral of the story is…I learned something new. That’s what I get for being snooty.

The great thing about biscuits (or scones, whatever you want to call them) is they are easy and quick to make.

Some pointers:

  • Always, always use very cold butter. Cube your butter and then put it back in the refrigerator. The key to flaky biscuits is cold butter. As the butter melts in the oven it releases steam, which creates your height and layers.
  • Always, always use cold liquid ingredients.
  • You can use your mixer, a pastry blender, or your hands. Whatever works for you. I used my mixer.
  • Sift your dry ingredients. This recipe suggests triple sifting, which I have no patience for. I sifted once and still had delightfully airy biscuits.
  • You can season this however you like. I will provide the base recipe provided to us, and then I will give you the adaptions I used. If you make sweet biscuits, add some sugar to your dry mix.
  • I did two versions. First, I just rolled out to a rectangle then cut into squares (or maybe still rectangle?). The second version I just patted the dough into a cast iron skillet (that had been buttered. Right, we needed more butter) and I liked this version better. Something about cast iron skillets! I cut the dough before baking it to make for easy grabbing after it was done.
  • If you use a cookie cutter to create round biscuits, do not twist the cutter. You will destroy your layers and have flat or lopsided cookies. Just press straight down.

And one more reminder…use cold butter! This picture was taken three years ago and was my first attempt at making biscuits (using a different recipe, but equally delicious. I’ll try and post that one soon). I left my butter out too long. The biscuit on the right had room temperature butter. The one on the left is cold butter.

Seems like just yesterday I was scratching my head as to why my biscuits were flat!

Yield: About 8 biscuits

Time: 30 minutes from start to finish

Difficulty: Very easy

One Year Ago: Deep Dark Chocolate Cookies

Basic Biscuits

Ingredients

  • 1 cup  (140 gm/5 oz)  all-purpose flour
  • 2 tsp baking powder
  • ¼ tsp salt
  • 2 TB frozen grated butter (I just used diced cold butter)
  •  ½ cup (120 ml) cold milk
  • Optional 1 tablespoon milk, for glazing the tops of the scones

1. Preheat oven to 475F. Sift your dry ingredients into your mixing bowl. Add the butter and mix on low until butter mixture resembles very coarse corn meal (slightly smaller than pea size). Watch carefully. Any smaller than that and you will start to lose your layers.

2. Add your milk and mix until just combined.

3. Very lightly dust a clean surface and knead a few times to create layers. This particular recipe is very wet so it will be difficult to knead. Just try a couple kneads and don’t get frustrated if it is sticky.

4. Roll out or pat to 1/2″ thickness. If you are baking in a cast iron skillet (highly recommend!) do not roll, just pat the dough into the pan and pre-cut before baking. Brush lightly with milk.

5. Bake for about 8 minutes if cut into individual pieces; if in a skillet it will take longer. Bake until edges are golden. Let cool slightly and then melt butter on top. Eat.

Spicy Cheddar Buttermilk Biscuits

Ingredients

  • 1 cup  (140 gm/5 oz) all-purpose flour
  • 2 tsp baking powder
  • 1/4 tsp baking soda
  •  1/2 tsp salt
  • 1/2 tsp mustard powder
  • 1/4 tsp cayenne
  • 1/2 cup grated cheese
  • 4 TB frozen grated butter (I just used diced cold butter)
  •  ½ cup (120 ml) buttermilk

Follow the same instructions as above, sifting the baking soda, mustard, and cayenne in with the rest of the dry ingredients. Knead the cheese in last and sprinkle a little on top. Enjoy!

13 Comments

Filed under Scones

Daring Bakers December Challenge: Sourdough Bread

Our Daring Bakers Host for December 2011 was Jessica of My Recipe Project and she showed us how fun it is to create sourdough bread in our own kitchens! She provided us with sourdough recipes from Bread Matters by Andrew Whitley as well as delicious recipes to use our sourdough bread in from Tonia George’s Things on Toast and Canteen’s Great British Food!

I’m not new to baking bread. In fact, we haven’t bought bread in about two years because I’ve been making our bread exclusively. I know, I know, I hardly ever post bread on here. That’s because making bread is second nature to me now. It’s part of my daily routine. But my New Year’s Resolution is to blog all my favorite bread recipes in January and February. And I’ll give you plenty of tips so that you too can start making bread on a regular basis.

This recipe, however, is messy, not easy to work with, and terrible to shape. All that is fine for an experienced bread maker, but may be frustrating for a new bread maker. It was frustrating for me! It does taste good, but not like sourdough that you are probably accustomed to.

The good thing about this bread is the crumb structure. You’ll notice how light and airy it is. That’s because this is an extremely wet dough! Almost as wet as ciabatta, which is also very light and airy.

I did not make this bread by hand, but used the dough hook instead. It’s much easier to make bread that way and I especially recommend it for this dough. It will make your life easier!

This is a minimum of a five day process, though very little actual hands on. My starter took much longer since it is quite cool in my house right now. I gave my starter almost two weeks to get going, at first feeding daily (and quite appalled at the initial smell, so much so that I almost threw it out), then every couple of days as it started to grow and bubble. It won’t smell tangy since it is a new starter, but it should bubble and start to smell yeasty.

Read through the entire procedure before starting. And if you are new to bread making, don’t be afraid to try it. It is challenging, but pretty hard to screw up. The biggest rule is to use quality flour. Using good quality flour is always important, but it makes the biggest difference with bread. I once used cheap flour for pizza dough and the recipe completely failed. Switched to a good bread flour and I had perfect pizza. So skip store brands and go for unbleached flour and good wheat flour.

Country Wheat Bread

Day 1

  • 4.5 TB (40 gr/ 1.5 oz) whole wheat flour
  • 3 TB water

In a medium sized storage container, mix the flour and water into a paste. Cover and set aside in a warm place.

Day 2

  • 4.5 TB (40 gr/ 1.5 oz) whole wheat flour
  • 3 TB water

Mix flour and water into previous days mixture. Cover and return to warm place.

Day 3

  • 4.5 TB (40 gr/1.5 oz) whole wheat flour
  • 4 tsp water

Mix flour and water into previous days mixture. Cover and return to warm place.

Day 4

  • 3/4 cup plus 1½ tablespoons (120 gm/4.25 oz) unbleached all-purpose flour
  • 1/2 cup less 4 teaspoons (100 ml) water

Mix flour and water into mixture. At this point it will hopefully be bubbling and starting to smell pleasant. Mine was not at this point and I almost threw it out because I did not like the smell. I continued this step for several more days and it was bubbly and smelling yeasty, so I think it was the wheat flour that gave a different smell than what I’m used to. I’ve never used a wheat starter before. After about 3 days of feeding with white flour, I started feeding every other day and reduced to 1/3 cup flour and 1/4 cup water. I didn’t actually use the starter until day 13, although it was ready a few days before that. I just didn’t have time when it was ready. I kept it at room temperature and continued to feed it.

Day 5 (or whichever day it ends up being for you)

  • 1 cup less 1 tablespoon (160 gr/5 ⅔ oz) starter
  • 6 tablespoons less 1 teaspoon (50 gr/1¾ oz) whole wheat flour
  • 1 cup plus 2 teaspoons (150 gr/5 ⅓ oz) unbleached bread flour (AP will work too, but bread would be better)
  • 1/2 cup (120 ml) water

Mix all together with a wooden spoon or this nifty contraption. It will be messy and not form a smooth ball. I mixed mine in the mixer bowl since I knew I’d be using it later. Loosely cover with plastic wrap.

Let rest in a warm place (try the oven with the oven light on. Just don’t forget it is in oven!) for about four hours. Then it will look like this:

Then add the remaining ingredients:

  • 3/4 cup less 1 teaspoon (100 gr/3 ½ oz) stoneground breadmaking whole-wheat or graham flour, plus more for dusting
  • 2 cups plus 2 tablespoons (300gr/10 ½ oz) unbleached bread flour or AP flour
  • 2¼ teaspoons sea salt (use less if you are using basic table salt)
  • 1 ¼ cups (300 ml) water

1. Using the dough hook on your mixer, knead for about 10 minutes or until mixture is smooth and pulls away from the bowl slightly. It will still be very sticky though. Alternately, mix with wooden spoon and knead lightly. Let rest for one hour. Avoid adding additional flour if you knead by hand. Just dampen them with water.

2. After one hour, perform a set of stretch and folds. Just stretch each of the four sides over onto itself and form a smooth ball (it will be difficult since it is a sticky dough. Dampen your hands with a little bit of water to make it easier). If you have a bannetone, spray it with non stick spray and flour very heavily, all the way to the top. Or place a thin towel or bannetone liner and flour heavily. If you do not have a bannetone, place a thin towel, heavily floured, into a shallow bowl. Place the dough into the bowl, seam side up (if you have a seam, might be too sticky). Lightly flour the top and cover loosely with a thin towel.

3. Let rest another 3 to 5 hours. It will double in size. Once it is almost ready, preheat the oven to 425F (remember to take your dough out first if you are proofing it in the oven!). Take the dough and flip it onto a sheet pan lined with parchment or silpat. The easiest way to do this is to put the sheet pan on top of the bowl and flip it over. It may stick a bit. If so, just use a knife to gently cut away the parts that are sticky. Try not to pull the dough too much at this point.

4. Using a sharp knife, lightly score (cut) the bread in about three spots. Just use a quick movement to cut the dough about 1/2 inch. This will allow the bread to bake evenly and will make it look pretty. However, your dough may be too sticky and this will not work. Don’t fret if it doesn’t.

5. Place dough in oven and lower temperature to 400F. Bake for about 40 minutes or until bread is golden. Temperature in the center should be no less than 190F.

6. Let cool and enjoy!

Some tips on using your bread: I like to enjoy bread with either butter or dipped in olive oil and a glass of wine to wash it all down. But this bread makes a great sandwich. I had some leftover prime rib which I sliced thin, warmed up in a saute pan, sprinkled some cheese on it, and placed between two slices for a very tasty lunch. It would make a great panini, grilled cheese (for a grown up version try adding some sauteed mushrooms and onions), and crostini.

Maintaining your starter: If you won’t be using your starter for a week or more, place in the refrigerator and take it out to feed once a week. At least every other time you feed it, discard some of the old starter before stirring in fresh flour.

Cleaning your kitchen: In this day and age we are obsessed with anti-bacterial everything. This kills all the good bacteria and can actually hurt your starter when it meets your kitchen counter. And, those chemicals can get into your bread as well. I clean my kitchen with vinegar, baking soda, and mild soap. That’s it. No ultra-kill-everything-die-germs-die cleaner, just the basics. It’s cheaper and better for you. Vinegar still kills all the bad bacteria while leaving no residue behind. At the very least, refrain from using the harsh chemicals where your bread will be.

7 Comments

Filed under bread

Daring Bakers October Challenge: Povitica

The Daring Baker’s October 2011 challenge was Povitica, hosted by Jenni of The Gingered Whisk. Povitica is a traditional Eastern European Dessert Bread that is as lovely to look at as it is to eat!

This was my very first Daring Bakers Challenge. It’s a great way to challenge myself and try recipes I might not have tried before, like this Povitica! I still can’t pronounce it, but I did read it is very similar to a Babka. My only experience with Babka is the Seinfeld episode, one of my favorites. If you’ve seen it, you know what I’m talking about. “Cinnamon takes a backseat to no Babka!”

I was of course thrilled that the first challenge for me was a yeast recipe, since I bake bread all the time (I know, I need to post my bread on here more often!). But this recipe was a little hard for me to follow. I’m very particular (perhaps peculiar?) about how a recipe is written and organized. I had to sort through it and rearrange it to my liking. Also, I never use active dry yeast (and you shouldn’t either!) and always use instant. So that took some modifying. But only a couple very tiny changes and the end result was really tasty. I’m so glad I made it and have also added “Chocolate Babka” to my must-make baking list. As if I didn’t already have a long list!

This recipe isn’t hard, but it sure isn’t easy nor is it quick. Plan on this taking a couple of hours of your time, depending on how fast you work. But the end result makes a great breakfast the next day. And a mid-day snack. And dessert after dinner.

Yield: 2 loaves

Dough

  • ¼ Cup (60 ml) water
  • 1 Cup (240 ml) whole milk*
  • ¼ Cup (½ stick) unsalted butter, melted, slightly cooled
  • 2 large eggs
  • 2 tsp instant yeast*
  • 6 TB + 1 tsp (89 grams) Sugar*
  • 1½ tsp salt
  • 4 cups (560 grams)  AP flour, divided

*Note: the original recipe calls for warm milk. Since we are using instant yeast here, warm milk is not required. If you do use active dry, then you will need 1 packet of yeast, 1 tsp of sugar, and milk warmed to 110F. You can still warm the milk a little for instant, but check the temperature. If it is over 110F, you will kill the yeast.

1. Mix together the melted butter, milk, eggs, and water in a separate bowl until just combined.

2. In stand mixer bowl, add your yeast, sugar, salt, and two cups of flour. Add liquid ingredients. Mix with paddle attachment just for a minute or two to help combine ingredients. Switch to a dough hook on speed 1. Add the remaining flour a tablespoon at a time until dough is well formed and smooth. You may not need all the flour, but I used all two cups and a little more. It depends on your weather!

3. Let rest in an oiled bowl until doubled, 1 to 2 hours. The picture below is before doubling. While it is rising, make the filling and topping.


Topping

  • ¼ Cup (60 ml) cold coffee
  • 1 TB granulated sugar

Combine and set aside

Filling

  • 3½ cups (560 grams) ground walnuts
  • ½ cups (120 ml) whole milk
  • ½ cup (1 stick) unsalted butter
  • 1  egg, beaten
  • ½ tsp vanilla extract
  • 1 cup (225 gm) sugar
  • ½ tsp unsweetened cocoa powder
  • ½ tsp cinnamon (I added extra!)

1. In a large bowl mix together the ground walnuts, sugar, cinnamon and cocoa.

2. Heat the milk and butter to boiling.

3. Pour the liquid over the nut/sugar mixture. Let cool slightly.

4.  Add the egg and vanilla and mix thoroughly.

5. Allow to stand at room temperature until ready to be spread on the dough.

6. If the mixture thickens, add a small amount of warm milk.

Returning to Dough

1. After dough has doubled, cut into two pieces. Just eyeball it. Spray two bread pans lightly with non stick spray. Preheat your oven to 350F.

2. Set out a silcone rolling sheet (or if you don’t have one, just use a clean bed sheet, it will help tremendously with the rolling) and a small bowl of flour for any light dusting. Get your rolling pin and prepare to work up a sweat! (Just kidding, it actually rolls out pretty easily).Roll the dough out very thin, less than 1/4″.  My rolling sheet is 24 inches by 14 inches and as you can see in the picture below I filled up the whole thing.  If you have any oddball pieces like I did, feel free to cut them off. Or if you aren’t a neurotic perfectionist like me, then leave it! A little extra dough never hurt anyone. 3. Add half of your filling and spread it on the dough, leaving room on the edges for rolling. Be careful rolling because your dough will be quite fragile at this point.

4. Very carefully start rolling the dough, just a little at a time, using light hands.

5. Then very carefully lift your dough into a bread pan. Form a “U” shape and twist back on itself.

6. Cover and let rest while you roll the second loaf. After both loaves are done and have rested about 15 minutes, brush with the coffee mixture. Bake for 15 minutes and then reduce the oven temperature to 300F.

7. Bake until golden, which will take another 30 to 45 minutes. Check the internal temperature and when it reads at least 180F, it is done.

8. Important: Let cool in the pan. This goes against most bread making rules, but if you try to remove it while it is still warm, it will fall apart. It is a very heavy bread!

9. After it is cool, slice, pour yourself a cup of coffee and enjoy!

7 Comments

Filed under bread, Daring Bakers