Tag Archives: quick

Pimento Cheese and Pretzel Sticks

Time once again to explore Southern food that once seemed so strange to this Northern gal. I’ve talked about corn bread and sweet potato pie in particular, but I think I’m most upset that I just now discovered Pimento Cheese. I’ve missed out on so many years! I don’t know if I ever tried it before (if I had it was obviously forgettable), but it always sounded like one of those “weird” foods that I’d be just fine without ever trying. And once again, I was proved incredibly wrong. I can’t get enough of it now that I’ve had it. I’ve been doing a lot of taste testing to tweak this recipe- all for your benefit of course. You’re welcome! It’s been tough but I survived. Yum.

According to our buddy Wikipedia, traditional pimento is pretty basic: sharp cheddar, mayo, pimentos, salt, and pepper. Pretty easy! But so many regional twists have been added that include hot sauce, cream cheese, jalapeños, and pickles. The possibilities are endless. And did you know that pimentos are just a version of red peppers? Slightly different and a little more expensive.

I used my new favorite cookbook Frank Stitt’s Southern Table to find a recipe base. Just a quick note on this cookbook: it’s a beautiful addition to any cookbook collection. Everything I’ve made has been fantastic and it has beautiful pictures with wonderful stories to accompany it. So if you are looking for a good Southern food cookbook (and if you aren’t, then why not?) this is it. (Note: I am not paid to say that! The cookbook was a gift from Dear Hubby.) But my recipe ended up quite different. First, I wanted to add pepper jack cheese in addition to sharp cheddar. Second, the mayo incident. He recommends making your own mayo (and has a recipe for it) but this was just not my day to make mayo. I’ve made it many times before without any issues but it just kept breaking on me, even after adding a second yolk! I didn’t want to spend all day making mayo so I just doubled the cream cheese. I also substituted jarred pimentos for roasting fresh red peppers to save time. And finally, I added some capers for a little color and tang.

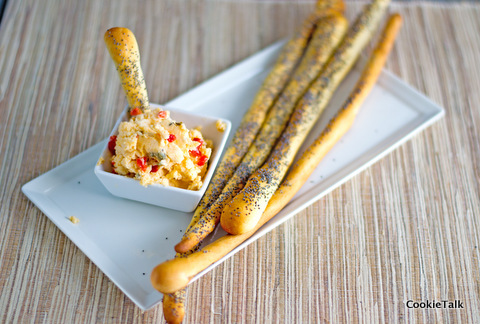
And the pretzel sticks are just a variation of these pretzels. Just take a small piece of dough and roll them out super thin. Sprinkle with poppy seeds, sesame seeds, or just salt and bake at 425F until brown and crispy. Easy! This is one of my favorite dough recipes. It comes together in no time at all and always tastes good. Dear hubby actually did this batch. I made the dough and he took it from there!

How’s that for football food?  Enjoy!

Pimento Cheese

Adapted from  Chef Frank Stitt

One year ago: Sourdough Pretzels

Yield: About 3 cups

Difficulty: Easy

Time: 10 minutes

Ingredients

  • 1/2 lb pepper jack cheese
  • 1/2 lb sharp cheddar
  • 7 oz jar pimentos, drained (you can use roasted red peppers if you can’t find pimentos)
  • 8 oz cream cheese, softened at room temperature
  • 1/2 juice lemon
  • 1 tsp pepper (or more to taste)
  • 1/8 tsp cayenne
  • Splash of hot sauce (or more to taste)
  • 1 tsp sugar
  • 1 TB capers, rinsed and drained

Directions

1. Finely shred the pepper jack or sharp cheddar. Coarsely shred it if you’d prefer more texture.

2. Add the remaining ingredients: drained pimentos, cream cheese, lemon, pepper, hot sauce, cayenne, and sugar. Mix until well combined. This may take a bit of muscle.

3. Eat! Leftovers will keep for several days in the refrigerator. But, you will want to let it come to room temperature or microwave very briefly, about 5 seconds, or it will be rather challenging to dip.

5 Comments

Filed under bread, savory

Seedy Crisps (Crackers)

Our July 2012 Daring Bakers’ Host was Dana McFarland and she challenged us to make homemade crackers! Dana showed us some techniques for making crackers and encouraged to use our creativity to make each cracker our own by using ingredients we love.

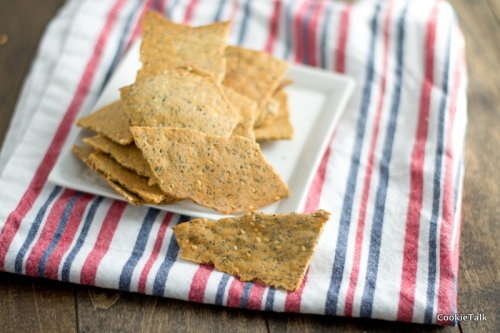
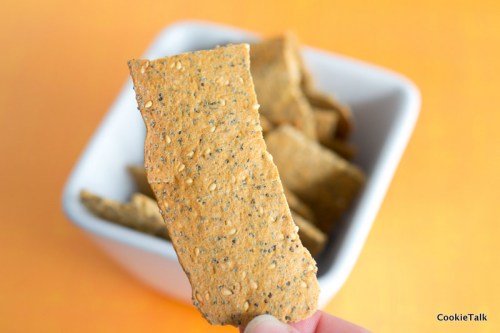
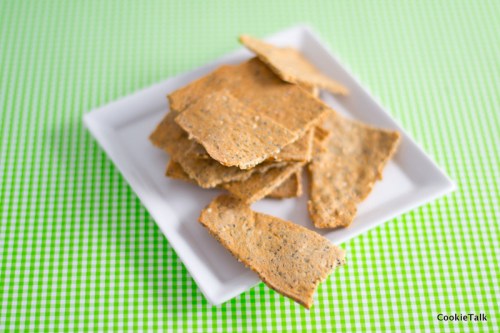
I know I just did  Parm Herb Crackers, but can you really have too many cracker options? Nope, I didn’t think so either. This dough is very easy to roll out nice and thin with very little muscle involved. That makes me happy. These are also crackers that you can just break into random pieces. Fun, right? Oh, and they go great with cheese, which is a requirement for a good cracker. If a cracker can’t hold a piece of cheese and taste good, that cracker is failing in its cracker duties. What’s that? I’m not making sense? Well, blame that on too much coffee and not enough wine. Oh, look, a cracker!

I used White Wheat flour again but otherwise didn’t change the recipe at all. These come together in no time at all. You’ll definitely spend more time standing around the oven waiting for them to cook. Or maybe don’t stand around the oven. It’s hot out, after all. Go hang out by the freezer.

On a side note, I do not like taking pictures of crackers. I don’t think they are photogenic. Good thing they are tasty.

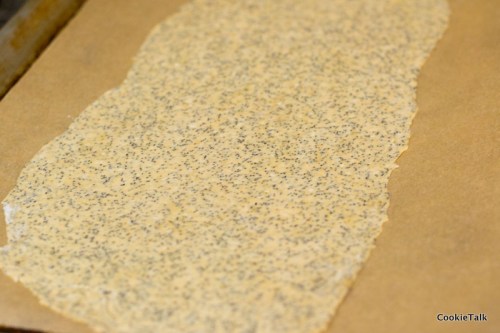
Here’s what they look like before baking:

In the time I spent writing this post, I could have made another batch of crackers. So, what are you waiting for?

Seedy Crisps

One year ago: Homemade Oreos

Yield: A lot of crackers

Difficulty: Easy

Time: 10 minutes to prep and roll; 15 minutes to rest;  30 minutes to bake

  • Ingredients
  • 2 cups (280 grams) White Wheat Flour (or split half wheat and half AP)
  • 1/3 cup (50 grams) poppy seeds
  • 1/3 cup (50 grams) sesame seeds
  • 1 1/2 tsp salt
  • 1 1/2 tsp baking powder
  • 3 TB olive oil
  • 3/4 cup + 1 TB (6 1/2 oz) water

Directions

1. Preheat oven to 450F. Line four sheet pans (or just work in batches) with silpat or parchment. Note: My oven takes forever to preheat, but if yours doesn’t, you can wait until the dough is finished before you turn on the inferno.

2. Mix together flour, seeds, salt, and baking powder. Stir in the olive oil. Then stir in the water slowly until a dough forms. You may not need it all, you may need more. I needed all the water, but not more. Knead a few times on the counter to form a smooth ball. Should come together fairly quickly. Cover with a towel and let rest for 15 minutes.

3. After resting, diving into four pieces. Roll each piece thin. It should be about the length of the sheet pan. Don’t worry about the shape – you will just be breaking it into pieces later.

4. Bake each pan for about 7 minutes, flip, then 7 minutes more. At this point, break into pieces and bake for another five minutes if needed. These crackers are supposed to be crispy.

5. Let cool completely and store in an airtight container for up to 2 weeks.

Eat and enjoy!

11 Comments

Filed under cracker, savory

Skillet Cornbread

My first memories of cornbread are in Southern Ohio where I have family. My great uncle and great grandma would make all the fixin’s with fried chicken, beans, cornbread, and I’m sure other things (Mom, what else?).

But I am from much farther north where this kind of food doesn’t really exist, at least in my world. So it was weird to me. I wasn’t a terribly adventurous eater as a kid either. And I just thought cornbread was strange and I assumed I didn’t like it, even though I don’t recall ever trying a bite until I was an adult. And I love it.  I wonder what I missed by not trying my great uncle’s cornbread from years ago.

Now this Yankee is living in the Deep South where cornbread is king, and you absolutely do not ever put any sugar or anything sweet in your cornbread. Because that is wrong and only Yankees do such terrible things. So of course I make cornbread with honey. That’s how I like it.

For a long time I made jalapeño cornbread from Ina Garten. I still love that recipe, but it is less cornbread-y, makes a lot, and takes a little more effort. I’ve recently adapted this simple recipe to meet our needs. It makes a small amount and the mix comes together in less time than it takes the oven to preheat. I’m sure that any additions like cheddar and chives would be delightful, but I haven’t tried  yet. If you do please let me know how it turns out. And making cornbread in a cast iron skillet just makes it oh so good. It gets that nice brown, buttery crust but the rest is light and airy. I don’t know how anyone couldn’t like cornbread when trying this fresh out of the oven with a slab of butter, and maybe even a little more honey!

Skillet Cornbread

Adapted from Alex G. 

Yield: 1 six inch pan of cornbread

Difficulty: Very easy

Time: 10 minutes to prep, 25 minutes to bake

Note: If you look at the original recipe, it is designed for a 9 inch skillet. My recipe is not exactly halved and changes have been made so doubling my recipe will not yield the same as the original. I’ve not made the original so I can’t vouch for it but I’m sure it is still delightful.

Another Note: A reminder that I always bake with unsalted butter and whole milk. You should too.

Ingredients

  • 1/2 cup + 2 TB coarse cornmeal
  • 1/4 cup + 2 TB flour
  • 1/2 tsp salt
  • 1 tsp baking powder
  • 1/4 tsp baking soda
  • 2/3 cup buttermilk (to make your own add a splash of vinegar to your milk and let sit for 5 minutes)
  • 2 eggs
  • 2 TB honey
  • 4 TB melted butter, slightly cooled, plus one more for the pan

Directions

1. Preheat oven to 425F. Place a six inch cast iron skillet in the oven to warm up.  After the oven is almost preheated, add a tablespoon of butter to the cast iron pan and return to oven until completely preheated. (Don’t have a cast iron skillet? They are dirt cheap on Amazon and a really wonderful pan. I use mine all the time for just about everything. All natural non-stick, no icky Teflon. So I recommend getting one. Still not convinced? A cake pan will work fine, but no need to preheat it for as long.  And make sure you butter the sides too. It will stick to a cake pan.)

2. In a medium bowl mix together the cornmeal, flour, salt, baking powder, and baking soda.

3. In a separate bowl, mix together the buttermilk, eggs, honey, and melted butter. Pour the wet into the dry and mix just until combined. Don’t over mix.

4. Remove the cast iron from the oven (carefully…it’s obviously hot!). Pour the mixture into the pan.

5. Lower the oven temperature to 375F. Bake for 25 minutes, or until a toothpick comes out completely clean. You want the cornbread to have a nice brown crust and hold together. Let cool for just a minute, then flip onto a cutting board. Cut into wedges and enjoy!

14 Comments

Filed under baking, bread

Christmas in July: Gingerbread Ice Cream Sandwiches

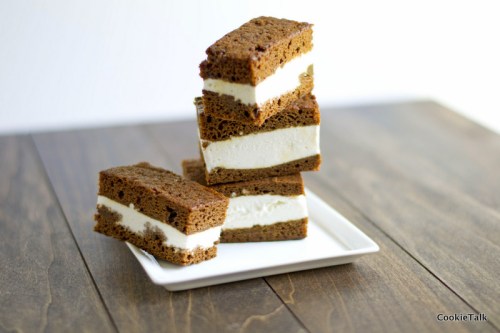
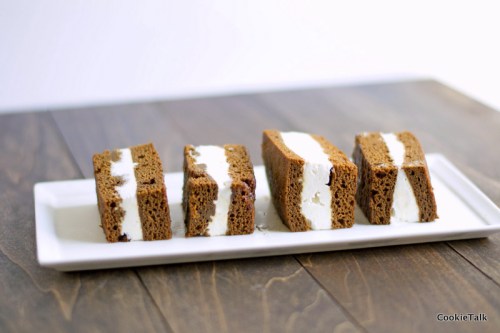
I know it isn’t quite July, but close enough. I assume you have planned out your 4th of July menu? No? Well, dessert is now decided. It’s easy, delicious, and a bit surprising: gingerbread ice cream sandwiches.

Gingerbread need not be reserved for just Christmas.  But no one really wants a rich, spicy cake when it is 100 degrees out. Gingerbread just seems way too heavy all by its lonesome. But freeze it and add some ice cream? Well, that is a whole different ball game.

This treat is fast and easy to make. You do have to turn your oven on, but only for 30 minutes, tops, including preheating.  It doesn’t have to be perfect (I think it looks better if it is not), can be cut to any size you want, and you can even use whatever ice cream you want. Although I think vanilla is best, but that’s just me.

Thanks to Gourmet Live Blog for suggesting this in the first place. Apparently June 5th is “National Gingerbread Day.” Yes, that does make perfect sense. I just don’t know why.

This recipe is also a one bowl wonder. One more reason to love it, right?

P.S. Did you notice I have a Facebook page now? Yes, I know, way to join the 21st Century. Just click “Like” over there on the right and join in the fun!

One year ago: Blackberry Buttermilk Cake

Gingerbread Ice Cream Sandwiches

From Gourmet Live

Yield: One half sheet pan of cake; sandwiches will depend on how you make them

Difficulty: Easy

Time: 10 minutes to make batter; 15 minutes to bake; 10 minutes to spread ice cream and cut into sandwiches

Ingredients

  • 1/2 cup butter, melted
  • 3/4 cup packed brown sugar
  • 1/2 cup molasses (not blackstrap)
  • 1 large egg
  • 1 1/2 tsp ground ginger
  • 1 tsp baking soda
  • 1/2 tsp salt
  • 1/2 tsp cinnamon
  • 2 cups AP flour
  • 2/3 cup boiling water
  • 1 1/2 qt ice cream (vanilla is my preference)

Directions

1. Preheat oven to 350F. Butter a half sheet pan (cookie sheet) and then line with parchment.

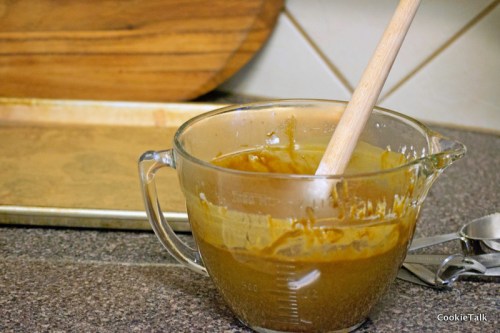
2. In a large bowl, mix together the butter, brown sugar, molasses, and egg. Then add the ginger, baking soda, salt, cinnamon and flour. Mix until combined. It will be a bit thick at this point. Add your boiling water and stir. It will thin to a nice cake batter.

3. Spread on your sheet pan. Try to make it even, but not a huge deal if it isn’t perfect. Bake for 12 to 15 minutes or until toothpick comes out clean. Let cool completely. To speed things up, put it in the freezer.

4. Let your ice cream soften at room temperature. It will be easier to spread when it is soft.

5. Cut the entire sheet in half crosswise, basically into two squares. One will be your top, one will be your bottom. Spread the ice cream on one side. Top with the other. Freeze until ice cream is set again. Cut into desired sizes and shapes. Yes, a cookie cutter would be just fine here. You’ll just have to eat the scraps though. So terrible, huh?

6. Freeze until ready to eat. You can wrap them in parchment and freeze or just use a freezer bag. They keep quite nicely.

Enjoy!

153 Comments

Filed under cake, frozen treat

Spice Coffee Cake

The Daring Bakers’ April 2012 challenges, hosted by Jason at Daily Candor, were two Armenian standards: nazook and nutmeg cake. Nazook is a layered yeast dough pastry with a sweet filling, and nutmeg cake is a fragrant, nutty coffee style cake.

While the Nazook looked utterly amazing and mouthwatering, I had no time to make it this month due to my crazy busy schedule right now. (This is the part where you pity me, of course). Thankfully, the nutmeg cake rocked and I’m so glad Jason introduced us to it! It’s incredibly easy and quick to make and tastes delightful, especially with a cup of coffee (huh, wonder if that’s why it’s called a coffee cake?). It  has a crust like a cheesecake and texture like well, a dense cake. No icing or glaze needed but I’m sure that wouldn’t hurt things. Don’t let it’s simple exterior fool you. The flavor is quite complex.

This cake would be easy to personalize to meet your taste buds. I didn’t find the nutmeg overwhelming but I do love nutmeg. I also added a pinch of cinnamon. Nutmeg and cinnamon are just meant to be together, in my humble opinion. But if they aren’t your favorite spices, just add whatever suits you. This cake has a beautiful caramel taste. The edges get a little more done than the center but that was actually my favorite part. A little bit chewier and caramel-y.

Did I mention it was quick? Less than 20 minutes, maybe closer to 10 but I wasn’t really counting, to pull together and about 40 minutes to bake. I love quick recipes that taste awesome, don’t you?

Nutmeg Cake

  • 1 cup milk
  • 1 tsp baking soda
  • 2 cups (280 gm/10 oz) AP Flour
  • 2 tsp  baking powder
  • 2 cups  (400 gm/14 oz) brown sugar, firmly packed
  • 3/4 cup (170 gm/6 oz) butter, unsalted, cubed
  • 1/2 cup walnut pieces, or any nut of your choosing. I used pecans.
  • 1 to 1-1/2 teaspoons ground nutmeg
  • 1 tsp cinnamon
  • 1 egg

1. Preheat your oven 350°F.
2. Mix the baking soda (not baking powder) into the milk. Set aside.
3. Put the flour, baking powder, and the brown sugar into your food processor (mixer will work too). Pulse until uniformly mixed.
4. Toss in the cubed butter. Pulse until uniformly mixed into tan colored crumbs.
5. Pour HALF of the crumbs into your springform (9”/23cm) pan. Press out a crust using your fingers and knuckles.
6. Mix in the nutmeg and cinnamon
7.  Add the egg, mix until combined.
8. Pour in the milk and baking soda mixture. Continue to mix until a slightly lumpy tan batter is formed.
9. Pour the batter over the crust in the springform pan.
10. Gently sprinkle the nut pieces over the batter.
11. Bake in a preheated oven for 30-40 minutes. It’s ready when the top is golden brown, and when a toothpick comes out clean. It took 40 minutes in my oven, but I started checking at 30 minutes.
12. Let cool for a minute or two, then run a knife around the pan. Remove the outer part and let cool. If you let it cool in the pan it may stick. Make coffee and enjoy!

8 Comments

Filed under baking, breakfast, cake, Daring Bakers

Chocolate Chip Hazelenut Biscotti

Biscotti, how I love thee!

Ok, I know, I’ve been out of commission for what, six weeks now? I have lots of good reasons, and probably a few that aren’t so great. First, I’m taking a couple of online writing classes, which is the biggest reason I’m not blogging since I’m busy writing for a grade. Second, everything that can break seems to have broken, including my Kitchen Aid Stand Mixer (insert tears here).  That will be a separate post.

In the meantime…I’m making bread by hand and making other doughs with my hand mixer (also a Kitchen Aid…). Biscotti was perfect for the hand mixer, other than me being annoyed at having to stand there holding it. Yeah, I know, I’ve gotten lazy with my big, (sort of) powerful stand mixer. I have to actually pay close attention now! Can you imagine? Hmph.

This is an easy recipe and is actually the same as the Cinnamon Hazelnut Biscotti, but I took out the cinnamon and added espresso and hazelnuts. I originally had espresso in the title but that was bordering on obnoxiously long. And you could really use this recipe as a base for whatever you wanted. And for me, biscotti really hits the spot first thing in the morning when you are sitting down for coffee after a good workout or yard work. It’s a great way to start your day.

Chocolate Chip Hazelnut Biscotti

adapted from Bon Appetit Desserts

  • 3 cups unbleached AP Flour
  • 1 TB baking powder
  • 1/2 tsp salt (I prefer sea salt)
  • 2 tsp espresso powder (optional, but adds a nice touch)
  • 1 cup hazelnuts, toasted and husked*
  • 3/4 cup sugar
  • 1/2 cup (1 stick) butter, somewhere in between room temperature and cold.
  • 1 tsp vanilla extract
  • 3 large eggs, room temp
  • 1 1/2 cups chocolate chips

*To husk the hazelnuts: spread in a single layer on a sheet pan and bake in oven at 350F for about 10 minutes until very fragrant. Cover with a towel. Cool slightly and then rub together.   The skins will come off fairly easily.  Don’t fret if you don’t get all the skins. A little won’t hurt.

1. Preheat oven to 350F. Prepare two baking sheets with either silpat or parchment. Whisk together flour, baking powder, salt, and cinnamon. Set aside.

2. Chop hazelnuts in food processor until slightly chunky. How chunky depends on your preference.

3. Place butter, sugar, vanilla, and zest in stand mixer and mix until light and fluffy, about 3 to 5 minutes. Add eggs one at a time and mix until combined. Scrape the bowl after each addition. Add flour mixture. When flour is almost completely mixed, fold in the chopped hazelnuts and chocolate chips.

4. Divide the dough in half and place on prepared sheet pans. Flatten dough into an even rectangle. If you want to cut them diagnol, keep it narrow and long. If you want to cut just straight, make it wider. Bake for 20 to 25 minutes until golden on the edges. Remove from oven (but keep oven on),  let cool slightly and carefully move to a cutting board. Slice slightly on the diagonal. Return pieces to the sheet pan. Bake about 10 minutes. Flip pieces, bake 10 minutes more, or until desired crispiness. Careful that they don’t burn, but also make sure they are golden enough to be crunchy. Make coffee, and enjoy!


8 Comments

Filed under Cookies

Lemon Blueberry Ricotta Muffins

The Daring Bakers’ February 2012 host was – Lisa! Lisa stepped in last minute and challenged us to create a quick bread we could call our own. She supplied us with a base recipe and shared some recipes she loves from various websites and encouraged us to build upon them and create new flavor profiles.

I’m having a love hate relationship with these muffins. My favorite muffin forever has been blueberry. So of course, I decided to make blueberry muffins for this challenge, but work towards developing my own. I started with this recipe from King Arthur Flour. I modified it quite a bit before actually making the original recipe. Not always the best idea, but well, I was in a hurry. At first I hated them and almost threw them all in the garbage. After sitting, however, I liked them again.

I think the issue is that these are slightly healthier muffins. Not a health food, but healthier than say, a Starbucks muffin. There isn’t much fat, not much sugar, and flax for that I-feel-less-guilty-when-eating-these. I’m trying to add more flax to our baked goods, since it has so many health benefits, particularly all those Omega-3s. But when eating a muffin, most of the time we expect it to be sweet. These aren’t overly sweet, so once I got past that, I really liked them. My taste buds just needed a moment to adjust. I didn’t particularly care for the whole flax seeds, but the flax meal was not noticeable.

All that being said, these are a work in progress. But for now, they are a decent muffin, quite good with coffee. I used Meyer lemons since they are in season but traditional lemons will work fine. I’m posting two recipes: one with the healthier additions (which is the one I made) and the less healthier muffin for those days when you just need a muffin.

Lemon Blueberry Flax Muffins

Yield: 12 to 15 muffins

Time: Less than one hour including bake time

Difficulty: Very Easy

One Year Ago: Leaning Tower of Red Velvet

Modified from King Arthur Flour

  • 2 Cups AP Flour
  • 1/4 cup flax meal
  • 1/4 cup flax seeds (optional)
  • 1 1/2 tsp baking powder
  • 1/2 tsp baking soda
  • 1/2 tsp salt
  • 4 TB butter, room temp
  • 1/2 cup brown sugar
  • 4 TB lemon juice (juice of 1 lemon)
  • zest of 2 lemons
  • 2 eggs
  • 1 cup ricotta (or 3/4 cup milk)
  • 1 1/2 cup blueberries, fresh or frozen
  • Sanding (coarse) sugar for sprinkling

1. Preheat oven to 375F. Line a muffin pan with papers or grease.

2. Whisk together dry ingredients: flour, flax, baking powder, baking soda, and salt. Set aside.

3. Cream together the butter, sugar, lemon juice, and lemon zest until light and fluffy, 3 to 5 minutes.

4. Add the eggs, one at a time, scraping the bowl after each addition. Add the ricotta, mix until just combined. Add the dry ingredients and mix untilalmostcombined. The key to tender muffins is to not over mix!

5. Remove the bowl from the mixer and fold in the blueberries. Continue folding gently if needed until all flour is mixed in.

6. Fill muffin tins 2/3 full, sprinkle with sugar,  and bake in preheated oven for 15 to 18 minutes, or until toothpick comes out mostly clean. Let cool completely – they taste better after sitting for a while.

Lemon Blueberry Less Healthy Version

  • 2 Cups AP Flour
  • 1 1/2 tsp baking powder
  • 1/2 tsp baking soda
  • 1/2 tsp salt
  • 8 TB butter, room temp
  • 1/2 cup brown sugar
  • 4 TB lemon juice (juice of 1 lemon)
  • zest of 2 lemons
  • 2 eggs
  • 1 cup ricotta (or 3/4 cup milk)
  • 1 1/2 cup blueberries, fresh or frozen
  • Sanding (coarse) sugar for sprinkling

Follow the same instructions as above.

Enjoy with coffee!


5 Comments

Filed under Daring Bakers, muffins

Have You Met My Friend, Chocolate Chip Cookie?

It’s here! It’s finally here! What, you ask? The one year anniversary (or birthday?) of Cookie Talk. Yes, folks, I’ve survived one year of blogging. I’ve learned so much, particularly about photography, and it’s been great hearing all the comments and suggestions. Blogs are such a wonderful way to share and connect with others. So thank you for sticking with me!

And what to do for the 1st Anniversary? Cookies, of course. Not just one cookie, but three cookies. To be fair, I’ve done one before, it was one of my very first posts, the Best Chocolate Chip Cookie Ever, which is a copycat of the Levain Bakery from Lisa Michele. I’ve been making this cookie for about two years, feeling as though no other chocolate chip cookie could ever take it’s place. But all over the food world I see two other popular recipes: The New York Times recipe from Jacques Torres, and the Neiman Marcus “$250,000” cookie, or however much the rumor goes.

I was curious, and thus, came the challenge. I’d make all three chocolate chip cookies and the hubby and I, as well as a few of our more-than-willing friends and co-workers (“Hey, want to taste some cookies?” is a great way to win some friends), would do a blind taste test. It’s a rough job blogging. Really, tasting all these cookies was such hard work! Fine, don’t believe me.

The blind tasting for hubby and I was actually challenging, but probably not in a way that will garner any sympathy. We knew what went into each cookie and what each one looked like. But we tried to make it as objective as possible and even went so far as to blindfold one while the other took notes. But it was still pretty easy to guess which cookie we were tasting.

I learned a lot from this experiment, and was a bit surprised as well. I’m also working on my own chocolate chip cookie recipe, combining our favorites from each. But that’s a post for another day. Making the perfect cookie doesn’t happen overnight.

And the winner is (drum roll)…… The New York Times Jacques Torres, with Levain as a very close second. In fact, my initial favorite was Levain, barely, because I just couldn’t accept that my favorite cookie was being replaced. The more I ate the NYT cookie (yes, I’ve had several, which is not good for the waist line. See the sacrifices I make?) the more I liked it and the more I realized the Levain wasn’t as special as I thought it was. It was like learning you and your best friend have grown apart and now you have a new best friend who is much cooler and more compatible. It hurts a little. Until you have another cookie.

Now, I must point out that I have never had a true Levain cookie, or a Jacques Torres cookie, or a Neiman Marcus cookie. The Levain is a copycat recipe, which could completely change the results. So it isn’t a completely true competition, but hey, we’re doing the best we can. Someday I hope to go to New York and have Jacques Torres and Levain all in the same day. Probably with a tummy ache on the side.

Now, let’s talk about the differences in these cookies. All three are basic chocolate chip cookies: flour, sugar, baking soda and powder, butter, chocolate.  But they are all very different cookies, as you can see in the picture above. I used the same scoop, 3 TB, for each cookie and they baked very differently. The first is the Torres cookie, the second Levain, and the third Neiman Marcus.

Let’s talk first about the least favorite: The Neiman Marcus. Really, this cookie had no business attempting to compete against the other two. It’s not even in the same category. Two people did say it was their favorite, but most didn’t even like it all that much. The only redeeming factor was the chocolate-y-ness of it (and also that was by far the fastest to make), which came from the insane amount of instant coffee. It almost tasted like a Coffee Chocolate Chip cookie. But it was kind of dry, almost crunchy, and really not that special. It had the least amount of butter, only 1 egg, and was mostly brown sugar, which should have been a good thing. But it just didn’t measure up. Sorry, Neiman Marcus, your cookie isn’t even worth $2.50.

Next, the runner up, the Levain Copycat. After I made this recipe for the umpteenth time, I noticed Lisa Michele had updated her recipe to include less flour and more brown sugar, which is exactly what we thought it needed after tasting the NYT recipe. I had always used less flour than she suggested, and I always add vanilla. I feel it is necessary in a chocolate chip cookie. This is a great overall cookie. It is cakey and well balanced between dough and chocolate. If you were forced to eat this cookie for the rest of your life, you’d still be darned happy. It does dry out quite a bit the next day, which is one of the reasons it was forced into second place, but a few seconds in the microwave can help fix that.

And finally, the star of the Cookie World, the New York Times recipe courtesy of Jacques Torres. This cookie is a real show stopper. It is everything you want in a chocolate chip cookie and then some. And I didn’t even use the chocolate “discs” as the recipe suggests, which I can only imagine would make it even more delightful. This cookie had a lower brown sugar to granulated sugar ratio than the Neiman Marcus, but for some reason the brown sugar really stood out in the Jacques Torres cookie.  I don’t know why it stood out more in this cookie. I’m baffled. I’m also completely baffled at how it baked. I fully expected a bigger rise on this cookie due to the cold butter and the extra baking powder. But it didn’t. It spread and wasn’t cakey at all like the Levain. Have I mentioned I’m baffled? This goes against my basic knowledge of baking. Anyone care to help me out here? It must have something to do with the ratio of butter to flour to leavening agents. Or maybe it is because it is made with bread flour and cake flour? Help. Where is Alton Brown when I need him? I need to watch his Chocolate Chip Cookie episode again!

And back to the cookie. It’s crunchy on the outside. Gooey on the inside. A rich chocolate flavor with a caramel tasting dough. Oh, and if that wasn’t enough, how about sprinkling some sea salt on top to take you right over the edge into Chocolate Chip Cookie Heaven? Yup, that’s a winning cookie.

Let’s take another look at the cookies:

New York Times/Jacques Torres

Levain Copycat

Neiman Marcus

This was a fun experiment. It’s interesting to see how slightly different measurements can create a completely different cookie.  So what’s your favorite chocolate chip cookie and why?

Tips and Pointers: For each recipe I used Guittard chocolate chips, light brown sugar, unsalted butter, fine sea salt, King Arthur Flour, and a 3 TB scoop. I also could not bake and eat all these cookies at the same time, nor do I have enough friends to share all this dough. I recommend scooping each dough out, freezing the dough balls, and then baking when you are ready. If you freeze the dough and then try to scoop, you are likely to hurt your shoulder. Trust me, I learned the hard way. This also ensures that you can always have fresh baked cookies on a moments notice…which might not be a good thing.

One Year Ago: Chocolate Peanut Butter Whoopie Pies

Neiman Marcus

  • 1/2 cup (1 stick) butter, softened
  • 1 cup light brown sugar
  • 3 tablespoons granulated sugar
  • 1 large egg
  • 2 tsp vanilla extract
  • 1 3/4 cup all purpose flour
  • 1/2 tsp baking powder
  • 1/2 tsp baking soda
  • 1/2 tsp salt
  • 1 1/2 tsp instant espresso powder (doesn’t sound like much, but it is!)
  • 1 1/2 cups chocolate chip cookies

1) Preheat oven to 300F. Cream the butter with the sugars using an electric mixer on medium speed until fluffy.

2) Beat in the egg and vanilla for another 30 seconds, or until combined.

3) In a mixing bowl, sift together the dry ingredients and beat into the butter mixture at low speed for about 15 seconds. Stir in espresso and chocolate chips.

4) Using your desired cookie scoop, drop onto a parchment lined cookie sheet (or silpat) about three inches apart. Gently press down to flatten. Bake about 20 minutes, or until brown. I think 20 minutes is too long and only baked for about 16 minutes.

Levain Copycat

  • 2 sticks ‘cold and cubed’ unsalted butter
  • 3/4 cup sugar
  • 3/4 cup brown sugar
  • 1 tablespoon good vanilla
  • 2 eggs
  • 3 1/4 to 3 1/2 cups AP flour – Spoon and Sweep method. I usually stick with 3 1/4 cup.
  • 3/4 teaspoon Kosher salt
  • 3/4-1 teaspoon baking powder (just under 1 teaspoon)
  • 1/4 tsp baking soda
  • 2 cups good quality semisweet chocolate chips or chunks
1)  Preheat oven to 350 degrees.
2)  In bowl of electric mixer fitted with paddle, cream together butter and sugars and vanilla until well blended and fluffy, 3 to 5 minutes.  Add eggs, one at a time.. and beat until well incorporated.
3)  Add flour, salt, baking soda, baking powder and mix until just combined. Gently fold in chocolate chunks, or add to the mixer at the very end on very low speed.
4)  Using a scoop, place each on sheet pan lined with parchment paper or silpat and bake in the preheated oven until very lightly browned, taking care not to over bake, about 14 – 16 minutes depending on your preference.

New York Times adapted from Jacques Torres

  • 2 cups minus 2 TB cake flour
  • 1 2/3 cup bread flour
  • 1 1/4 tsp baking soda
  • 1 1/2 tsp baking powder
  • 1 1/2 tsp coarse salt
  • 2 1/2 sticks unsalted butter
  • 1 1/4 cups light brown sugar
  • 1 cup plus 2 TB granulated sugar
  • 2 large eggs
  • 2 2/3 cups chocolate chips or discs
1)  Whisk together dry ingredients. Set aside.
2)  Cream together sugars and butter until very light, about 5 minutes. Add eggs, one at a time, mixing completely and scraping bowl after each addition. Reduce speed to low and very slowly add dry ingredients, mixing just until combined. Add chocolate very carefully.
3) Scoop cookies onto baking sheet and chill for 24 to 36 hours. Wrap tightly.
4)  Preheat oven to 350F. Bake cookies 14 to 18 minutes depending on the size, until golden but still gooey.
5) Eat immediately and have another.

17 Comments

Filed under Cookies

Peanut Butter Blondies with Chocolate and Sea Salt – Football Food!

Today marks the first day of my favorite time of year – football season, which goes until the end of the holidays. I rarely  sit down to actually watch a game, but there is something I love about having it on in the background and my dear hubby enjoying watching his Alma Matter play their hearts out. The weather is starting to cool off, soon the leaves will be turning…it’s the best time of year!

And with football comes football food! I technically made these for a BBQ the day before, but they’d be great for game day. At a BBQ or any similar event you really need a food that is easy to pick up, no utensils needed. Smitten Kitchen saved the day yet again with these fabulous Peanut Butter Blondies with Chocolate Ganache.They are very easy and very addictive. Well, addictive if your favorite combination in the whole wide world is peanut butter and chocolate. And mine is. I hope yours is too.

The batter takes about 10 minutes to make, including gathering up your ingredients (remember, I am slow with this part). It looks just like cookie dough, and I think you could probably actually drop these and make cookies instead.

Then you bake anywhere from 35 to 45 minutes, depending on how you like your edges and how hot your oven is. After it cools completely, make the ganache. If you live in the Oven, aka the South, like me, you might want to put the blondies int he refrigerator to chill, otherwise you’ll be waiting all night. I needed to sleep, so that was not an option.

Pour the ganache on top, sprinkle with sea salt if you so desire. I think it would also be very tasty with some pretzels crushed on top for some added texture and that salty sweet taste. And would also make it more manly than “sea salt”.

And try very hard not to eat them all at once. Thankfully I gave most of mine away and am only left with a few little pieces.  Enjoy, and Go Team!

Peanut Butter Blondies with Chocolate Ganache

Courtesy of Smitten Kitchen

Blondies

  • 2 sticks (1/2 pound) unsalted butter, softened
  • 1 3/4 cups sugar
  • 1 cup creamy peanut butter (I used all natural, fresh ground, honey roasted from Earth Fare)
  • 2 large eggs plus 1 large yolk
  • 2 teaspoons pure vanilla extract
  • 2 cups all-purpose flour
  • 1 1/2 cups semisweet chocolate chips (9 ounces)
  • 1/2 teaspoon salt, see note**

Preheat oven to 350 degrees F with rack in middle. Butter a 13- by 9- by 2-inch baking pan, then line bottom of pan with parchment paper and butter parchment.

Beat together butter, sugar, and vanilla with an electric mixer at medium-high speed until mixture is light and fluffy, about five minutes. Then add peanut butter and beat until incorporated. Beat in whole eggs and egg yolk.

Reduce mixer sped to low, then mix in flour until almost combined. Add in chocolate chips and beat on low until combined. Batter will be very thick!

Bake until blondies are deep golden, puffed on top and a wooden pick inserted in center come out with some crumbs, about 35 to 45 minutes.

Cool completely in pan on a rack, about 1 1/2 hours. Chill if needed.

Ganache
1 1/2 cups semisweet chocolate chips (9 ounces)**
1/2 cup heavy cream
1 tablespoon unsalted butter, softened

*1 1/2 tsp of coarse sea salt for topping

Put chocolate chips  in a heatproof bowl.

Bring cream to a boil in a small saucepan, then pour over chocolate chips and let mixture stand for one minute. Mix with a whisk starting slowly in small circles in the center, slowly working your way out as the chocolate and cream combine.

Gently whisk in butter until it is incorporated, chocolate is melted, and a smooth mixture forms.

Spread ganache on cooled brownies. Sprinkle with sea salt (or pretzels, or nothing at all). Let cool until set. This may take a while if it is hot and humid out, possibly overnight. Chill for a short while (30 minutes tops) if you need to speed things up. Ganache is best at room temperature though.

Slice and enjoy!

7 Comments

Filed under brownies

Lavender Cookies, With or Without Chocolate

After last week’s pie adventure, I needed something quick and easy. What is easier than sugar cookies? Not much. The oven took longer to preheat than it did for me to make the dough.


These are special with lavender added for that summer touch. They are good with or without chocolate, however, I prefer with chocolate (besides the obvious must-eat-chocolate-every-day) because it balances out the strong lavender flavor. Quite amazing how strong a mere tablespoon of lavender can be.

I made these very tiny, using a teaspoon scoop, as recommended by the recipe. It means you can eat more, right? Right. These would be perfect for an afternoon with the girls. Lavender is very girly, after all. Especially when you add a little chocolate. (But your male counterparts will like them too, even if they say they are too macho to eat lavender.)


The recipe comes from The Baking Sheet by King Arthur Flour, their subscription magazine (newsletter?). It was a housewarming gift from my dear friend (thank you!).

I changed the baking technique slightly and added vanilla. Because vanilla and lavender sound good together, which also means they taste good together.

Enjoy!

  • 1 cup (2 sticks) cold butter, cubed
  • 1 cup (7 ounces) sugar
  • 2 tsp vanilla
  • 1 large egg
  • 2 1/2 cups AP Flour
  • 1/2 tsp salt
  • 1 TB dried lavender (if you use fresh, use more)
  • 1 1/3 cups dark chocolate

Preheat oven to 350. Line two sheet pans with parchment or silpat.

In a stand mixer (hand held is fine too), beat the butter, sugar, and vanilla until very fluffy, about 5 minutes (set a timer!). Add the egg, mix, scrape bowl, and mix again. Stir in the flour and salt, mix until almost combined, add lavender, and finish mixing.

Drop dough by teaspoonful, leaving about an inch between cookies. They won’t spread much at all. Bake until slightly golden on edges, about 11 minutes.

Cool completely on rack.

Once cool, melt your chocolate. I prefer a double boiler for this because it will also keep your chocolate soft while you are dipping. Plus, you are much less likely to burn as you would if you melted your chocolate in the microwave. Dip cookies in chocolate and set out on sheet pan to set. If you live in a hot and humid environment like me, it may never set. Chill briefly (very briefly) in the refrigerator to at least get them off the sheet pan.

Now grab a bowl of these dish with the girls.

3 Comments

Filed under Cookies