Tag Archives: vanilla

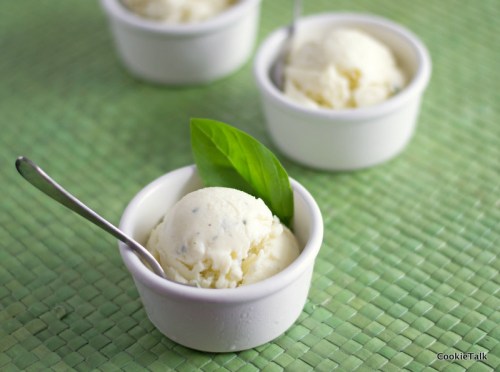
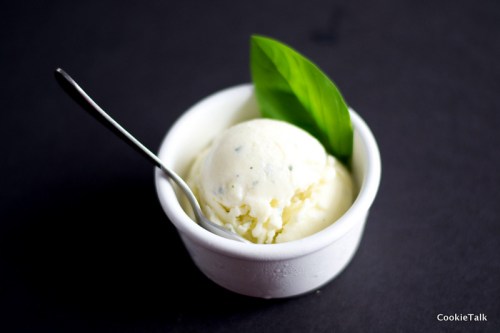
Basil Olive Oil Gelato – Where Have You Been All My Life?

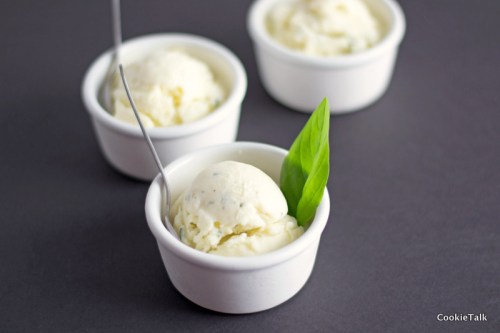
I know what you are thinking. “She’s lost her mind. Gone completely coo coo. Basil olive oil gelato? Huh?”

Oh it is so good. After one bite you’ll wonder why you haven’t had it before.The basil makes it a bit minty and the olive oil adds a fruity and peppery side. Combine the two and flavors explode in your mouth. It’s refreshing. It’s sweet, but not too sweet. It’s unique and it is delicious. We first had this at a local restaurant and now it has become one of our favorite flavors.

I did a lot of research trying to find a recipe that would be as close to the real gelato (Italian style ice cream) I once had in Italy. It’s hard to find here, and it is hard to find solid info on how exactly gelato should be made. Two things are certain: gelato has less fat than American style ice cream and has less air. That combination gives you more bang for your buck with each bite. The flavor is more concentrated.

Now, as for the whether or not gelato should have eggs is rather dependent upon the region. Either way, it should have far fewer eggs (4 yolks is about the max per batch) and it should not have cream. When researching recipes, those that had too many yolks and cream were out. Yes, I’m certain those recipes would have been delicious, that’s not the point. That would have made it American style ice cream. I’m going for Italian here.

I was a bit surprised to find many recipes use corn starch as a thickener instead of egg yolks. Corn starch doesn’t exactly bring “tasty” to mind. But, it does make sense. Egg yolks have a strong flavor and they distract from the flavor of the gelato, in this case, basil and olive oil. The best part, in my humble opinion, about using corn starch is that you don’t have to worry about tempering those eggs. Sure, it’s not that difficult, but it does make for a much more relaxing experience when you aren’t worried about curdling your eggs and checking the temperature frequently. It. Was. Easy.

I actually rarely make ice cream because when all is said and done, it’s not cheaper to make it at home and it can be tedious. Egg yolks and cream add up. This gelato was not expensive and it was so much easier to make. So I’m hooked.  I will be using this recipe as my base for other flavors.

I finally decided on this pistachio recipe from Saveur. I obviously didn’t add the pistachios. I steeped a vanilla bean and basil in the milk overnight, then added olive oil the next day. To finish I folded in minced basil. I’m so happy with how it turned out. At first I was worried it was too much olive oil, but after freezing the flavor is perfect. It is very easy to adjust to your liking.

It’s very important to use a good extra virgin olive oil here, otherwise you won’t taste it. And if you can’t taste it, what’s the point?

Basil Olive Oil Gelato

Modified from Saveur

Yield: 6 cups of gelato

Difficulty: Easy to Medium

Time: 20 mins to make mixture; chill overnight; 20 to 30 minutes in ice cream maker

Special Equipment: Ice cream maker

Ingredients

  • 4 cups whole milk, divided
  • 1 cup sugar
  • 3 TB cornstarch
  • 1 vanilla bean, split
  • 4 to 6 fresh basil leaves, divided, leaving 2 to 4 whole and the rest finely minced
  • 1/4 cup good extra virgin olive oil, plus additional 2 TB if needed
  • Tiny pinch of salt

Directions

1. Heat 3 cups of milk to a simmer. Remove from heat. Meanwhile, mix the remaining 1 cup milk with the sugar and corn starch.

2. Stir sugar mixture into the hot milk. Return to heat and cook, stirring constantly (using a spoon not a whisk!), for 8 to 10 minutes. Mixture will thicken, but not much.

3. Stir in 2 to 4 whole basil leaves and the vanilla bean. Pour into heat proof bowl. Let cool slightly, stirring frequently, then cover and chill completely overnight.

4. The next day, remove the basil leaves and vanilla. Add in 1/4 cup of olive oil and a pinch of salt. Mix according to your ice cream makers instruction, stopping after about 10 minutes to taste. Add additional olive oil if desired. Flavor will be less pronounced as it freezes.

5. After the mixture is done in the ice cream maker, fold in your minced basil and freeze. Enjoy!

9 Comments

Filed under frozen treat

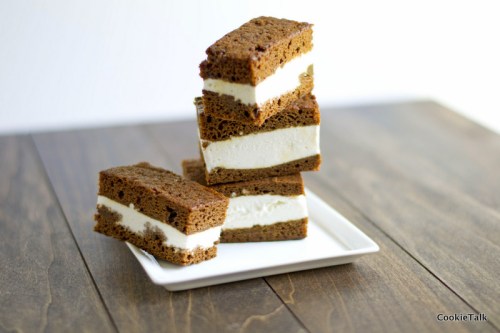
Christmas in July: Gingerbread Ice Cream Sandwiches

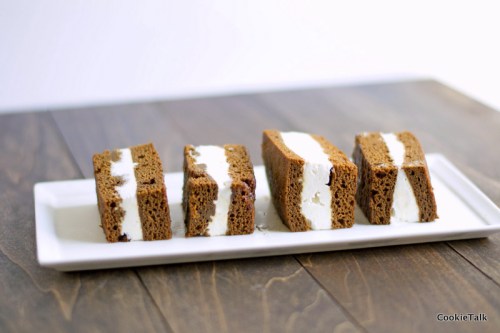
I know it isn’t quite July, but close enough. I assume you have planned out your 4th of July menu? No? Well, dessert is now decided. It’s easy, delicious, and a bit surprising: gingerbread ice cream sandwiches.

Gingerbread need not be reserved for just Christmas.  But no one really wants a rich, spicy cake when it is 100 degrees out. Gingerbread just seems way too heavy all by its lonesome. But freeze it and add some ice cream? Well, that is a whole different ball game.

This treat is fast and easy to make. You do have to turn your oven on, but only for 30 minutes, tops, including preheating.  It doesn’t have to be perfect (I think it looks better if it is not), can be cut to any size you want, and you can even use whatever ice cream you want. Although I think vanilla is best, but that’s just me.

Thanks to Gourmet Live Blog for suggesting this in the first place. Apparently June 5th is “National Gingerbread Day.” Yes, that does make perfect sense. I just don’t know why.

This recipe is also a one bowl wonder. One more reason to love it, right?

P.S. Did you notice I have a Facebook page now? Yes, I know, way to join the 21st Century. Just click “Like” over there on the right and join in the fun!

One year ago: Blackberry Buttermilk Cake

Gingerbread Ice Cream Sandwiches

From Gourmet Live

Yield: One half sheet pan of cake; sandwiches will depend on how you make them

Difficulty: Easy

Time: 10 minutes to make batter; 15 minutes to bake; 10 minutes to spread ice cream and cut into sandwiches

Ingredients

  • 1/2 cup butter, melted
  • 3/4 cup packed brown sugar
  • 1/2 cup molasses (not blackstrap)
  • 1 large egg
  • 1 1/2 tsp ground ginger
  • 1 tsp baking soda
  • 1/2 tsp salt
  • 1/2 tsp cinnamon
  • 2 cups AP flour
  • 2/3 cup boiling water
  • 1 1/2 qt ice cream (vanilla is my preference)

Directions

1. Preheat oven to 350F. Butter a half sheet pan (cookie sheet) and then line with parchment.

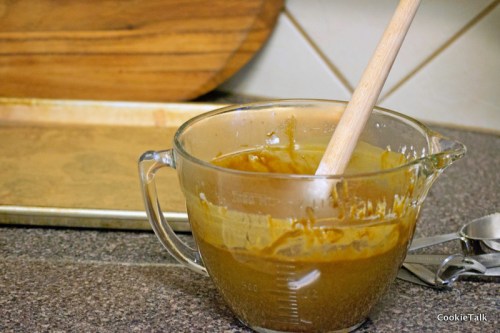
2. In a large bowl, mix together the butter, brown sugar, molasses, and egg. Then add the ginger, baking soda, salt, cinnamon and flour. Mix until combined. It will be a bit thick at this point. Add your boiling water and stir. It will thin to a nice cake batter.

3. Spread on your sheet pan. Try to make it even, but not a huge deal if it isn’t perfect. Bake for 12 to 15 minutes or until toothpick comes out clean. Let cool completely. To speed things up, put it in the freezer.

4. Let your ice cream soften at room temperature. It will be easier to spread when it is soft.

5. Cut the entire sheet in half crosswise, basically into two squares. One will be your top, one will be your bottom. Spread the ice cream on one side. Top with the other. Freeze until ice cream is set again. Cut into desired sizes and shapes. Yes, a cookie cutter would be just fine here. You’ll just have to eat the scraps though. So terrible, huh?

6. Freeze until ready to eat. You can wrap them in parchment and freeze or just use a freezer bag. They keep quite nicely.

Enjoy!

153 Comments

Filed under cake, frozen treat

Cinnamon Vanilla Granola

I complain about the heat all summer long. It’s just what I do. Normally I’d be whining about how it is 95 out, but it is hotter in other parts of the country so I’ll just keep my pretty little mouth shut. And being the perfectly reasonable person that I am, I still turn my oven on during the hottest time of the day to make yummies that bake for over an hour, like granola. I mean, 250F isn’t that hot for an oven, so what’s the big deal?


I know it would be better for my electric bill to scale back on the oven use over the hot summer months, but I still need my treats. And granola is a staple in this house, usually with dried fruit. We are never without it. I sprinkle it on my yogurt. My hubby takes it to work everyday for a snack. We eat it as cereal. We take it with us whenever we travel. So, you see, I can’t just stop making granola because it is hot outside. I could stop whining, but what fun would that be?

Put into jars for easy little homemade gifts! 

One year ago: Best Ever Banana Bread

Cinnamon Vanilla Granola

Inspired from Alton Brown

Yield: About 6 to 8 cups depending on the nuts you use

Difficulty: Really Easy

Time: 10 minutes to prep; 1 hour 15 minutes to bake

Ingredients

  • 3 cups old fashioned rolled oats (not quick cooking)
  • 2 1/2 cups chopped nuts (I usually use a combination of almonds and walnuts, but anything goes here)
  • 1/2 cup ground flaxseed
  • 1 TB cinnamon
  • 1/2 cup brown sugar
  • 1/2 cup honey, maple syrup, or a combination
  • 1/4 cup olive oil
  • 1 tsp vanilla
  • Pinch of salt
  • Dried fruit, optional. (I prefer cranberries or cherries)

Notes: I’ve made this recipe so many different ways over the years. It is very flexible and you can add or delete things to make it yours. You can adjust the sugar to suit your needs: more will obviously make it sweeter but will also cause it to clump together more, kind of like bars. Less will make it looser, which isn’t bad either, but I’ve found it is harder to snack on that way. Olive oil may seem strange but it is a better fat than canola oil and I think the taste is better. Flaxseed is optional, but a great way to add some heart goodness to your food without knowing it is there! If you omit it, I’d add another 1/2 cup of nuts or oats. It is pretty sweet by itself but is a wonderful compliment to tangy greek yogurt.

Directions

1. Preheat oven to 250F. Prepare one or two sheet pans. One if you want your granola to clump together a bit more (this is what I do) or two if you want it to be looser and roast a bit more.

2. In a large bowl combine the oats, nuts, flaxseed, cinnamon, and brown sugar. Toss together to combine well.

3. In a small bowl combine the oil, honey or maple syrup, vanilla, and pinch of salt. Whisk together.  Pour over the oat mixture and stir until well combined.

4. Spread onto sheet pan. Bake for 1 hour and 15 minutes. Your house will smell intoxicating. No need for candles today!

5. Let cool in the sheet pan. If you want really big clumps, don’t touch it till it is cool. It will then break nicely into large pieces (if you used just one pan). If you want it to be more cereal like, let it cool for just a minute then take a spatula and start stirring it up. You can add dried fruit at this point, but I usually don’t add the fruit until right before serving. I may use fresh fruit, especially this time of year, or dried fruit.

What’s your favorite granola? I  need some ideas to mix it up a bit!

Enjoy!

9 Comments

Filed under baking, granola