Category Archives: cake

Baby Shower Cupcakes and Tips for Working with Fondant

I have a monthly, uh, book club, if you can call it that (I’m not sure we even talked about the book last month) and right now two of our regulars are knocked up with sure to be adorable baby boys. So of course we had to do a book club themed shower, right? Right. We kept it simple. Still met at our normal book club meeting time, had planned on talking about the book, but instead had cupcakes and for gifts everyone brought books for the baby. These little boys are off to a great book collection already!

Baby showers are all about Cute and Tiny. Because that’s what a baby is, right? Thus, all coordinating baby shower items must be cute and tiny and I knew I had to make book toppers for the cupcakes. I must confess that these books did not turn out at all the way I wanted. I got all big headed and assumed I’d be perfect at making these because I’ve worked fondant before. Over two years ago. So yeah, I struggled a bit. But they still turned out pretty cute, all things considered.

Making the books are actually pretty easy once you get the hang of it. I decided how big I wanted them to be (about 1 1/2 inches) and then doubled that and added a bit since you will be folding them over. Then for the middle I just guessed to make the pages. Just cut out a piece that fits nicely in the book. It may take a couple of tries. I used a tiny dab of water and powdered sugar to help it stick to the center. To make it more book like I used an edible marker for the “ABC” and then used a paring knife to make indentations on the side and on the “pages”. Once you get your first one done the way you like it, use it as a template to cut out the others. I just used a pizza cutter and a ruler!

Let’s talk about the Don’ts I learned from this experience.

1. Do not use the Wilton Spray Food Color. Never. Ever. It’s terrible and I was cleaning up blue for the next week. And it doesn’t stick to fondant very well. It might work fine and dandy with regular icing but not fondant. I grabbed it to save time. Bad idea.

2. Do not assume that Wilton “Rolled Fondant” is all rolled and ready to go with no kneading required. It still needs kneading and rolling it out thin is still tough work. I also grabbed this to save time. Bad idea number 2.

3. Don’t expect to be perfect the first time.

Dos:

1. Do experiment a few times to get the hang of it.

2. Keep your fondant covered with a damp paper towel or it will dry out and make it difficult to work with. And you will end up frustrated.

3. Knead in your food coloring. It will only take a couple of drops. You can always add more if you need to adjust your color.

The spray color was simply a mess to work with! 

After I got started, making these were pretty easy. They would have been easier if I hadn’t done Mistakes 1 and 2. As for the cupcakes, I just used my favorite chocolate cake recipe. The buttercream was a simple buttercream. I actually don’t like simple buttercream and scrape it off my cupcake. However, I needed an icing that would hold up to warm, humid temperatures and this one does beautifully. And this cake doesn’t need a buttercream but the book needed to sit on something!

What cute baby shower ideas have you seen?

5 Comments

Filed under baking, cake

Christmas in July: Gingerbread Ice Cream Sandwiches

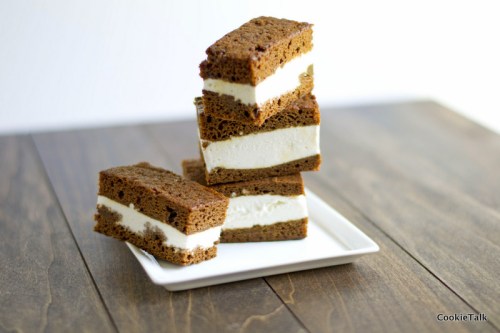
I know it isn’t quite July, but close enough. I assume you have planned out your 4th of July menu? No? Well, dessert is now decided. It’s easy, delicious, and a bit surprising: gingerbread ice cream sandwiches.

Gingerbread need not be reserved for just Christmas.  But no one really wants a rich, spicy cake when it is 100 degrees out. Gingerbread just seems way too heavy all by its lonesome. But freeze it and add some ice cream? Well, that is a whole different ball game.

This treat is fast and easy to make. You do have to turn your oven on, but only for 30 minutes, tops, including preheating.  It doesn’t have to be perfect (I think it looks better if it is not), can be cut to any size you want, and you can even use whatever ice cream you want. Although I think vanilla is best, but that’s just me.

Thanks to Gourmet Live Blog for suggesting this in the first place. Apparently June 5th is “National Gingerbread Day.” Yes, that does make perfect sense. I just don’t know why.

This recipe is also a one bowl wonder. One more reason to love it, right?

P.S. Did you notice I have a Facebook page now? Yes, I know, way to join the 21st Century. Just click “Like” over there on the right and join in the fun!

One year ago: Blackberry Buttermilk Cake

Gingerbread Ice Cream Sandwiches

From Gourmet Live

Yield: One half sheet pan of cake; sandwiches will depend on how you make them

Difficulty: Easy

Time: 10 minutes to make batter; 15 minutes to bake; 10 minutes to spread ice cream and cut into sandwiches

Ingredients

  • 1/2 cup butter, melted
  • 3/4 cup packed brown sugar
  • 1/2 cup molasses (not blackstrap)
  • 1 large egg
  • 1 1/2 tsp ground ginger
  • 1 tsp baking soda
  • 1/2 tsp salt
  • 1/2 tsp cinnamon
  • 2 cups AP flour
  • 2/3 cup boiling water
  • 1 1/2 qt ice cream (vanilla is my preference)

Directions

1. Preheat oven to 350F. Butter a half sheet pan (cookie sheet) and then line with parchment.

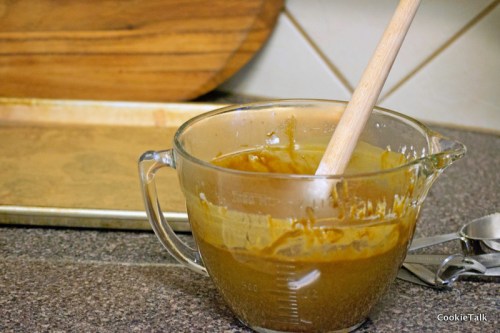
2. In a large bowl, mix together the butter, brown sugar, molasses, and egg. Then add the ginger, baking soda, salt, cinnamon and flour. Mix until combined. It will be a bit thick at this point. Add your boiling water and stir. It will thin to a nice cake batter.

3. Spread on your sheet pan. Try to make it even, but not a huge deal if it isn’t perfect. Bake for 12 to 15 minutes or until toothpick comes out clean. Let cool completely. To speed things up, put it in the freezer.

4. Let your ice cream soften at room temperature. It will be easier to spread when it is soft.

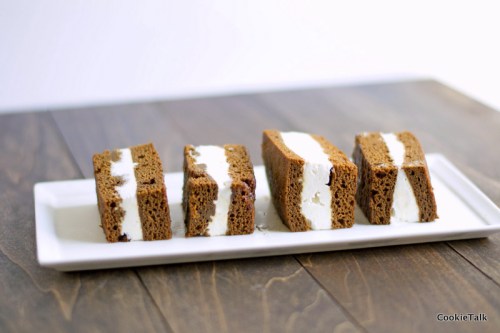
5. Cut the entire sheet in half crosswise, basically into two squares. One will be your top, one will be your bottom. Spread the ice cream on one side. Top with the other. Freeze until ice cream is set again. Cut into desired sizes and shapes. Yes, a cookie cutter would be just fine here. You’ll just have to eat the scraps though. So terrible, huh?

6. Freeze until ready to eat. You can wrap them in parchment and freeze or just use a freezer bag. They keep quite nicely.

Enjoy!

153 Comments

Filed under cake, frozen treat

Spice Coffee Cake

The Daring Bakers’ April 2012 challenges, hosted by Jason at Daily Candor, were two Armenian standards: nazook and nutmeg cake. Nazook is a layered yeast dough pastry with a sweet filling, and nutmeg cake is a fragrant, nutty coffee style cake.

While the Nazook looked utterly amazing and mouthwatering, I had no time to make it this month due to my crazy busy schedule right now. (This is the part where you pity me, of course). Thankfully, the nutmeg cake rocked and I’m so glad Jason introduced us to it! It’s incredibly easy and quick to make and tastes delightful, especially with a cup of coffee (huh, wonder if that’s why it’s called a coffee cake?). It  has a crust like a cheesecake and texture like well, a dense cake. No icing or glaze needed but I’m sure that wouldn’t hurt things. Don’t let it’s simple exterior fool you. The flavor is quite complex.

This cake would be easy to personalize to meet your taste buds. I didn’t find the nutmeg overwhelming but I do love nutmeg. I also added a pinch of cinnamon. Nutmeg and cinnamon are just meant to be together, in my humble opinion. But if they aren’t your favorite spices, just add whatever suits you. This cake has a beautiful caramel taste. The edges get a little more done than the center but that was actually my favorite part. A little bit chewier and caramel-y.

Did I mention it was quick? Less than 20 minutes, maybe closer to 10 but I wasn’t really counting, to pull together and about 40 minutes to bake. I love quick recipes that taste awesome, don’t you?

Nutmeg Cake

  • 1 cup milk
  • 1 tsp baking soda
  • 2 cups (280 gm/10 oz) AP Flour
  • 2 tsp  baking powder
  • 2 cups  (400 gm/14 oz) brown sugar, firmly packed
  • 3/4 cup (170 gm/6 oz) butter, unsalted, cubed
  • 1/2 cup walnut pieces, or any nut of your choosing. I used pecans.
  • 1 to 1-1/2 teaspoons ground nutmeg
  • 1 tsp cinnamon
  • 1 egg

1. Preheat your oven 350°F.
2. Mix the baking soda (not baking powder) into the milk. Set aside.
3. Put the flour, baking powder, and the brown sugar into your food processor (mixer will work too). Pulse until uniformly mixed.
4. Toss in the cubed butter. Pulse until uniformly mixed into tan colored crumbs.
5. Pour HALF of the crumbs into your springform (9”/23cm) pan. Press out a crust using your fingers and knuckles.
6. Mix in the nutmeg and cinnamon
7.  Add the egg, mix until combined.
8. Pour in the milk and baking soda mixture. Continue to mix until a slightly lumpy tan batter is formed.
9. Pour the batter over the crust in the springform pan.
10. Gently sprinkle the nut pieces over the batter.
11. Bake in a preheated oven for 30-40 minutes. It’s ready when the top is golden brown, and when a toothpick comes out clean. It took 40 minutes in my oven, but I started checking at 30 minutes.
12. Let cool for a minute or two, then run a knife around the pan. Remove the outer part and let cool. If you let it cool in the pan it may stick. Make coffee and enjoy!

8 Comments

Filed under baking, breakfast, cake, Daring Bakers

Mini King Cakes

Today is Mardi Gras. A splurge day before you must behave until Easter. Or something like that.

Mardi Gras has a rich history, particularly in New Orleans. I have been to New Orleans, pre-Katrina, but I was there during the off season and it was still crazy. Did you know that Mardi Gras originated in Mobile, AL? I’d always assumed New Orleans!

I’d never had a King Cake before, but essentially it is brioche (the “cake”) and gold, green, and purple sprinkles. Williams-Sonoma did a fun blog post on King Cakes describing the sugars as “…purple for justice, green for faith, and gold for power.” Those are some seriously loaded sugars.  Newer versions of King Cake include various fillings, such as cream cheese and praline. And in true Alabama fashion, their version of the King Cake is deep fried. I would expect nothing less.

I’m sure you’ve heard of hiding a prize inside the King Cake. In past years it would be jewels (the wealthy), beans (the poor), almonds, and in most recent years…a plastic baby. The plastic baby really creeps me out for some reason. I mean, it’s a piece of plastic in your cake! I just find that odd, so I omitted that part. Forgive me. But the main point of the prize is that whoever gets the prize is in charge of bringing the King Cake next year. I don’t mind making them again. They were easy and very tasty.

I found my recipe from King Arthur Flour but you could really use any brioche recipe, add some lemon and nutmeg, glaze it, sprinkle some sugars and voila! King Cakes! This brioche recipe is a little bit “cak-i-er” and less “bread-i-er” than other brioche and it was fast and easy to make. Less than four hours including bake and rising time! Can’t beat that.

If you don’t have gold, green, and purple sugars, make your own. Just add a little food coloring to your sugar. Easy. I had gel food colors so I put a dab on a toothpick, spritzed with water, and added to the sugar. It doesn’t take much at all.

Mini King Cakes

Yield: 10 to 12 mini King Cakes

Time: about 4 hours, including baking and rising

Difficulty: Easy

One Year Ago: Chocolate Souffle

Recipe from King Arthur Flour

Dough

  • 1/2 cup (8 TB) butter, melted
  • 3/4 cup lukewarm milk
  • 2 large eggs + 1 large egg yolk, white reserved
  • 1/4 cup sugar
  • 1/4 cup dry milk
  • 1 1/4 tsp salt
  • 1/4 tsp ground nutmeg
  • 1 tsp grated lemon rind
  • 3 1/2 cups AP Flour
  • 2 1/2 tsp instant yeast

Icing

  • 1 cup confectioners’ sugar
  • ½ tsp vanilla or lemon extract (I used Fiori di Sicilia, but careful – a little goes a long way)
  • 1 TB + ½ to 1 tsp milk, enough to make a thick but pourable glaze

Topping

  • yellow, purple, and green sparkling sugars

Directions

1. Combine all ingredients for dough into mixer. Mix with dough hook for 5 minutes on speed 1 until dough comes together. Increase to speed 3 until dough forms a smooth ball. You may need to sprinkle more flour into the dough. I had to add about an extra 1/2 cup because the dough was just too soft. It should be soft and slightly sticky, but still have some shape. If it is just a sloppy mess, you will have a hard time with it. Sprinkle one teaspoon at a time and let mix completely before adding more. This step may take 15 minutes total.

2. Let dough rise, covered, for about one hour in a warm place, like your oven with the light on (but oven turned off!). See before and after rising:

3. Scale into 12 equal pieces (I did 10 since I only have 10 brioche pans). Shape into rolls. This will be very easy to do since the dough is easy to work with. Place into greased muffin tins or brioche pans.

4. Let rise for another hour (but not in your oven this time) covered loosely with a towel. While the dough is rising, preheat your oven to 350F.

5. After rising, combine the reserved egg with  about a tablespoon of water, mix thoroughly, and brush on the cakes. Bake the cakes for 35 to 45 minutes, tenting if they brown too fast. Check the temperature about the 30 minute mark. It should read at least 180F  when they are ready.

6. To make the glaze, just combine all the glaze ingredients together, adding more milk if needed. After the cakes have cooled, dip in the glaze and sprinkle with sugars. Eat!

Check out more bread recipes at Wild Yeast.

6 Comments

Filed under bread, cake

Love and Whoopie….Pies

Red velvet whoopie pies with a raspberry marshmallow center. Does that say Valentine’s Day or what? I finally decided to jump on the Valentine’s Day band wagon and make something with red velvet.  It is one of my favorite cakes, after all, and I’ve had red velvet on my To Bake list for, oh, a year maybe?

And at this point I am retyping my entire post, minus the paragraph above, since WordPress was so kind to crash and not register my last save! Don’t you just hate it when technology doesn’t do exactly what you want it to do?

There, just saved. Still good.

I think I said something along the lines of every day is special, no need to just use Valentine’s Day as an excuse, and yada yada yada. Maybe I was being too mushy and WordPress decided to intervene? Well, hmph.

And just saved again. Still good.

These are really tasty “cookies” with an identity crisis (I mean, they are essentially small cakes, with pie in the name, and we consider them cookies?). Chocolatey, cakey, and yummy. What more could you ask for in a cookie? Oh, that they are easy? Done. (Save).

Happy Valentine’s Day!

Red Velvet Whoopie Pies modified from Epicurious

Yield: about 2 dozen

Time: about 1 hour, including bake time

Difficulty: Easy

One Year Ago: Granola Bars

Cookie (Cake)

  • 2 cups all-purpose flour
  • 1/4 cup  unsweetened (natural) cocoa powder (not Dutch process)
  • 1/2 teaspoon baking soda
  • 1/2 teaspoon salt
  • 1 stick (1/2 cup) unsalted butter, softened
  • 1 cup brown sugar
  • 1 large egg
  • 1 teaspoon vanilla
  • 1 teaspoon distilled white vinegar
  • 2/3 cup well-shaken buttermilk
  • 1 (1-ounce) bottle red food coloring (2 tablespoons) OR 1 tsp gel food coloring dissolved in 2 TB water
1. Preheat oven to 350°F. Line two baking sheets with parchment paper or silpat. Sift your cocoa powder, then whisk together flour, cocoa powder, baking soda, and salt in a bowl.
2. Beat butter, sugar, and vanilla with an electric mixer until combined well and fluffy, about 5 minutes. Beat in egg, scrape the bowl, and then the vinegar.
3. Reduce speed to low and alternately mix in flour and buttermilk in batches, beginning and ending with the flour until combined.
4. Add the red food coloring and mix on low speed until thoroughly combined.
5. Spoon 1 tablespoon mounds of batter 2-inches apart on lined baking sheets.
6. Bake, switching positions of baking sheets halfway through baking, until rounds are puffed and set (check with a toothpick), 8 to 10 minutes.
7.  Spread about 1 tablespoon of icing (two choices below) on flat-side of half the rounds; top with remaining rounds, flat side down, to form whoopie pies.

Marshmallow Icing from Smitten Kitchen

This is the one I used. No refrigeration needed. Made a lot, so you could cut the recipe in half.

  • 2 large egg whites
  • 1/2 cup sugar
  • 1/4 cup light corn syrup
  • 2 tablespoons water
  • 1 1/2 teaspoons pure vanilla extract OR chambord
  • pinch of salt

Combine icing ingredients in a metal or glass bowl set over a saucepan of simmering water and beat with a handheld electric mixer at high speed until frosting is thick and fluffy, 6 to 7 minutes. Remove bowl from heat and continue to beat until slightly cooled. Add food coloring if desired. Use frosting the day it is made. It will still be good the next day, just won’t be as fluffy.

Cream Cheese Icing from Epicurious

  • 8 ounces cream cheese, softened
  • 1/2 stick (1/4 cup) unsalted butter, softened
  • 1 teaspoon fresh lemon juice
  • 1/2 teaspoon vanilla
  • 1/8 teaspoon salt
  • 2 cups confectioners’ sugar

Beat together cream cheese, butter, lemon juice, vanilla, salt, and sugar until creamy, 1 to 2 minutes.

Leave a comment

Filed under cake, Cookies

Lemon Cupcakes

Do you ever feel like you’ve lost your mojo in the kitchen? I’ve had a lot of kitchen mishaps in the last month. Early in January when I was making this I left the handle of my ladle on the edge of a still hot burner. It only melted a bit and is still usable. A few days later I was making a salted buttercream and completely over salted it. A week later, after running the oven cleaner, I put my pizza stone back in the oven only to discover it was suddenly smoking profusely, causing me to run around frantically opening all windows and turn on all fans. I felt like a fool when I discovered the cause of the  smoke: a cork trivet stuck to the bottom of the pizza stone. Our house stunk for several days. And finally, I was making Guinness brownies with a Guinness glaze (from the most recent BA) and completely ruined them by pouring the glaze on while the brownies were still hot, essentially creating pudding (but still tasty).

Needless to say, my ego had been a bit bruised. I started questioning my ability to bake. Then I saw the Limoncello and Meyer Lemon Cupcakes from Tartelette. I have always, always loved lemon desserts. I don’t make them often because they aren’t my hubby’s most favorite but after all these mishaps I needed a dessert that I knew I’d love. And they turned out beautiful and incredibly tasty. So moist and flavorful.

And I didn’t screw them up or attempt to burn the house down. Mission success!

Now let’s talk about limoncello. I was first introduced to this delicious digestif when we lived in Hawaii and we met our dear friends, one is Italian, the other is German. And if you didn’t know, Europeans like their digestifs. I lived in Germany for two years and came to love the digestifs brought to you after dinner. I really wish American restaurants would pick up this delightful tradition!

I used to buy it all the time, but now we live in a out dated old fashioned  Charming Southern State and I can’t buy it. But I can buy ever clear (makes perfect sense) and therefore I can make my own. I used this recipe from Limoncello Quest (yes, that’s right, an entire website dedicated to making your own limoncello), with two exceptions. I used less sugar, about 1/2 cup less I think, and I did not wait the full 45 days the second time around. I did the first 45 days, added the simple syrup, then waited about 10 days. And it is strong but it is delightful and will warm your soul. Even got my mom hooked on it! If you ever have digestive problems or stuffed sinuses, just have a swig of this. You’ll be better in no time!

That being said, the amount of alcohol in these cupcakes is quite minor. The cake batter portion will cook out, but if you are concerned about the icing, you can easily omit it and just add extra lemon juice instead.

Lemon Cupcakes with Meyer Lemons and Limoncello

From Tartelette

Yield: 12 – 15 cupcakes

Time: 90 minutes including cooling and bake time

Difficulty: Easy to Intermediate

One Year Ago: Triple Chocolate Brownies

Meyer Lemon Limoncello Cupcakes:

Cupcakes

  • 2 oz (60gr)unsalted butter, at room temperature
  • 2 oz(60gr) cream cheese, at room temperature
  • 1 cup (200gr)sugar
  • 3 large eggs
  • 2 tablespoons (30gr) limoncello (see here or here for possible recipes)
  • 1½ cups (190gr) all-purpose flour
  • 1 teaspoon baking powder
  • ½ teaspoon salt
  • ½ cup(125ml) buttermilk
  • 1/4 cup Meyer lemon juice
  • zest of one Meyer lemon


1. Preheat oven to 350F and position a rack in the center.

2. In the bowl of an electric mixer fitted with the paddle attachment, beat the butter, cream cheese and sugar at medium speed until light and creamy, about 2-3 minutes. Add the eggs, one at a time, beating well after each addition. Add the limoncello and beat an extra minute.

3. In a medium bowl, combine the flour, baking powder, and salt. Add flour mixture and buttermilk alternatively to the butter/eggs mixture, beginning and ending with flour mixture. Add the lemonjuice and zest.

4. Fill cupcake tins 2/3 full. Bake for 20 minutes or until a toothpick inserted near the middle comes out clean. Let cool completely.

Meyer Lemon Curd

  • zest of 2 lemons*
  • 1/2 cup (125ml) lemon juice
  • 1/4 cup (50gr) sugar
  • 1 egg + 1 egg yolk

*If you cannot find Meyer Lemons, use standard lemons but add a bit more sugar.

1. In a heavy medium saucepan, stir together the lemon zest, juice and sugar and bring to a simmer over medium heat. In a small bowl, beat the egg and egg yolk to break them up.

2. Very slowly beat in all of the lemon mixture into the eggs to temper (this will prevent scrambled eggs). Scrape the mixture back into the saucepan and cook stirring constantly until it thickens up, about 5 minutes (only took 3 minutes for me). Remove the curd from the heat, let cool completely. To speed up cooling, place in refrigerator.

Cream Cheese Icing

  • 2 oz (60gr)unsalted butter, at room temperature
  • 4 ounces (120gr) cream cheese, at room temperature
  • 1 tablespoon (15gr) limoncello (or lemon juice)
  • 1 cup (115gr) powdered sugar, sifted

In the bowl of an electric mixer fitted with the paddle attachment, beat the butter and cream cheese on medium speed until light and creamy, about 2-3 minutes. Add the limoncello and beat an extra minute. Reduce the speed to low and gradually add the sifted powdered sugar and beat until fully incorporated and smooth.

To assemble
Cut a whole into each cupcake with a melon baller or the back end of a large pastry tip. Fill each cavity with the lemon curd. Fill a pastry bag fitted with a star tip with the cream cheese frosting and pipe onto each cupcake. Decorate with berries if desired.

Thank you, Tartelette!

5 Comments

Filed under cake

Day 13 of Baker’s Dozen: Easy Panettone

We did it. We made it to the last day of the Baker’s Dozen. Tomorrow is Christmas Eve. I know many organizations are off from work today, getting a head start on the holiday weekend. I hope you are all finished with your shopping and baking and can now sit back and enjoy the holiday season with your loved ones.

This is the easy version of Panettone, which is an Italian fruitcake. You will see it in stores generally in the blue boxes. I’ve never bought one of those. I worry how dry and old they may be. And the whole preservative thing (obviously it has something in it if it is shelf stable for months!) Which is probably one of the big reasons it is commonly turned into French Toast (which will be my Sunday morning brunch. Can’t wait). But the traditional way to make panettone is a very long and tedious process. And really, who has time for long and tedious this month? Not me.

After all the baking I’ve done this month, I needed the easy version.  King Arthur Flour has the easy version and it was delicious. You’ll notice that there’s a hole in my panettone. Traditional panettone is baked high with no hole, which makes for a more difficult baking process.Remember, we need easy right now.

I followed their recipe almost exactly, except that I let my biga rise for almost 24 hours  and then I tossed my dried fruit in a little rum for about 30 minutes before adding it to the dough. And that’s it.  They did such a great job with the instructions that I’m just going to give you the link. You can still make it in time for Christmas Brunch and you won’t regret it. After all your hard work this month, you deserve a treat, don’t you think? Now you can have your cake and eat it too.

King Arthur Flour American Style Panettone

Be sure to read the tips right below the ingredient list.

Warmest wishes to you and yours! Happy Holidays!

8 Comments

Filed under bread, cake

Day 12 of Baker’s Dozen: Cranberry Brioche Coffee Cake

Surely you are all done with your holiday shopping, right? Yesterday, maybe not, but today, definitely, right? No? Well, there are quite a few stores that still guarantee holiday delivery. One happens to be my favorite baking store, Sur La Table (hint hint). Not only do they have an amazing baking supply, like these great paper baking pans, but they also have a fantastic selection of adorable foodie ornaments, which I plan on shopping for at After Christmas Sales (another favorite!).

And those paper baking pans would be perfect for today’s recipe, Cranberry Brioche Coffee Cake, which would make an amazing gift and earn you a few BFFs. Who wouldn’t love a beautiful coffee cake for a gift? Bonus: I used the Sugared Cranberries in addition to dried cranberries. Yum. And just another reason to love brioche, as if we needed another reason, right?

This recipe is one that can be very easily adapted to suit your needs. Don’t like cranberries? No problem, just add any fruit that you like. Want to make several smaller cakes? Easy.  You don’t even need to use this brioche recipe. There are a ton to chose from (just a quick google search brought up Epicurious, Food Network) or maybe you have your own that you like.

And the great thing about brioche is the dough freezes very well until you are ready for it. Maybe you want this coffee cake for Sunday morning. You could make the dough today, freeze it, take it out Saturday to thaw, and have this coffee cake in time for brunch with very little work. Or, even better, you could make it Saturday because it tastes better the next day.

This recipe came from the most recent issue of King Arthur Flour’s Baking Sheet, which I received as a housewarming gift from a dear friend (many thanks!!). However, I made a few adjustments, and I used my trusted brioche recipe and not theirs, although I’m sure it’s great and would work just fine. Enjoy!

Cranberry Brioche Coffee Cake

Adapted from King Arthur Flour’s The Baking Sheet, Holiday 2011

Yield: 1 8 inch coffee cake

Difficulty: Easy to Medium

Prep time: About 45 minutes hands on, 12+ hours for resting dough, 35 minutes for baking

Ingredients

Procedure

1. Soak the dried fruit in the alcohol or juice overnight, or microwave for 30 seconds. Note: the alcohol does not cook off completely and still has a distinct flavor. If you don’t like this, I recommend using half alcohol and half juice, or all juice. Drain before using.

2. Make the brioche recipe of your choice and have ready before rising (this does not refer to the freezing and overnight chilling if your recipe calls for that). Scale out about 500 g (17 oz) and press into a buttered 8 inch pan. I used a spring form pan but any pan will work. If you want to make mini coffee cakes, just scale out enough dough for the mini pans. If you want a bigger cake, use more brioche.

3. Let rise until puffy, preferably in a warm spot like your oven (turned off!). It took a good hour for mine because the dough was still cold and my house is chilly. If your recipe doesn’t call for any chilling, this may not take as long. Preheat oven to 400F (but take the dough out before preheating if you were proofing it in the oven).

4. Once puffy, lightly dimple the dough, but do not deflate it. Pour the cream over the dough (if using a spring form pan then make sure it is sitting on a sheet pan), then the sugar, and then the drained dried fruit. Alternately, you can lightly kneed the fruit into the dough before putting in the pan, and sprinkle a few extra on top. If you are using the sugared cranberries I’d recommend pulsing them in a food processor first.

5. Bake in preheated oven until golden and a thermometer reads 190F in the center. It took about 30 minutes for my cake. The original recipe says 23 minutes, which wasn’t long enough. Let cool completely or ideally overnight before serving. Enjoy with a cup of coffee!

2 Comments

Filed under bread, cake

Day 9 of Baker’s Dozen: Sticky Toffee Pudding

A couple months ago I had never heard of sticky toffee pudding. I first learned about this British treat when watching Unique Sweets. I think they called it sticky date pudding and I had trouble finding a decent recipe. Since the holidays kicked into full gear though, it is everywhere. Everywhere! It’s the new thing. And for good reason – it is a tasty and very unique treat. Not overly sweet, fruity, and a great change from all the typical holiday treats!

After searching recipes I finally decided on one from King Arthur since their recipe used figs. Its not terribly different and substituting dates to make it more traditional would be perfectly fine. But I love figs so this was the recipe for me.

You’ll notice that this doesn’t look like American pudding. It’s definitely a cake but called pudding across the pond. Pudding can also be savory, like Yorkshire pudding. Here pudding is more closely associated with pastry cream.

It’s pretty quick to make and easy too. The caramel sauce takes a while but is easy. I spiked both my cake and sauce, because, well, it’s the holidays, and why not? Figs go great with oranges so I added grand marnier to my cake and put a bit of dark rum in the caramel sauce. Have fun this holiday season!

Sticky Toffee Pudding

Adapted from King Arthur Flour

Yield: 6 to 8 individual cakes

Difficulty: Easy

Cake

  • 1 cup chopped figs or chopped dried dates
  • 1/3  cup + 3 TB boiling water
  • 2 TB Grand Marnier or orange juice
  • ¼ cup soft butter
  • 1/4 cup brown sugar
  • 3/4 tsp salt
  • 1/2 tsp baking powder
  • 1 large egg
  • 2 TB dark molasses
  • 1 tsp vanilla extract
  • 1 cup cake flour or AP Flour
  • 1/4 tsp baking soda

Sauce

  • ½ cup sugar
  • 6 tablespoons unsalted butter
  • ¼ teaspoon salt; omit if using salted butter
  • ¾ cup heavy cream
  • 1 tsp dark rum, optional

1. Preheat the oven to 350°F. Butter six ¾-cup silicone baking cups or oven-safe custard cups. Combine the figs and boiling water, and liqueur if using, and set aside.

2. Beat the 1/4 cup butter, brown sugar, salt, and baking powder until fluffy. Beat in the egg, then the molasses and vanilla, then the flour.

3. Purée the figs and water in a food processor or blender. Add the baking soda, and stir into the batter.

4. Pour into the prepared baking cups. Place molds on a baking sheet.

5. Bake the cakes for 18 to 22 minutes, until a cake springs back when lightly pressed in the center. Remove from the oven, and cool in the molds or cups.

6. Meanwhile, make the sauce. Cook the sugar, butter, and salt over medium heat until the mixture is a deep amber color; watch closely to prevent burning. It should take about 10 minutes.

7. Carefully mix in the cream. Cook the mixture until it’s thick enough to coat a spoon. This will take another 5 to 10 minutes. Add the rum, if using.

8. Unmold the cakes and serve with the sauce.

2 Comments

Filed under cake

Bon Appetit Blackberry Buttermilk Cake

I’m obviously on a Bon Appetit kick.  This recipe is in the most recent issue, July 2011, in the berry special. I was crazy about the berry special in the first place and then I saw this treat.  It was 96 degrees the day I made this cake, which obviously is a great day to turn on the oven for an hour. You may think I’m crazy, but who could possibly resist a beautiful blackberry buttermilk cake? Not me, and it was worth the extra sweat to dig into this scrumptious summertime cake. And it is easy. Really easy. Yes, it bakes for a long time and heats up your kitchen. But it is worth it. This cake would be perfect of a summer BBQ/potluck type of event. No icing required and the fruit makes it healthy….right? I mean, doesn’t that look so delicious?

Oh, and one more thing. I got a new camera. That’s right, I finally got a DSLR,  Nikon D3100. No, I didn’t get it just to blog. I’ve been taking pictures of everything, but I do admit I am loving the improvement on my food pictures. I am just barely starting to learn how it works, and I have such a long way to go with staging. But, I’m still pleased with my improvement. What do you think?

Ok, on to the recipe!

Like I said, this recipe is very easy. I made it late in the afternoon and it was easily ready for dinner.

Blackberry Buttermilk Cake by Bon Appetit

Ingredients

  • 3/4 cup (1 1/2 sticks) unsalted butter, room temperature, plus more for pan and parchment
  • 2 1/3 cups cake flour (sifted, then measured) plus more for pan
  • 2 1/2 cups (10 ounces) fresh blackberries
  • 1/4 cup plus 1 1/3 cups sugar
  • 1 1/2 teaspoons baking powder
  • 3/4 teaspoon salt
  • 1/2 teaspoon baking soda
  • 3 large eggs, room temperature
  • 2 teaspoons vanilla extract
  • 1 1/2 teaspoons finely grated orange zest
  • 1 cup well-shaken buttermilk
  • Powdered sugar (for dusting)
  • special equipment:

    Use a 9″-10″-diameter springform pan

Preparation

  • Position a rack in middle of oven and preheat to 350°. Butter pan; line bottom with a round of parchment paper. Butter parchment. Dust with flour; tap out excess. Arrange berries in a single layer in bottom of pan; sprinkle evenly with 1/4 cup sugar.

  • Sift 2 1/3 cups flour, baking powder, salt, and baking soda into a medium bowl; set aside. Using an electric mixer, beat 3/4 cup butter and remaining 1 1/3 cups sugar in a large bowl at medium-high speed, occasionally scraping down sides of bowl, until pale and fluffy, about 2 minutes. Add eggs, one at a time, beating well after each addition. Beat in vanilla and zest. Reduce speed to low; beat in flour mixture in 3 additions, alternating with buttermilk in 2 additions, beginning and ending with flour mixture and beating just until incorporated. Pour batter over berries in pan; smooth top.

Aren’t the orange specks pretty?

  • Bake until cake is golden brown and a tester inserted into the center comes out clean, about 1 hour 25 minutes. Note: My cake only took 1 hr, 8 minutes. You will see in the reviews some only took 40 minutes. So watch very carefully! A tester should not be crumb free, that is too dry!   Let cool in pan set on a wire rack for 15 minutes, then run a thin, sharp knife around edge of pan to loosen. Remove pan sides. Invert cake onto rack and remove pan bottom; peel off parchment. Dust top generously with powdered sugar and let cool completely.

The easiest way to flip is to first undo the sides of the pan, then put a cake board (you can find them in the cake decorating section at Walmart and Michaels, along with a slew of other stores. Well worth the money!) on top of the cake and just flip! Then you have this:

Dust with powdered sugar and you are the hit of the party! Don’t forget to save a piece for yourself….

2 Comments

Filed under cake