Tag Archives: cinnamon

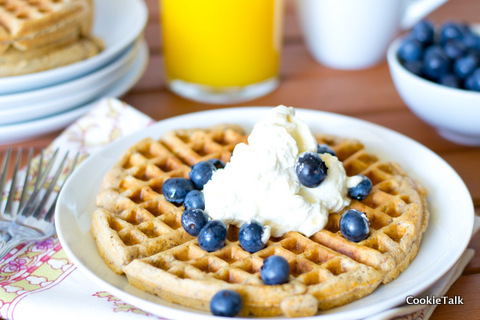
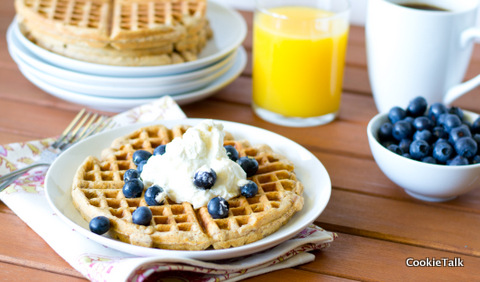
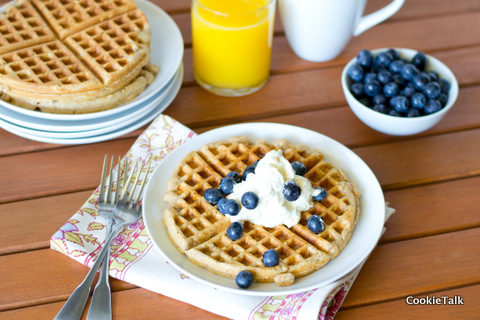
Tasty Heart Healthy Cinnamon Waffles (No Cardboard Allowed)

Don’t you just love a delicious Belgium waffle for breakfast? Rich, crispy on the outside, soft and gooey on the inside, then slathered with butter, maple syrup and,  if you are feeling special, some whipped cream and fruit? Dusted with powered sugar, of course. Oh, and a side of salty applewood bacon on the side. Yeah, I like that too.

These are not those waffles. But they are still delicious.

Let’s be realistic. We can’t eat like that every day. It’s horrible for our heart and waistline. It doesn’t mean we can’t have waffles every day, nor must we resort to those cardboard frozen “waffles” that so many of us grew up on. We can still have delicious waffles that are good for us and not have to spend much time making them.

I personally have eggs almost every day for breakfast. I love a good scrambled egg and a piece of toast. It fills me up and keeps me going. My dear hubby likes eggs, but he doesn’t love them. Using a King Arthur Flour recipe as a base, I made this heart healthy and filling waffle to keep him going. This makes me an Awesome Wife, don’t you think?

It make 3 to 6 waffles depending on the size of your waffle iron. We throw these babies in the freezer and then just put them in the microwave for about 30 to 45 seconds. If you have a toaster oven, that would work better. Ours started on fire a few years ago (no damage done) and we decided not to replace it! But I digress…

Serious Stuff: These are full of flax seed, oats, and a good bit of cinnamon. Flax and oats are known to be heart healthy. Cinnamon is an anti-inflammatory which is good for your heart and your aches and pains!  (Please note, I am not a dietician. I just read a lot.) And the whole wheat fiber will help keep you full , as well as provide a nice nutty taste. I switched out the granulated sugar for honey because I think it tastes better and I use grape seed oil because I think it also tastes better.  I’ve never tried adding nuts but I think that would be a great addition, just make sure you chop them well. And there’s always bacon….

I had a couple of curious little noses while I was photographing the waffles. This table was just their height, so of course they though it was their breakfast!

Cinnamon Wheat Waffles

Adapted slightly from KAF

One year ago: Lavender Cookies

Yield: 3 to 6 Waffles, depending on your waffle iron

Difficulty: Easy

Time: 10 minutes or less to prepare batter; time to cook waffles will depend on your iron

Special Equipment: Waffle Iron*

*Note: We’re on our third waffle iron. The first one was super cheap, with melting plastic and kinda flimsy, but we had it for about 6 years because we loved the waffles it made! Unfortunately, they no longer make this model. We bought another one a couple years ago that just died for no apparent reason right in the middle of our waffle making. So we used the rest of the batter for pancakes. They were good but dense. Now we are on our third iron and it makes smaller waffles but still quite tasty. I don’t want to recommend a specific waffle iron because everyone has different needs and price points. I’d recommend going to Amazon and just checking out all the reviews and different irons to find one that works for you! Many great ones are fairly inexpensive and small.

Ingredients

  • 6.5 oz (1 1/2 cups) white wheat or whole wheat flour
  • 3 oz (1 cup) rolled oats
  • 1 oz (1/4 cup) ground flax seed
  • 1 1/2 tsp cinnamon
  • 2 tsp baking powder
  • 1/2 tsp salt
  • 1 oz  (about 2 TB) honey
  • 2 oz (about 1/4 cup) oil
  • 1 tsp vanilla
  • 1 egg
  • 12 oz (1 1/2 cups) milk

Directions

1. Preheat your waffle iron according to the instruction manual.

2. In a large bowl, mix together your dry ingredients: flour, oats, flax seed, cinnamon, baking powder, and salt. Set aside.

3. In a separate bowl, mix together your wet ingredients: honey (helps to warm slightly), oil, vanilla, egg, and milk. As you can see, there is very little sugar in this recipe. We like it that way but if you like yours sweeter, feel free to up the honey. Or just add more maple syrup to the finished product.

4. Pour the wet ingredients into the dry and mix until barely combined. Lumps are just fine here. This is a thick batter and it will not spread much in your iron so you may want to use more than what you are accustomed to for the first one. Cook according your waffle iron manual. If you are freezing, let cool and then put into a freezer bag. Reheat to your liking.

Enjoy!

5 Comments

Filed under breakfast

Cinnamon Vanilla Granola

I complain about the heat all summer long. It’s just what I do. Normally I’d be whining about how it is 95 out, but it is hotter in other parts of the country so I’ll just keep my pretty little mouth shut. And being the perfectly reasonable person that I am, I still turn my oven on during the hottest time of the day to make yummies that bake for over an hour, like granola. I mean, 250F isn’t that hot for an oven, so what’s the big deal?


I know it would be better for my electric bill to scale back on the oven use over the hot summer months, but I still need my treats. And granola is a staple in this house, usually with dried fruit. We are never without it. I sprinkle it on my yogurt. My hubby takes it to work everyday for a snack. We eat it as cereal. We take it with us whenever we travel. So, you see, I can’t just stop making granola because it is hot outside. I could stop whining, but what fun would that be?

Put into jars for easy little homemade gifts! 

One year ago: Best Ever Banana Bread

Cinnamon Vanilla Granola

Inspired from Alton Brown

Yield: About 6 to 8 cups depending on the nuts you use

Difficulty: Really Easy

Time: 10 minutes to prep; 1 hour 15 minutes to bake

Ingredients

  • 3 cups old fashioned rolled oats (not quick cooking)
  • 2 1/2 cups chopped nuts (I usually use a combination of almonds and walnuts, but anything goes here)
  • 1/2 cup ground flaxseed
  • 1 TB cinnamon
  • 1/2 cup brown sugar
  • 1/2 cup honey, maple syrup, or a combination
  • 1/4 cup olive oil
  • 1 tsp vanilla
  • Pinch of salt
  • Dried fruit, optional. (I prefer cranberries or cherries)

Notes: I’ve made this recipe so many different ways over the years. It is very flexible and you can add or delete things to make it yours. You can adjust the sugar to suit your needs: more will obviously make it sweeter but will also cause it to clump together more, kind of like bars. Less will make it looser, which isn’t bad either, but I’ve found it is harder to snack on that way. Olive oil may seem strange but it is a better fat than canola oil and I think the taste is better. Flaxseed is optional, but a great way to add some heart goodness to your food without knowing it is there! If you omit it, I’d add another 1/2 cup of nuts or oats. It is pretty sweet by itself but is a wonderful compliment to tangy greek yogurt.

Directions

1. Preheat oven to 250F. Prepare one or two sheet pans. One if you want your granola to clump together a bit more (this is what I do) or two if you want it to be looser and roast a bit more.

2. In a large bowl combine the oats, nuts, flaxseed, cinnamon, and brown sugar. Toss together to combine well.

3. In a small bowl combine the oil, honey or maple syrup, vanilla, and pinch of salt. Whisk together.  Pour over the oat mixture and stir until well combined.

4. Spread onto sheet pan. Bake for 1 hour and 15 minutes. Your house will smell intoxicating. No need for candles today!

5. Let cool in the sheet pan. If you want really big clumps, don’t touch it till it is cool. It will then break nicely into large pieces (if you used just one pan). If you want it to be more cereal like, let it cool for just a minute then take a spatula and start stirring it up. You can add dried fruit at this point, but I usually don’t add the fruit until right before serving. I may use fresh fruit, especially this time of year, or dried fruit.

What’s your favorite granola? I  need some ideas to mix it up a bit!

Enjoy!

9 Comments

Filed under baking, granola

Spice Coffee Cake

The Daring Bakers’ April 2012 challenges, hosted by Jason at Daily Candor, were two Armenian standards: nazook and nutmeg cake. Nazook is a layered yeast dough pastry with a sweet filling, and nutmeg cake is a fragrant, nutty coffee style cake.

While the Nazook looked utterly amazing and mouthwatering, I had no time to make it this month due to my crazy busy schedule right now. (This is the part where you pity me, of course). Thankfully, the nutmeg cake rocked and I’m so glad Jason introduced us to it! It’s incredibly easy and quick to make and tastes delightful, especially with a cup of coffee (huh, wonder if that’s why it’s called a coffee cake?). It  has a crust like a cheesecake and texture like well, a dense cake. No icing or glaze needed but I’m sure that wouldn’t hurt things. Don’t let it’s simple exterior fool you. The flavor is quite complex.

This cake would be easy to personalize to meet your taste buds. I didn’t find the nutmeg overwhelming but I do love nutmeg. I also added a pinch of cinnamon. Nutmeg and cinnamon are just meant to be together, in my humble opinion. But if they aren’t your favorite spices, just add whatever suits you. This cake has a beautiful caramel taste. The edges get a little more done than the center but that was actually my favorite part. A little bit chewier and caramel-y.

Did I mention it was quick? Less than 20 minutes, maybe closer to 10 but I wasn’t really counting, to pull together and about 40 minutes to bake. I love quick recipes that taste awesome, don’t you?

Nutmeg Cake

  • 1 cup milk
  • 1 tsp baking soda
  • 2 cups (280 gm/10 oz) AP Flour
  • 2 tsp  baking powder
  • 2 cups  (400 gm/14 oz) brown sugar, firmly packed
  • 3/4 cup (170 gm/6 oz) butter, unsalted, cubed
  • 1/2 cup walnut pieces, or any nut of your choosing. I used pecans.
  • 1 to 1-1/2 teaspoons ground nutmeg
  • 1 tsp cinnamon
  • 1 egg

1. Preheat your oven 350°F.
2. Mix the baking soda (not baking powder) into the milk. Set aside.
3. Put the flour, baking powder, and the brown sugar into your food processor (mixer will work too). Pulse until uniformly mixed.
4. Toss in the cubed butter. Pulse until uniformly mixed into tan colored crumbs.
5. Pour HALF of the crumbs into your springform (9”/23cm) pan. Press out a crust using your fingers and knuckles.
6. Mix in the nutmeg and cinnamon
7.  Add the egg, mix until combined.
8. Pour in the milk and baking soda mixture. Continue to mix until a slightly lumpy tan batter is formed.
9. Pour the batter over the crust in the springform pan.
10. Gently sprinkle the nut pieces over the batter.
11. Bake in a preheated oven for 30-40 minutes. It’s ready when the top is golden brown, and when a toothpick comes out clean. It took 40 minutes in my oven, but I started checking at 30 minutes.
12. Let cool for a minute or two, then run a knife around the pan. Remove the outer part and let cool. If you let it cool in the pan it may stick. Make coffee and enjoy!

8 Comments

Filed under baking, breakfast, cake, Daring Bakers

It’s the Great Pumpkin Cinnamon Roll, Charlie Brown

It’s pumpkin season. Need I say more? This time of year I love to make Pumpkin Brioche. It can be sweet or savory, it makes the best french toast, and it is just darn tasty. And for a long time now I’ve been suspecting that it would also make excellent cinnamon rolls.

I was right. It is so sweet being right. Literally.

These are better than traditional cinnamon rolls. And I’m not just saying that because I made them.  The hint of pumpkin really adds to the whole cinnamon roll experience.  You still get the cinnamon roll flavor and the cream cheese icing. Add in the pumpkin and it is a match made in tummy heaven.

Now for the slightly bad news. Something that tastes this good does not happen quickly. The brioche requires an overnight starter, then a rise for an hour or two, depending on how warm your house is, then the cinnamon rolls need to rise for another hour. Then bake, then eat. So, if you want these for breakfast, make them the day before, which actually means starting two nights before. I know. I know! But after all your hard work will be the best cinnamon roll you have ever tasted. I promise.

You can find the full pumpkin brioche instructions here. I’m just going to do the basic below. You will have enough brioche to make two 10 inch round pans of rolls, and then leftovers. I just shaped mine into rolls. They are tasty like that too.

Yield: 2 10 inch pans of cinnamon rolls plus six plain rolls

Difficulty: Advanced

One year ago: French Four Spiced Cake with Browned Butter Frosting

Pumpkin Brioche

Biga

  • 312 g bread flour
  • 190 g milk
  • pinch of instant yeast

Mix all together and knead until smooth. Let rest for 12 to 24 hours.

Pumpkin Brioche

  • 500 g bread flour
  • 1 whole egg
  • 2 egg yolks
  • 7.5 g instant yeast
  • 25 g milk
  • 11.5 g salt
  • 375 g pumpkin puree
  • 1 tsp cinnamon
  • 1/2 tsp nutmeg
  • 1/2 tsp ginger
  • 1/2 tsp clove
  • 65 g sugar
  • 50 g honey
  • Biga
  • 125 g butter

Warm liquids to 68F. Cut up your biga into small pieces. Add everything except the butter into the mixer. Mix on speed one for 5 minutes with a dough hook. Scrape the sides if necessary. While it is mixing, make your butter pliable. After the 5 minutes, increase to speed 2 or 3, depending on what your mixer can handle. Add the butter a small amount at a time, fully incorporating before adding more. After all is added, mix until a gluten window is formed. This part will take 10 to 15 minutes.   Let rest in lightly oiled bowl for about 90 minutes. Do one set of stretch and fold after 45 minutes. After doubled, move on to cinnamon rolls.

Cinnamon Rolls

Filling (enough for two pans of rolls)

  • 6 oz unsalted butter (soft)
  • 4 oz brown sugar
  • 4 oz sugar
  • 1 TB cinnamon

Make sure butter is very soft, but not melted. Mix all ingredients together.

Cream Cheese Icing (enough for two pans)

  • 4 oz cream cheese, room temp
  • 4 oz butter, room temp
  • 7 oz powdered sugar
  • 6 oz water

Cream together the butter and cream cheese until smooth. Add powdered sugar. Mix until combined. Slowly add water until a thin, but not watery, consistency is achieved. This may take more or less water. Do this step  a few minutes before the cinnamon rolls are finished.

Making the rolls

Lightly butter your pans, including the sides, so they remove from the pan easier.

Scale out two 20 ounce balls of brioche. Set remaining brioche aside for another use.  Roll out each ball into a rectangle. Spread filling leaving about one inch on the edges.

Gently roll the edge (long way) into a long roll. Cut the ends off to make it neat. Still bake the ends though, they are good.  Cut the roll in half using either a sharp knife, a dough cutter, or floss. Floss takes a long time, but gives you a nice cut. I used a dough cutter. After you cut it in half, cut each half in half, and then repeat. You should have eight rolls. Place into a 10 inch pan (or whatever size you decide to use will work fine) nice side down. Press down lightly.

Cover loosely with either a towel or plastic wrap and let rise about one hour. Repeat with the second dough ball.

Meanwhile, heat your oven to 350F. Once rolls are puffy, bake until golden, 20 to 30 minutes. Let cool for about 5 minutes, then flip over onto a plate, platter, a sheet pan, whatever will hold the rolls. Pour half the icing on each pan. Let cool long enough so you don’t burn your tongue, grab a cup of coffee or milk, and eat.

These will keep for several days, but may dry out a bit. Just pop in the microwave for about 30 seconds and you are good to go again. Yum. Worth the effort, right?

3 Comments

Filed under bread, breakfast

Daring Bakers October Challenge: Povitica

The Daring Baker’s October 2011 challenge was Povitica, hosted by Jenni of The Gingered Whisk. Povitica is a traditional Eastern European Dessert Bread that is as lovely to look at as it is to eat!

This was my very first Daring Bakers Challenge. It’s a great way to challenge myself and try recipes I might not have tried before, like this Povitica! I still can’t pronounce it, but I did read it is very similar to a Babka. My only experience with Babka is the Seinfeld episode, one of my favorites. If you’ve seen it, you know what I’m talking about. “Cinnamon takes a backseat to no Babka!”

I was of course thrilled that the first challenge for me was a yeast recipe, since I bake bread all the time (I know, I need to post my bread on here more often!). But this recipe was a little hard for me to follow. I’m very particular (perhaps peculiar?) about how a recipe is written and organized. I had to sort through it and rearrange it to my liking. Also, I never use active dry yeast (and you shouldn’t either!) and always use instant. So that took some modifying. But only a couple very tiny changes and the end result was really tasty. I’m so glad I made it and have also added “Chocolate Babka” to my must-make baking list. As if I didn’t already have a long list!

This recipe isn’t hard, but it sure isn’t easy nor is it quick. Plan on this taking a couple of hours of your time, depending on how fast you work. But the end result makes a great breakfast the next day. And a mid-day snack. And dessert after dinner.

Yield: 2 loaves

Dough

  • ¼ Cup (60 ml) water
  • 1 Cup (240 ml) whole milk*
  • ¼ Cup (½ stick) unsalted butter, melted, slightly cooled
  • 2 large eggs
  • 2 tsp instant yeast*
  • 6 TB + 1 tsp (89 grams) Sugar*
  • 1½ tsp salt
  • 4 cups (560 grams)  AP flour, divided

*Note: the original recipe calls for warm milk. Since we are using instant yeast here, warm milk is not required. If you do use active dry, then you will need 1 packet of yeast, 1 tsp of sugar, and milk warmed to 110F. You can still warm the milk a little for instant, but check the temperature. If it is over 110F, you will kill the yeast.

1. Mix together the melted butter, milk, eggs, and water in a separate bowl until just combined.

2. In stand mixer bowl, add your yeast, sugar, salt, and two cups of flour. Add liquid ingredients. Mix with paddle attachment just for a minute or two to help combine ingredients. Switch to a dough hook on speed 1. Add the remaining flour a tablespoon at a time until dough is well formed and smooth. You may not need all the flour, but I used all two cups and a little more. It depends on your weather!

3. Let rest in an oiled bowl until doubled, 1 to 2 hours. The picture below is before doubling. While it is rising, make the filling and topping.


Topping

  • ¼ Cup (60 ml) cold coffee
  • 1 TB granulated sugar

Combine and set aside

Filling

  • 3½ cups (560 grams) ground walnuts
  • ½ cups (120 ml) whole milk
  • ½ cup (1 stick) unsalted butter
  • 1  egg, beaten
  • ½ tsp vanilla extract
  • 1 cup (225 gm) sugar
  • ½ tsp unsweetened cocoa powder
  • ½ tsp cinnamon (I added extra!)

1. In a large bowl mix together the ground walnuts, sugar, cinnamon and cocoa.

2. Heat the milk and butter to boiling.

3. Pour the liquid over the nut/sugar mixture. Let cool slightly.

4.  Add the egg and vanilla and mix thoroughly.

5. Allow to stand at room temperature until ready to be spread on the dough.

6. If the mixture thickens, add a small amount of warm milk.

Returning to Dough

1. After dough has doubled, cut into two pieces. Just eyeball it. Spray two bread pans lightly with non stick spray. Preheat your oven to 350F.

2. Set out a silcone rolling sheet (or if you don’t have one, just use a clean bed sheet, it will help tremendously with the rolling) and a small bowl of flour for any light dusting. Get your rolling pin and prepare to work up a sweat! (Just kidding, it actually rolls out pretty easily).Roll the dough out very thin, less than 1/4″.  My rolling sheet is 24 inches by 14 inches and as you can see in the picture below I filled up the whole thing.  If you have any oddball pieces like I did, feel free to cut them off. Or if you aren’t a neurotic perfectionist like me, then leave it! A little extra dough never hurt anyone. 3. Add half of your filling and spread it on the dough, leaving room on the edges for rolling. Be careful rolling because your dough will be quite fragile at this point.

4. Very carefully start rolling the dough, just a little at a time, using light hands.

5. Then very carefully lift your dough into a bread pan. Form a “U” shape and twist back on itself.

6. Cover and let rest while you roll the second loaf. After both loaves are done and have rested about 15 minutes, brush with the coffee mixture. Bake for 15 minutes and then reduce the oven temperature to 300F.

7. Bake until golden, which will take another 30 to 45 minutes. Check the internal temperature and when it reads at least 180F, it is done.

8. Important: Let cool in the pan. This goes against most bread making rules, but if you try to remove it while it is still warm, it will fall apart. It is a very heavy bread!

9. After it is cool, slice, pour yourself a cup of coffee and enjoy!

7 Comments

Filed under bread, Daring Bakers

Cinnamon Hazelnut Biscotti

Biscotti is one of those words you just love to say…and it is one of those treats you love to eat! What could be better than a crunchy cookie dipped in coffee for an afternoon pick-me-up? Yum. I’ll take two, please.

Making biscotti is pretty basic. You make dough, shape the dough into logs, bake the logs, cut the logs, bake again. Easy! This is by far my favorite biscotti. I’ve made and had others, but I just keep coming back to this. Something about cinnamon and hazelnuts that seem to go well together.  And when the weather is cooperating (i.e. not so freakin’ humid) I also like to dip and/or drizzle with white chocolate. You know I have to throw chocolate in there somehow!

But today I just did biscotti without chocolate. I tried, but the chocolate just wasn’t cooperating. And the chocolate always wins. Temperamental stuff! I originally got this recipe from a friend (who originally suggested adding the white chocolate, which obviously makes her a genius!) and I lost that recipe. Thankfully, Bon Appetit saves the day again (going to have to change the name of the blog to Bon Appetit & Chocolate considering how many posts revolve around the two!) and had a “Hazelnut Cinnamon” biscotti recipe in their Desserts book, which is pretty darned close to the one I had before.

I adjusted the method and added more cinnamon. Their recipe only calls for 1/4 tsp, in which case it should just be called Hazelnut Biscotti. I love cinnamon and I want to taste it, so I added 2 tsp. Adjust according to your taste.

Cinnamon Hazelnut Biscotti

adapted from Bon Appetit Desserts

  • 3 cups unbleached AP Flour
  • 1 TB baking powder
  • 1/2 tsp salt (I prefer sea salt)
  • 2 tsp ground cinnamon
  • 1 cup hazelnuts, toasted and husked*
  • 3/4 cup sugar
  • 1/2 cup (1 stick) butter, somewhere in between room temperature and cold.
  • 1 TB orange zest
  • 1 tsp vanilla extract
  • 3 large eggs, room temp

*To husk the hazelnuts: spread in a single layer on a sheet pan and bake in oven at 350F for about 10 minutes. Let cool slightly, then take a tea towel and rub.  The skins will come off fairly easily. If not, bake a few minutes longer. Don’t fret if you don’t get all the skins. A little won’t hurt.

1. Preheat oven to 350F. Prepare two baking sheets with either silpat or parchment. Whisk together flour, baking powder, salt, and cinnamon. Set aside.

2. Chop hazelnuts in food processor until slightly chunky. How chunky depends on your preference.

3. Place butter, sugar, vanilla, and zest in stand mixer and mix until light and fluffy, about 3 to 5 minutes. Add eggs one at a time and mix until combined. Scrape the bowl after each addition. Add flour mixture. When flour is almost completely mixed, add the chopped hazelnuts. Mix just until combined.

4. Divide the dough in half and place on prepared sheet pans. Flatten dough into an even rectangle. If you want to cut them diagnol, keep it narrow and long. If you want to cut just straight, make it wider. Bake for 20 to 25 minutes until golden on the edges. Remove from oven,  let cool slightly and move to a cutting board (very carefully!). Slice into biscotti shapes. Place on sheet pan. Bake 10 minutes. Flip pieces, bake 10 minutes more, or until desired crispiness. Careful that they don’t burn. Make coffee, and enjoy!

5. If you are dipping in chocolate, melt about 8 oz chocolate, dip biscotti, let set, and then make coffee.  Sharing is optional.

2 Comments

Filed under Cookies

Apple Cinnamon Muffins

What can I say, I’m in an apple mood. It’s that time of year, after all. My mother-in-law brought us some apples from Virginia and apple muffins sounded like the perfect treat to make. Muffins are tricky. They seem like a no-brainer. However, if you aren’t careful, the muffin will turn out dry. That’s not what I want in a muffin. I found a recipe that met my expectations from The Girl Who Ate Everything. She has a super cute blog, and the comments on this recipe were great. I’m always hesitant to try a recipe that doesn’t have reviews (guess most of you are hesitant to try my recipes, eh?).

The recipe didn’t fail. They turned out so fantastic. They were moist on the inside with a crunchy outside. I only changed two small things (well, three, really), but I think they would have turned out great even if I hadn’t changed these.  And since we are close to Halloween, I was able to use cute muffin liners! It’s the small things that make me happy. Enjoy these – you won’t regret making them.

The changes I made were based on personal preference. First, I love cinnamon so I doubled the amount to 2 teaspoons. Second, I used 1 cup granulated sugar and 1 cup turbinado sugar (sugar in the raw). I think this change is what made these muffins so delectable. Usually when I bake with turbinado sugar (and I often do) I will put the sugar in a food processor to make it finer. I didn’t do that here and it added a wonderful hint of crunch. Also, it almost made the apples candy like. So delish. And, since I was on a turbinado kick, I used that for the topping instead of brown sugar, although next time (and there will be a next time) I will use brown sugar to compare. I love brown sugar, so I’m sure it will be great.

Apple Cinnamon Muffins, modified from The Girl Who Ate Everything

Preheat oven to 350F. Prepare two muffin pans with either muffin liners or sprayed with cooking spray. Makes about 24 muffins. My batch made 23!

  • 3 cups flour
  • 1 tsp salt
  • 1 tsp baking soda
  • 2 tsp cinnamon
  • 1 cup granulated sugar
  • 1 cup turbinado sugar + more for topping
  • 2 eggs
  • 1 cup oil
  • 1 TB vanilla
  • 3 cups small diced apples

1. Whisk together the flour, salt, baking soda, and cinnamon. Set aside.

2. With a handheld mixer or stand mixer, cream the oil, sugars, and vanilla until well combined. Add the eggs one at a time and mix until well combined.

3. Add the flour mixture and mix until just combined – don’t overmix! Lumps are good! Gently fold in the apples. Using a scoop (this was the first time I was able to use my new scoop! It’s the perfect size, 4 TB. Remember, the small things!), fill the muffin cups about 3/4 full. Sprinkle with sugar.

4) Bake until golden, about 25 minutes, depending on your oven. Let cool slightly.

Dig in!


Leave a comment

Filed under muffins

Cinnamon Apple Pie Pockets

My husband takes most of my baked goods to work to share with his co-workers. We certainly can’t eat everything and I enjoy making them goodies. Since it is fall, I wanted to make something with apples. Of course I first think of apple pie! However, pie is not an easy item to take into work, nor is it easy to serve. I like to send in goodies that people can grab and go. So, I made mini apple pies. I suppose we could call them apple empanadas, since that is what they look like.  But I like pockets. It’s cute.

Apple pie filling is great because you can adjust it to suit your tastes. Don’t like as much cinnamon? Easy! Less sugar? No problem! This is just what I like, but please, adjust it to suit your taste buds…after all, those are the ones that matter!

Pie Dough

I recommend making this the day before so it can chill overnight and will also give you less do to on baking day.

  • 500 g AP flour (about 4 cups)
  • 2 tsp salt
  • 2 TB sugar
  • 1 TB cinnamon (optional)
  • 350 g butter (3 sticks)
  • Ice water, about 2 TB

Place flour, salt, sugar, and cinnamon into a food processor and pulse until well blended. Cube the butter and add to food processor. For a mealy pie dough, pulse until consistency of corn meal. For flaky, until pea size. For these pockets, mealy will hold together easier. Be careful not to over mix the dough! If the flour absorbs the butter, you will not be able to add the water. Just short pulses until the right consistency. Then add the water, 1 TB at a time until dough pulls together to form a ball. Wrap in plastic and chill overnight, or freeze until ready for use.

Apple filling

It’s important to use apples that will hold their shape. A  soft apple will quickly turn to mush and you will have applesauce instead. I used Rome apples because they were on sale, but my preferred apple is Granny Smith.

  • 3 pounds of apples, peeled and sliced into wedges
  • 1/2 cup sugar
  • 1/4 cup + 1 TB brown sugar
  • 3 TB butter
  • 1 1/2 tsp salt
  • 1 1/2 TB cinnamon
  • 1/4 tsp nutmeg
  • 1/4 tsp cloves
  • 1/4 tsp ginger
  • Zest of 1 lemon
  • Juice of 1 lemon
  • 1 TB cornstarch
  • 2 TB cold water

Place all ingredients except the cornstarch and water into a large, heavy bottom pan. Stir to combine and warm over medium heat. Whisk together the cornstarch and water (add more or less water if needed). Once the apples are warm, but not hot, slowly stir in the cornstarch mixture. Bring to boil. Turn heat to low and cook until apples are slightly tender, but warm. Cool completely.

Transfer in small batches to a food processor and pulse slightly to make the apple pieces smaller. Be careful not to puree! I think it is easier to process after cooking because if the apple pieces are too small they will become mush too easily when cooking. And just slicing makes them too big for the small pockets.

Assmebly

Yield: about 27 pie pockets

Preheat oven to 375F.

I used a four inch cutter, but you can use whatever size you have. If you don’t have a cutter you can use a bowl and a pizza wheel.

Let your dough come to room temperature. Lightly flour your surface and roll to about 1/8″. A good way to get your dough even is to use dowels. You can pick up multiple sizes at the hardware store and then use them for cookies, scones, and pie! Also, to avoid using excessive flour (which will just result in a tough dough) constantly move your dough around. If you roll too long in one spot, it will start to stick.

Cut out the pie dough and place on a sheet pan lined with either a silpat or parchment.

Place one teaspoon of filling in the center (I used a scoop to ensure all are even). Gently fold over to match up the edges, then use a fork to seal. Brush egg wash (just an egg and water) over the entire surface and sprinkle with sanding sugar. If you don’t have sanding sugar just use any sugar you have. Turbinado sugar would be a great touch!

Bake until golden, 15 to 20 minutes. If you used cinnamon in your dough, it will be harder to tell when it is golden, so keep a close eye not to burn.

Let cool as long as you can before devouring with a scoop of ice cream! Your co-workers will love you for these!

Note: You will end up with extra apple filling. Either make less or do what we did…put it on your waffles, pancakes, or something equally delicious for a special breakfast. Yum!

Leave a comment

Filed under Pie