Tag Archives: breakfast

Boozy Biscotti

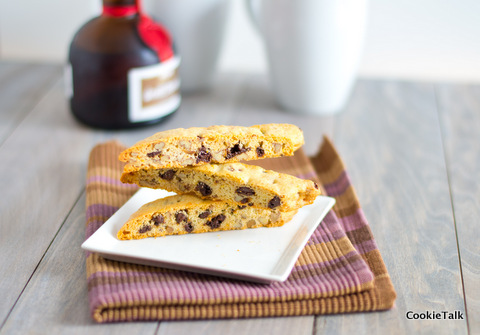
The title may be a wee bit deceiving. Yes, these biscotti have booze in them, but not enough to really call them boozy. But it got your attention, didn’t? Yup, thought so!

You have probably figured out by now that I like biscotti, considering this is my third biscotti post (check out the others here and here). I find it hard not to like biscotti. It’s sweet, but not too sweet, crunchy, and goes so perfectly with that morning cup of coffee. I’m a sucker for anything that goes well with coffee (as well as anything that goes well with wine, but that’s another story for another day).

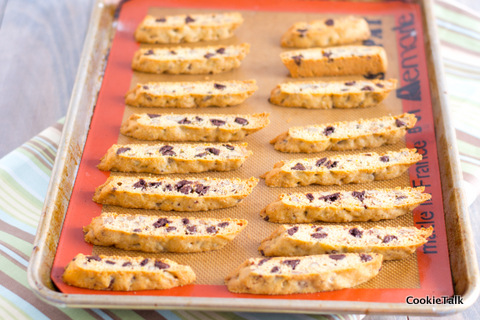
This recipe just took front and center as my favorite. And I found that they held up better than other biscotti when slicing. Of course, that could be attributed to my finally being patient enough to let the biscotti cool sufficiently before slicing. In the past I tried to rush (I know, I know) and sliced too soon, resulting in crumbly slices. (Sheepishly hangs head).
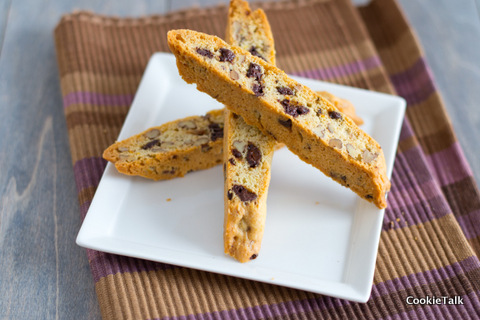
Another reason I like these so much is because orange and chocolate go splendidly together. I’ve always thought it a strange combination but darn is it tasty! I used Grand Marnier, but feel free to use OJ or another orange liqueur.  The recipe is as easy as any other cookie recipe. Would be perfect to take to work, or obviously, a coffee with the girls.

Chocolate Orange Biscotti

Adapted from Bon Appetit Desserts

One year ago: Cheesecake Deconstructed

Yield: About 3 dozen

Difficulty: Easy

Time: 10 minutes or less to prepare; 20 minutes to chill; 1 hour total to bake, plus 20 minutes to rest in between

Ingredients

  • 2 cups plus 2 TB unbleached AP flour
  • 1 1/2 tsp baking powder
  • 1/4 tsp salt
  • 3/4 cup sugar
  • 1/2 cup (1 stick) butter
  • 2 TB Grand Marnier
  • 1 TB orange zest (don’t skip this or you won’t get that orange-y flavor)
  • 2 large eggs
  • 1 cup pecans, toasted and chopped
  • 6 oz bittersweet or semisweet chocolate, chopped or use chips

Directions

1. Line two sheet pans with parchment or silpat.

2. Whisk together flour, baking powder, and salt in a bowl. Set aside.

3. Using an electric mixer, cream together the butter, sugar, zest, and Grand Marnier until light and fluffy, 3 to 4 minutes. Beat in eggs one at a time, blending completely after each addition.

4. Reduce speed to low and add flour mixture. Mix until almost combined and then add the pecans and chocolate. Mix until just combined.

5. Gather dough into two balls, wrap in plastic and freeze for 20 minutes.

6. While dough is chilling, preheat your oven to 350F.

7. After dough is chilled, place each piece on prepared sheet pan. Roll (or pat) into a long log, about 14 inches long and 2 inches wide. Bake until barely golden, about 30 minutes.

8. Remove from oven and place on racks to cool for 20 minutes. Carefully move the logs to a cutting board. Cut on a diagonal into 1/2 inch slices. Move pieces back to sheet pan, standing up right. Bake another 30 minutes, or until dry to the touch and golden. Cool completely before dunking in coffee.

9. Store in airtight container. They will keep for several days. Enjoy!

3 Comments

Filed under Cookies

Tasty Heart Healthy Cinnamon Waffles (No Cardboard Allowed)

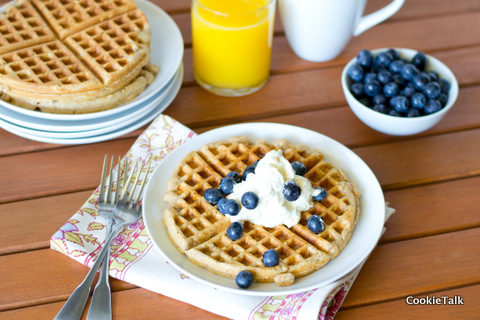
Don’t you just love a delicious Belgium waffle for breakfast? Rich, crispy on the outside, soft and gooey on the inside, then slathered with butter, maple syrup and,  if you are feeling special, some whipped cream and fruit? Dusted with powered sugar, of course. Oh, and a side of salty applewood bacon on the side. Yeah, I like that too.

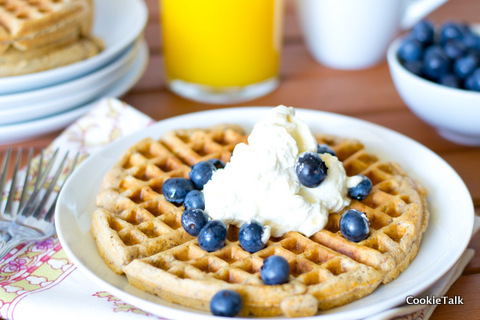
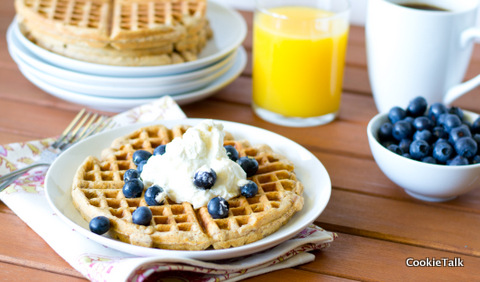
These are not those waffles. But they are still delicious.

Let’s be realistic. We can’t eat like that every day. It’s horrible for our heart and waistline. It doesn’t mean we can’t have waffles every day, nor must we resort to those cardboard frozen “waffles” that so many of us grew up on. We can still have delicious waffles that are good for us and not have to spend much time making them.

I personally have eggs almost every day for breakfast. I love a good scrambled egg and a piece of toast. It fills me up and keeps me going. My dear hubby likes eggs, but he doesn’t love them. Using a King Arthur Flour recipe as a base, I made this heart healthy and filling waffle to keep him going. This makes me an Awesome Wife, don’t you think?

It make 3 to 6 waffles depending on the size of your waffle iron. We throw these babies in the freezer and then just put them in the microwave for about 30 to 45 seconds. If you have a toaster oven, that would work better. Ours started on fire a few years ago (no damage done) and we decided not to replace it! But I digress…

Serious Stuff: These are full of flax seed, oats, and a good bit of cinnamon. Flax and oats are known to be heart healthy. Cinnamon is an anti-inflammatory which is good for your heart and your aches and pains!  (Please note, I am not a dietician. I just read a lot.) And the whole wheat fiber will help keep you full , as well as provide a nice nutty taste. I switched out the granulated sugar for honey because I think it tastes better and I use grape seed oil because I think it also tastes better.  I’ve never tried adding nuts but I think that would be a great addition, just make sure you chop them well. And there’s always bacon….

I had a couple of curious little noses while I was photographing the waffles. This table was just their height, so of course they though it was their breakfast!

Cinnamon Wheat Waffles

Adapted slightly from KAF

One year ago: Lavender Cookies

Yield: 3 to 6 Waffles, depending on your waffle iron

Difficulty: Easy

Time: 10 minutes or less to prepare batter; time to cook waffles will depend on your iron

Special Equipment: Waffle Iron*

*Note: We’re on our third waffle iron. The first one was super cheap, with melting plastic and kinda flimsy, but we had it for about 6 years because we loved the waffles it made! Unfortunately, they no longer make this model. We bought another one a couple years ago that just died for no apparent reason right in the middle of our waffle making. So we used the rest of the batter for pancakes. They were good but dense. Now we are on our third iron and it makes smaller waffles but still quite tasty. I don’t want to recommend a specific waffle iron because everyone has different needs and price points. I’d recommend going to Amazon and just checking out all the reviews and different irons to find one that works for you! Many great ones are fairly inexpensive and small.

Ingredients

  • 6.5 oz (1 1/2 cups) white wheat or whole wheat flour
  • 3 oz (1 cup) rolled oats
  • 1 oz (1/4 cup) ground flax seed
  • 1 1/2 tsp cinnamon
  • 2 tsp baking powder
  • 1/2 tsp salt
  • 1 oz  (about 2 TB) honey
  • 2 oz (about 1/4 cup) oil
  • 1 tsp vanilla
  • 1 egg
  • 12 oz (1 1/2 cups) milk

Directions

1. Preheat your waffle iron according to the instruction manual.

2. In a large bowl, mix together your dry ingredients: flour, oats, flax seed, cinnamon, baking powder, and salt. Set aside.

3. In a separate bowl, mix together your wet ingredients: honey (helps to warm slightly), oil, vanilla, egg, and milk. As you can see, there is very little sugar in this recipe. We like it that way but if you like yours sweeter, feel free to up the honey. Or just add more maple syrup to the finished product.

4. Pour the wet ingredients into the dry and mix until barely combined. Lumps are just fine here. This is a thick batter and it will not spread much in your iron so you may want to use more than what you are accustomed to for the first one. Cook according your waffle iron manual. If you are freezing, let cool and then put into a freezer bag. Reheat to your liking.

Enjoy!

5 Comments

Filed under breakfast

Cinnamon Vanilla Granola

I complain about the heat all summer long. It’s just what I do. Normally I’d be whining about how it is 95 out, but it is hotter in other parts of the country so I’ll just keep my pretty little mouth shut. And being the perfectly reasonable person that I am, I still turn my oven on during the hottest time of the day to make yummies that bake for over an hour, like granola. I mean, 250F isn’t that hot for an oven, so what’s the big deal?


I know it would be better for my electric bill to scale back on the oven use over the hot summer months, but I still need my treats. And granola is a staple in this house, usually with dried fruit. We are never without it. I sprinkle it on my yogurt. My hubby takes it to work everyday for a snack. We eat it as cereal. We take it with us whenever we travel. So, you see, I can’t just stop making granola because it is hot outside. I could stop whining, but what fun would that be?

Put into jars for easy little homemade gifts! 

One year ago: Best Ever Banana Bread

Cinnamon Vanilla Granola

Inspired from Alton Brown

Yield: About 6 to 8 cups depending on the nuts you use

Difficulty: Really Easy

Time: 10 minutes to prep; 1 hour 15 minutes to bake

Ingredients

  • 3 cups old fashioned rolled oats (not quick cooking)
  • 2 1/2 cups chopped nuts (I usually use a combination of almonds and walnuts, but anything goes here)
  • 1/2 cup ground flaxseed
  • 1 TB cinnamon
  • 1/2 cup brown sugar
  • 1/2 cup honey, maple syrup, or a combination
  • 1/4 cup olive oil
  • 1 tsp vanilla
  • Pinch of salt
  • Dried fruit, optional. (I prefer cranberries or cherries)

Notes: I’ve made this recipe so many different ways over the years. It is very flexible and you can add or delete things to make it yours. You can adjust the sugar to suit your needs: more will obviously make it sweeter but will also cause it to clump together more, kind of like bars. Less will make it looser, which isn’t bad either, but I’ve found it is harder to snack on that way. Olive oil may seem strange but it is a better fat than canola oil and I think the taste is better. Flaxseed is optional, but a great way to add some heart goodness to your food without knowing it is there! If you omit it, I’d add another 1/2 cup of nuts or oats. It is pretty sweet by itself but is a wonderful compliment to tangy greek yogurt.

Directions

1. Preheat oven to 250F. Prepare one or two sheet pans. One if you want your granola to clump together a bit more (this is what I do) or two if you want it to be looser and roast a bit more.

2. In a large bowl combine the oats, nuts, flaxseed, cinnamon, and brown sugar. Toss together to combine well.

3. In a small bowl combine the oil, honey or maple syrup, vanilla, and pinch of salt. Whisk together.  Pour over the oat mixture and stir until well combined.

4. Spread onto sheet pan. Bake for 1 hour and 15 minutes. Your house will smell intoxicating. No need for candles today!

5. Let cool in the sheet pan. If you want really big clumps, don’t touch it till it is cool. It will then break nicely into large pieces (if you used just one pan). If you want it to be more cereal like, let it cool for just a minute then take a spatula and start stirring it up. You can add dried fruit at this point, but I usually don’t add the fruit until right before serving. I may use fresh fruit, especially this time of year, or dried fruit.

What’s your favorite granola? I  need some ideas to mix it up a bit!

Enjoy!

9 Comments

Filed under baking, granola

Easy Challah Bread

May’s Daring Bakers’ Challenge was pretty twisted – Ruth from The Crafts of Mommyhood challenged us to make challah! Using recipes from all over, and tips from “A Taste of Challah,” by Tamar Ansh, she encouraged us to bake beautifully braided breads.

I was pretty excited about this month’s challenge. My hubby and I love challah and I love any excuse to make it!

Challah bread is definitely a bread that anyone can make. It’s pretty forgiving and easy to shape. I have no idea just how traditional this particular recipe is (not much challah bread up in North Dakota where I grew up), but it is tasty. This could also be easily made into rolls for those summer time burgers now that grilling season is here with Memorial Day.

Thank you to all who serve on this Memorial Day! Thanks to my grandfather who served 23 years in the Air Force, my father-in-law who served 20 years, and my brother-in-law who also served 20 years. And especially to my wonderful hubby who is still serving – you make me proud every day!

Challah Bread

From Professional Baking by Wayne Gisslen

Yield: 2 loaves

Difficulty: Intermediate

Time: 30 minutes hands on; additional 2 to 3 hours for baking and proofing.

  • 8 oz water (temperature will vary depending on your kitchen – warm kitchen equals cool water)
  • 1 TB + 2 tsp instant yeast
  • 20 oz bread flour
  • 4 oz egg yolk (about 6 to 8 eggs)
  • 1.5 oz sugar
  • 2 tsp salt
  • 2 oz oil
  • egg wash

1. Put all the ingredients into a mixing bowl starting with the water. If using a stand mixer, mix on speed 2 for 4 minutes (using your dough hook) or until all the ingredients come together into a ball, or use a wooden spoon to mix until it is ready to knead. At this point I like to finish kneading by hand, but feel free to finish in the mixer on speed 3. Knead until smooth.

2. Form into a ball and place in a greased bowl. Cover and let rise until about double, about 1 to 2 hours.

3. Gently deflate and cut six equal strands. Roll each strand to the length of your sheet pan. Place three strands on each sheet pan and braid. Pinch the ends and tuck under. Brush with egg wash and let rest for another hour or until about double again. Preheat oven to 400F.

4. Brush with egg wash again. Bake about 25 minutes, rotating half way through. Loaves should be golden brown. Check temperature if needed – bread should be no less than 180F in the center.

Let cool completely (it will be tough!) before enjoying! This bread makes a fantastic french toast, but it is also great all by itself! Enjoy!

Note: I know there are no pictures of the process and the instructions might be a bit vague for those who haven’t made bread before. Please shoot me an email or comment below if you need further clarification! It really is an easy bread to make!

Check out more bread ideas at Yeast Spotting

9 Comments

Filed under bread

Spice Coffee Cake

The Daring Bakers’ April 2012 challenges, hosted by Jason at Daily Candor, were two Armenian standards: nazook and nutmeg cake. Nazook is a layered yeast dough pastry with a sweet filling, and nutmeg cake is a fragrant, nutty coffee style cake.

While the Nazook looked utterly amazing and mouthwatering, I had no time to make it this month due to my crazy busy schedule right now. (This is the part where you pity me, of course). Thankfully, the nutmeg cake rocked and I’m so glad Jason introduced us to it! It’s incredibly easy and quick to make and tastes delightful, especially with a cup of coffee (huh, wonder if that’s why it’s called a coffee cake?). It  has a crust like a cheesecake and texture like well, a dense cake. No icing or glaze needed but I’m sure that wouldn’t hurt things. Don’t let it’s simple exterior fool you. The flavor is quite complex.

This cake would be easy to personalize to meet your taste buds. I didn’t find the nutmeg overwhelming but I do love nutmeg. I also added a pinch of cinnamon. Nutmeg and cinnamon are just meant to be together, in my humble opinion. But if they aren’t your favorite spices, just add whatever suits you. This cake has a beautiful caramel taste. The edges get a little more done than the center but that was actually my favorite part. A little bit chewier and caramel-y.

Did I mention it was quick? Less than 20 minutes, maybe closer to 10 but I wasn’t really counting, to pull together and about 40 minutes to bake. I love quick recipes that taste awesome, don’t you?

Nutmeg Cake

  • 1 cup milk
  • 1 tsp baking soda
  • 2 cups (280 gm/10 oz) AP Flour
  • 2 tsp  baking powder
  • 2 cups  (400 gm/14 oz) brown sugar, firmly packed
  • 3/4 cup (170 gm/6 oz) butter, unsalted, cubed
  • 1/2 cup walnut pieces, or any nut of your choosing. I used pecans.
  • 1 to 1-1/2 teaspoons ground nutmeg
  • 1 tsp cinnamon
  • 1 egg

1. Preheat your oven 350°F.
2. Mix the baking soda (not baking powder) into the milk. Set aside.
3. Put the flour, baking powder, and the brown sugar into your food processor (mixer will work too). Pulse until uniformly mixed.
4. Toss in the cubed butter. Pulse until uniformly mixed into tan colored crumbs.
5. Pour HALF of the crumbs into your springform (9”/23cm) pan. Press out a crust using your fingers and knuckles.
6. Mix in the nutmeg and cinnamon
7.  Add the egg, mix until combined.
8. Pour in the milk and baking soda mixture. Continue to mix until a slightly lumpy tan batter is formed.
9. Pour the batter over the crust in the springform pan.
10. Gently sprinkle the nut pieces over the batter.
11. Bake in a preheated oven for 30-40 minutes. It’s ready when the top is golden brown, and when a toothpick comes out clean. It took 40 minutes in my oven, but I started checking at 30 minutes.
12. Let cool for a minute or two, then run a knife around the pan. Remove the outer part and let cool. If you let it cool in the pan it may stick. Make coffee and enjoy!

8 Comments

Filed under baking, breakfast, cake, Daring Bakers

Chocolate Chip Hazelenut Biscotti

Biscotti, how I love thee!

Ok, I know, I’ve been out of commission for what, six weeks now? I have lots of good reasons, and probably a few that aren’t so great. First, I’m taking a couple of online writing classes, which is the biggest reason I’m not blogging since I’m busy writing for a grade. Second, everything that can break seems to have broken, including my Kitchen Aid Stand Mixer (insert tears here).  That will be a separate post.

In the meantime…I’m making bread by hand and making other doughs with my hand mixer (also a Kitchen Aid…). Biscotti was perfect for the hand mixer, other than me being annoyed at having to stand there holding it. Yeah, I know, I’ve gotten lazy with my big, (sort of) powerful stand mixer. I have to actually pay close attention now! Can you imagine? Hmph.

This is an easy recipe and is actually the same as the Cinnamon Hazelnut Biscotti, but I took out the cinnamon and added espresso and hazelnuts. I originally had espresso in the title but that was bordering on obnoxiously long. And you could really use this recipe as a base for whatever you wanted. And for me, biscotti really hits the spot first thing in the morning when you are sitting down for coffee after a good workout or yard work. It’s a great way to start your day.

Chocolate Chip Hazelnut Biscotti

adapted from Bon Appetit Desserts

  • 3 cups unbleached AP Flour
  • 1 TB baking powder
  • 1/2 tsp salt (I prefer sea salt)
  • 2 tsp espresso powder (optional, but adds a nice touch)
  • 1 cup hazelnuts, toasted and husked*
  • 3/4 cup sugar
  • 1/2 cup (1 stick) butter, somewhere in between room temperature and cold.
  • 1 tsp vanilla extract
  • 3 large eggs, room temp
  • 1 1/2 cups chocolate chips

*To husk the hazelnuts: spread in a single layer on a sheet pan and bake in oven at 350F for about 10 minutes until very fragrant. Cover with a towel. Cool slightly and then rub together.   The skins will come off fairly easily.  Don’t fret if you don’t get all the skins. A little won’t hurt.

1. Preheat oven to 350F. Prepare two baking sheets with either silpat or parchment. Whisk together flour, baking powder, salt, and cinnamon. Set aside.

2. Chop hazelnuts in food processor until slightly chunky. How chunky depends on your preference.

3. Place butter, sugar, vanilla, and zest in stand mixer and mix until light and fluffy, about 3 to 5 minutes. Add eggs one at a time and mix until combined. Scrape the bowl after each addition. Add flour mixture. When flour is almost completely mixed, fold in the chopped hazelnuts and chocolate chips.

4. Divide the dough in half and place on prepared sheet pans. Flatten dough into an even rectangle. If you want to cut them diagnol, keep it narrow and long. If you want to cut just straight, make it wider. Bake for 20 to 25 minutes until golden on the edges. Remove from oven (but keep oven on),  let cool slightly and carefully move to a cutting board. Slice slightly on the diagonal. Return pieces to the sheet pan. Bake about 10 minutes. Flip pieces, bake 10 minutes more, or until desired crispiness. Careful that they don’t burn, but also make sure they are golden enough to be crunchy. Make coffee, and enjoy!


8 Comments

Filed under Cookies

It’s the Great Pumpkin Cinnamon Roll, Charlie Brown

It’s pumpkin season. Need I say more? This time of year I love to make Pumpkin Brioche. It can be sweet or savory, it makes the best french toast, and it is just darn tasty. And for a long time now I’ve been suspecting that it would also make excellent cinnamon rolls.

I was right. It is so sweet being right. Literally.

These are better than traditional cinnamon rolls. And I’m not just saying that because I made them.  The hint of pumpkin really adds to the whole cinnamon roll experience.  You still get the cinnamon roll flavor and the cream cheese icing. Add in the pumpkin and it is a match made in tummy heaven.

Now for the slightly bad news. Something that tastes this good does not happen quickly. The brioche requires an overnight starter, then a rise for an hour or two, depending on how warm your house is, then the cinnamon rolls need to rise for another hour. Then bake, then eat. So, if you want these for breakfast, make them the day before, which actually means starting two nights before. I know. I know! But after all your hard work will be the best cinnamon roll you have ever tasted. I promise.

You can find the full pumpkin brioche instructions here. I’m just going to do the basic below. You will have enough brioche to make two 10 inch round pans of rolls, and then leftovers. I just shaped mine into rolls. They are tasty like that too.

Yield: 2 10 inch pans of cinnamon rolls plus six plain rolls

Difficulty: Advanced

One year ago: French Four Spiced Cake with Browned Butter Frosting

Pumpkin Brioche

Biga

  • 312 g bread flour
  • 190 g milk
  • pinch of instant yeast

Mix all together and knead until smooth. Let rest for 12 to 24 hours.

Pumpkin Brioche

  • 500 g bread flour
  • 1 whole egg
  • 2 egg yolks
  • 7.5 g instant yeast
  • 25 g milk
  • 11.5 g salt
  • 375 g pumpkin puree
  • 1 tsp cinnamon
  • 1/2 tsp nutmeg
  • 1/2 tsp ginger
  • 1/2 tsp clove
  • 65 g sugar
  • 50 g honey
  • Biga
  • 125 g butter

Warm liquids to 68F. Cut up your biga into small pieces. Add everything except the butter into the mixer. Mix on speed one for 5 minutes with a dough hook. Scrape the sides if necessary. While it is mixing, make your butter pliable. After the 5 minutes, increase to speed 2 or 3, depending on what your mixer can handle. Add the butter a small amount at a time, fully incorporating before adding more. After all is added, mix until a gluten window is formed. This part will take 10 to 15 minutes.   Let rest in lightly oiled bowl for about 90 minutes. Do one set of stretch and fold after 45 minutes. After doubled, move on to cinnamon rolls.

Cinnamon Rolls

Filling (enough for two pans of rolls)

  • 6 oz unsalted butter (soft)
  • 4 oz brown sugar
  • 4 oz sugar
  • 1 TB cinnamon

Make sure butter is very soft, but not melted. Mix all ingredients together.

Cream Cheese Icing (enough for two pans)

  • 4 oz cream cheese, room temp
  • 4 oz butter, room temp
  • 7 oz powdered sugar
  • 6 oz water

Cream together the butter and cream cheese until smooth. Add powdered sugar. Mix until combined. Slowly add water until a thin, but not watery, consistency is achieved. This may take more or less water. Do this step  a few minutes before the cinnamon rolls are finished.

Making the rolls

Lightly butter your pans, including the sides, so they remove from the pan easier.

Scale out two 20 ounce balls of brioche. Set remaining brioche aside for another use.  Roll out each ball into a rectangle. Spread filling leaving about one inch on the edges.

Gently roll the edge (long way) into a long roll. Cut the ends off to make it neat. Still bake the ends though, they are good.  Cut the roll in half using either a sharp knife, a dough cutter, or floss. Floss takes a long time, but gives you a nice cut. I used a dough cutter. After you cut it in half, cut each half in half, and then repeat. You should have eight rolls. Place into a 10 inch pan (or whatever size you decide to use will work fine) nice side down. Press down lightly.

Cover loosely with either a towel or plastic wrap and let rise about one hour. Repeat with the second dough ball.

Meanwhile, heat your oven to 350F. Once rolls are puffy, bake until golden, 20 to 30 minutes. Let cool for about 5 minutes, then flip over onto a plate, platter, a sheet pan, whatever will hold the rolls. Pour half the icing on each pan. Let cool long enough so you don’t burn your tongue, grab a cup of coffee or milk, and eat.

These will keep for several days, but may dry out a bit. Just pop in the microwave for about 30 seconds and you are good to go again. Yum. Worth the effort, right?

3 Comments

Filed under bread, breakfast

Pumpkin Brioche & French Toast

I hope all of you aren’t getting sick of pumpkin. I’m not! I recently made one of my favorite treats – Pumpkin Brioche. There are many things you can do with this dough, but this time I made it into loaves for the Best French Toast Ever. Yup. That’s right. You’ll agree with me when you eat it yourself. The pumpkin and spices, soaked in a custard, cooked until golden and then topped off with some fresh whip cream. Are you drooling yet? 

Now to have this as your delicious Sunday brunch, you’ll have to do a little planning ahead. Never fear though, while it is a little time consuming, there isn’t much hands on. Just a lot of waiting and you can knock off other things on your to-do list while you wait. This recipe is once again from Ciril Hitz, although I’m not sure what book it is from because it is a recipe I picked up in culinary school.

You’ll follow a similar technique to Classic Brioche, except this recipe has a starter called a Biga. The biga is super easy, but you need to plan for it to rest for at least 12 hours, preferrably 24. The biga has very little yeast so it won’t rise much, but it will help enhance the flavor.

Biga

  • 312 g    (11 oz)  Bread Flour
  • 190 g     (6.75 oz) Milk
  • Pinch instant yeast

Mix all ingredients together and then knead by hand until it forms a somewhat smooth, but still dry, dough. It will seem as though something is wrong, but it’s not. As long as it is mixed and kneaded, it will be fine and should look something like this: 

Cover and let rest at room temperature for up to 24 hours.

The next day…..gather all your ingredients and keep the cold stuff cold.

  • 500 g (17.6 oz) Bread flour
  • 1 egg
  • 2 egg yolks
  • 8 g (1 1/4 tsp) instant yeast
  • 25 g (0.9 oz) milk
  • 11.5 g (0.5 oz) salt
  • 375 g (almost 1 can) pumpkin puree (not pumpkin pie!)
  • 1/2 tsp cinnamon
  • 1/4 tsp nutmeg
  • 1/4 tsp ground ginger
  • 1/4 tsp ground cloves
  • 65 g (2.3 oz) sugar
  • 50 g (1.76 oz) honey
  • 125 g (4.4 oz) butter

Place all your ingredients, except for the butter, in your mixing bowl. It helps to put the liquids in first, then your biga (which you can cut into pieces), and then the dry ingredients. Keep your butter aside for later. Mix on speed 1 for five minutes. While the dough is mixing, make your butter pliable.

After the clean up stage, increase to speed 2-4, depending on your mixer. I usually do speed 4. Slowly incorporate your butter adding a little at a time and waiting until fully incorporated before adding more. Remember, this process will take about 15 minutes.

After all the butter is incorporated, mix until a good gluten window has formed and the dough is smooth.

Empty dough into a container sprayed with cooking spray and perform a stretch and fold. Let rest for 45 minutes and perform another stretch and fold. After another 45 minutes, the dough should be ready. But, if it looks like it needs a little more time (perhaps your kitchen is cold?) then let it rise a bit longer until double.

A loaf is the easiest way to do this dough if you are making it for french toast. We will explore other options (such as filling with pastry cream!) another time.

This will make two big loaves of dough. It would probably make three loaves if you like your slices a little on the smaller side. So, depending on your preference, divide your dough up into two or three equal parts. Loosely shape your dough into rectangles and lightly flatten. Then, to shape into loaves, fold half the dough over towards itself and then the other half so they meet in the middle.

One side folded over to the center. Repeat with the other half.

When both sides are in the center, fold one side again so that it completely covers the other side and seal by lightly “hammering” with the side of your hand. Then flip the dough over and cup both ends with your hands and pull gently towards yourself repeatedly until the seam has sealed. Once it is sealed, place the dough in a prepared bread pan (sprayed lightly) and let rest until double. To create a home proofer, put both loaves in the oven and spray the oven with water. If this isn’t possible, just cover with a damp towel.

Before proofing.

After proofing.

After proofing, brush lightly with egg wash. If you made two big loaves, preheat your oven to 325F. I made the mistake of baking at 375 and the very top burned ever so slightly, so I’d recommend baking a lower temperature. Bake until a thermometer in the center (insert thermometer from the side or bottom, not the top) reads 160F. If you made three smaller loaves, then 375F should be fine.

After a few minutes, remove loaves from pan (don’t let sit in pan for more than 10 minutes or bread may become soggy) and let cool completely on a cooling rack. This will be hard to do. You will want to taste it. Resist the urge!

After cooling you can do what you wish. Make toast with cinnamon sugar (yum!) or make French Toast, which as mentioned earlier was my sole purpose for making this bread.

My favorite french toast recipe is from Alton Brown, modified slightly.

  • 1/2 cup heavy cream
  • 1/2 cup whole milk
  • 3 eggs
  • 2 TB honey, warm
  • 1/4 tsp salt
  • 1/2 tsp vanilla
  • 1/2 tsp cinnamon

Mix all ingredients together. Slice your bread and preheat oven to 250. Set up a cooling rack over a sheet pan. Place another sheet pan in the oven. Preheat a pan and have butter ready. Dip your bread in the custard and let each side soak for about 30 seconds. Move to cooling rack so excess can drip off. Add butter to your pan and brown the bread on each side, then move to oven to keep warm until you are finished with all the bread and custard.

Then, if you so desire, make some whip cream. I used about a cup of heavy cream, a couple tablespoons of powdered sugar, and some grand marnier. Whip until fluffy. This is all done to taste, so just experiment with what you like.

And then…dig in!

3 Comments

Filed under bread

Savory Scones – Bacon, Onions, and Gruyere

I’ve made scones many a times. I almost always make cranberry orange. I love cranberries and I love the buttery goodness of a scone. This time, however, my hubby requested I make savory scones for his students on the first day of class. I’ve talked of making savory scones (on that long list of Things To Make. I should write that list down someday) but just never did until now!

Making savory scones isn’t really much different than sweet. You just add different goodies at the end. The rest is the same. This particular recipe I added pepper with the dry and a pinch less sugar, but otherwise, the base is essentially the same. Which means if you don’t want savory scones, you can still use this recipe and just add whatever you desire!

These turned out really, really yummy. In fact, people scarfed these down faster than my sweet scones! Perhaps it was the bacon? Or maybe that it was something different? Really all that matters is people enjoyed these immensely. Which makes me happy!

I didn’t measure my bacon, onions, or cheese. But here’s the suggested amounts:

  • 45 g (1/3 cup) Caramelized onions
  • 45 g (1/3 cup) Cooked Bacon
  • 40 g (1/4 cup) Gruyere

I cooked my bacon first then used the bacon fat to cook the onions:

Let those cool and drain on a paper towel and continue on with the recipe.

Bacon and Caramelized Onion Scones with Gruyere

Recipe from Ciril Hitz Baking Artisan Breads and Pastries

  • 400 g (3 1/4 cup) All purpose Flour or Bread Flour (I prefer half each)
  • 4 g (1/2 tsp) Salt
  • 1 g (1/4 tsp) Pepper (omit if using a sweet filling)
  • 56 g (1/4 cup) Sugar
  • 24 g (2 TB) Baking powder
  • 148 g (10 TB) Unsweetened Butter, Cold
  • 1 Egg
  • 1 Egg white (save the yolk for egg wash)
  • 230 g (1 cup) Buttermilk
  • Egg wash, as needed

1. Preheat oven to 350F.

2. Whisk together the dry ingredients.

3. Cut the butter into cubes, but keep cold. If using a mixer, mix the butter into the flour using a paddle attachment. If not using a mixer, use your hands or a pastry cutter. Work the butter in until it is the texture of cornmeal. Be careful not to over mix.

4. In a separate bowl, whisk together the eggs and buttermilk. Slowly add the liquids to the flour mixture. Mix just until combined!

5. Move your dough to a work bench and get ready to knead! Get your things together before this step: Rolling pin, dough cutter, dowels, egg wash, pan with silpat or parchment, and knife or pizza wheel. And flour for dusting. Very important.

6. Work your dough into a nice ball. It will be pretty sticky at this point so you will need flour. Knead it by folding it over on itself, then rotate 90 degrees and repeat. This will create layers which will make your dough flaky.

7. Once the dough has come together fairly well, add the onions and bacon and knead to work it in. You may want to do this in batches.

8. Now that all the goodies are worked into the dough, roll out the dough to 1/2″. This is where you need the dowels. Again, if you don’t have dowels, use a ruler.

9. When you are at 1/2″, use your knife or pizza wheel to cut triangle. I like to cut squares and then triangles.

10. Move to your pan. Brush with egg wash and sprinkle with the cheese.

11. Bake until golden, which should take 15 to 20 minutes.

Enjoy!

2 Comments

Filed under Scones