Tag Archives: easy

Boozy Biscotti

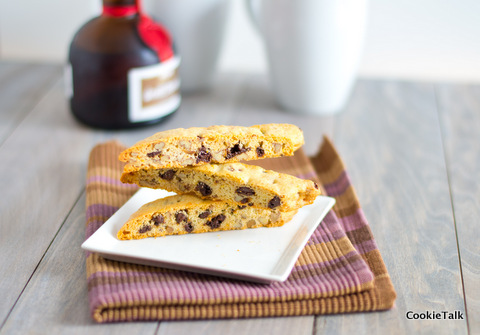
The title may be a wee bit deceiving. Yes, these biscotti have booze in them, but not enough to really call them boozy. But it got your attention, didn’t? Yup, thought so!

You have probably figured out by now that I like biscotti, considering this is my third biscotti post (check out the others here and here). I find it hard not to like biscotti. It’s sweet, but not too sweet, crunchy, and goes so perfectly with that morning cup of coffee. I’m a sucker for anything that goes well with coffee (as well as anything that goes well with wine, but that’s another story for another day).

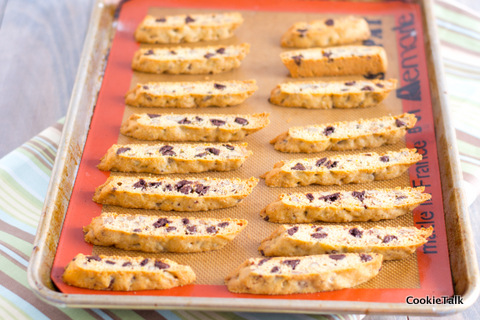
This recipe just took front and center as my favorite. And I found that they held up better than other biscotti when slicing. Of course, that could be attributed to my finally being patient enough to let the biscotti cool sufficiently before slicing. In the past I tried to rush (I know, I know) and sliced too soon, resulting in crumbly slices. (Sheepishly hangs head).
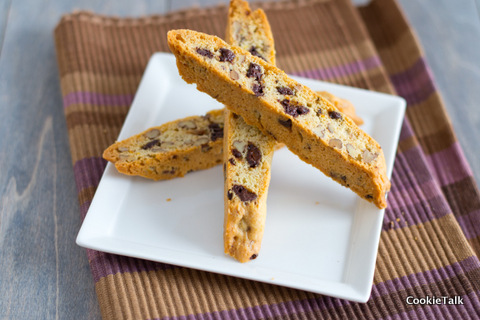
Another reason I like these so much is because orange and chocolate go splendidly together. I’ve always thought it a strange combination but darn is it tasty! I used Grand Marnier, but feel free to use OJ or another orange liqueur.  The recipe is as easy as any other cookie recipe. Would be perfect to take to work, or obviously, a coffee with the girls.

Chocolate Orange Biscotti

Adapted from Bon Appetit Desserts

One year ago: Cheesecake Deconstructed

Yield: About 3 dozen

Difficulty: Easy

Time: 10 minutes or less to prepare; 20 minutes to chill; 1 hour total to bake, plus 20 minutes to rest in between

Ingredients

  • 2 cups plus 2 TB unbleached AP flour
  • 1 1/2 tsp baking powder
  • 1/4 tsp salt
  • 3/4 cup sugar
  • 1/2 cup (1 stick) butter
  • 2 TB Grand Marnier
  • 1 TB orange zest (don’t skip this or you won’t get that orange-y flavor)
  • 2 large eggs
  • 1 cup pecans, toasted and chopped
  • 6 oz bittersweet or semisweet chocolate, chopped or use chips

Directions

1. Line two sheet pans with parchment or silpat.

2. Whisk together flour, baking powder, and salt in a bowl. Set aside.

3. Using an electric mixer, cream together the butter, sugar, zest, and Grand Marnier until light and fluffy, 3 to 4 minutes. Beat in eggs one at a time, blending completely after each addition.

4. Reduce speed to low and add flour mixture. Mix until almost combined and then add the pecans and chocolate. Mix until just combined.

5. Gather dough into two balls, wrap in plastic and freeze for 20 minutes.

6. While dough is chilling, preheat your oven to 350F.

7. After dough is chilled, place each piece on prepared sheet pan. Roll (or pat) into a long log, about 14 inches long and 2 inches wide. Bake until barely golden, about 30 minutes.

8. Remove from oven and place on racks to cool for 20 minutes. Carefully move the logs to a cutting board. Cut on a diagonal into 1/2 inch slices. Move pieces back to sheet pan, standing up right. Bake another 30 minutes, or until dry to the touch and golden. Cool completely before dunking in coffee.

9. Store in airtight container. They will keep for several days. Enjoy!

3 Comments

Filed under Cookies

Fruit Crostata (Galette aka Free Form Tart)

Let’s start with the exciting news! My blog was nominated for the Blog on Fire Award by One Picture, A Million Words! I’m so honored to be nominated! Thank you! There are official rules to accepting this nomination, including nominating eight other blogs and sharing eight things about yourself. I’m still working on that part (hey, I need to be thorough! Don’t rush me!) but I just wanted to formally say “thanks” for the nomination! Post coming soon with my eight nominations.

I love The Chew. Yes, I’ve mentioned that before but every week I laugh at their antics, drool over the food, and get inspired by this show. It’s so genuine and so unlike any other cooking show!  We’ve made dozens of recipes from the show and most have been fantastic. Last week I made Carla’s Blooming Onion (or rather, “Flower Power”). We’ve done several Sunday Suppers from The Chew as well.

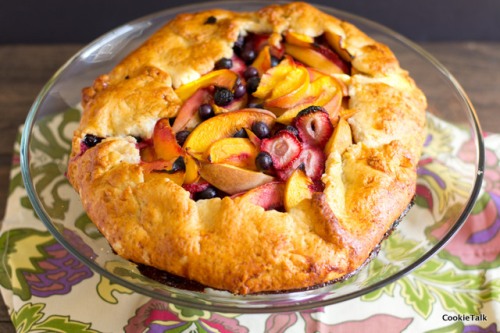
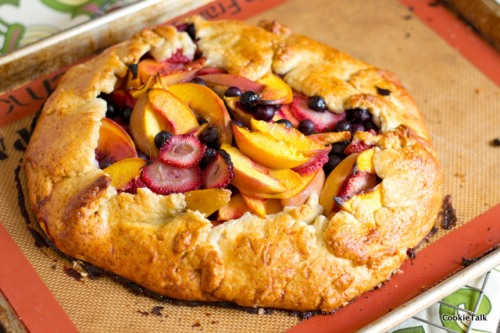
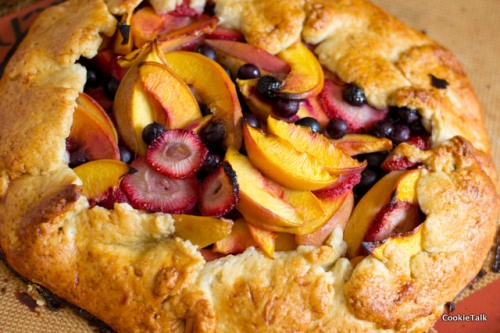
I didn’t tweak this crostata at all, except for the type of berries I used. Mario used all blackberries, but I used strawberries and blueberries, along with peaches of course, because that is what I had available. You could use any fruit and it would be delicious. I’m looking forward to trying it with apples and cranberries this fall. The dough is so easy to work with and actually one of my favorite doughs that I’ve had. I’m not a big fan of pie, I mean, I ‘ll eat it, but the crust is my least favorite part of a pie. Not for this crostata! I probably could have eaten it all by itself. Ok, maybe a little fruit.

Don’t skip the honey and egg glaze…makes it oh so irresistible!

Crostatas (galette) are a lot easier and more forgiving than a pie. If you are afraid of making pie because of the crust looking crazy, then this is for you! It’s supposed to look a little crazy! That makes it “rustic” and therefore cool. Don’t you love that? I sure do.

Peach & Berry Crostata

From Mario Batali

One year ago: Lime & Blackberry Italian Meringue Pie (funny that a year ago was a pie, don’t you think? It’s a good one too!)

Yield: One 12 inch crostata

Difficulty: Easy

Time: Hands on 20 minutes; chill time 30 minutes; bake time 1 hour

Ingredients

  • For the Dough:
  • 2 1/2 cup Cake Flour (plus more for dusting)
  • 3 tablespoons Sugar
  • 1/2 teaspoon Salt
  • Grated Zest of 1 Lemon
  • 1 cup (2 sticks) cold unsalted Butter (cut into small chunks)
  • 1/4 cup Ice Water plus more if needed
  • For the Filling:
  • 5 Large Ripe Peaches (pitted and cut into 16 slices each)
  • 2 pint Fresh Blackberries
  • Juice of 1 Lemon
  • 3 tablespoons Sugar
  • 1 tablespoon All-purpose Flour
  • To Finish:
  • 2 tablespoons Honey
  • 1 Large Egg (at room temperature)
  • 1 cup Mascarpone or Freshly Whipped Cream

Directions

1. Add flour, sugar, salt, and lemon zet to food processor or stand mixer with paddle attachment. Mix briefly to combine. Add butter and mix until coarse crumbs (if using food processor then pulse quickly). Add water 1 TB at a time, allowing plenty of time between additions to be absorbed. Add until dough comes together but is not wet or sticky. Should be easy to handle. If you add too much water, add a tablespoon of flour. Flatten into a disk, wrap in plastic, and chill for at least 30 minutes.

2. Meanwhile, preheat your oven to 365F. Slice your peaches into approximately 16 slices each. If you are using strawberries, slice them too. Add  the lemon, sugar, and flour to the fruit and toss gently to combine. Set aside.

3. Remove dough from refrigerator. If it is too cold, let soften at room temperature a little. But, colder dough is easier to work with so don’t let it warm up too much. Colder dough will require less flour to dust. Dust your work surface and rolling pin very lightly. The more flour you add, the tougher your dough will be so refrain from constantly dusting your dough. Move it around frequently to keep it from sticking. And, don’t worry about it being perfect. We’re going for rustic, remember? Roll it to about 16 inch circle and 1/4 inch thick.

5. If you have a 12 inch tart pan with removable bottom, you can use that. I only have a 9 inch and that would have been too small. Thus, I just used a sheet pan and did free form. Do whatever is easiest for you. If you do free form, just place the dough on your sheet pan (lined with parchment or silpat). It may hang over a bit at first but you’ll fix that in a second.

6. Dump your fruit into the center. I actually had to take some of my fruit out because it was too much! Once the fruit is in the center, fold the edges in, leaving plenty of the fruit to show, but make sure it is also folded over enough so the fruit doesn’t fall out. There’s no rule on how to do this, just fold it over so that it stays together and the fruit stays put.

7. Mix together the honey and egg and brush over the entire crostata, including the fruit. It will act as a delicious glaze and help the crostata brown nicely.

8. Bake for about 1 hour to 1 hour and 10 minutes. Start checking about 50 minutes. Once it is golden brown and the fruit bubbly, it is ready!

9. Top with fresh whipped cream (I’d avoid adding sugar to the whip cream…otherwise it will be too sweet) and enjoy!

3 Comments

Filed under baking, Pie

Seedy Crisps (Crackers)

Our July 2012 Daring Bakers’ Host was Dana McFarland and she challenged us to make homemade crackers! Dana showed us some techniques for making crackers and encouraged to use our creativity to make each cracker our own by using ingredients we love.

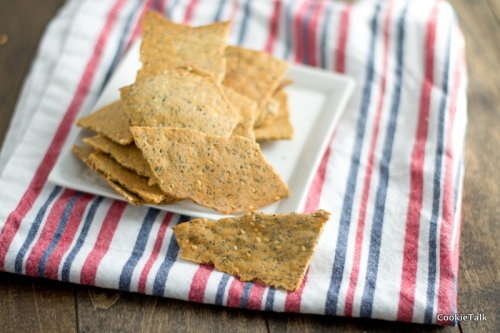
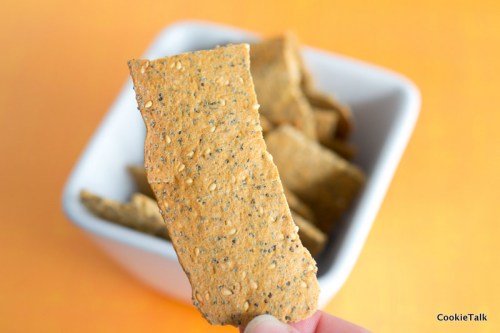
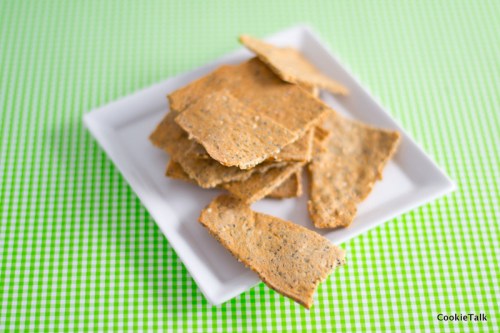
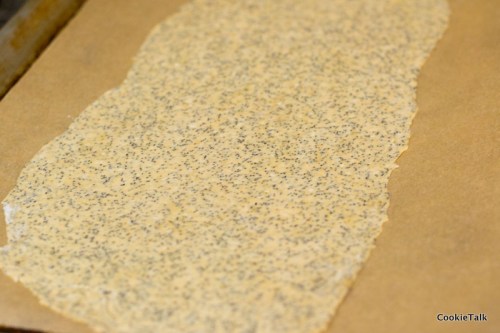
I know I just did  Parm Herb Crackers, but can you really have too many cracker options? Nope, I didn’t think so either. This dough is very easy to roll out nice and thin with very little muscle involved. That makes me happy. These are also crackers that you can just break into random pieces. Fun, right? Oh, and they go great with cheese, which is a requirement for a good cracker. If a cracker can’t hold a piece of cheese and taste good, that cracker is failing in its cracker duties. What’s that? I’m not making sense? Well, blame that on too much coffee and not enough wine. Oh, look, a cracker!

I used White Wheat flour again but otherwise didn’t change the recipe at all. These come together in no time at all. You’ll definitely spend more time standing around the oven waiting for them to cook. Or maybe don’t stand around the oven. It’s hot out, after all. Go hang out by the freezer.

On a side note, I do not like taking pictures of crackers. I don’t think they are photogenic. Good thing they are tasty.

Here’s what they look like before baking:

In the time I spent writing this post, I could have made another batch of crackers. So, what are you waiting for?

Seedy Crisps

One year ago: Homemade Oreos

Yield: A lot of crackers

Difficulty: Easy

Time: 10 minutes to prep and roll; 15 minutes to rest;  30 minutes to bake

  • Ingredients
  • 2 cups (280 grams) White Wheat Flour (or split half wheat and half AP)
  • 1/3 cup (50 grams) poppy seeds
  • 1/3 cup (50 grams) sesame seeds
  • 1 1/2 tsp salt
  • 1 1/2 tsp baking powder
  • 3 TB olive oil
  • 3/4 cup + 1 TB (6 1/2 oz) water

Directions

1. Preheat oven to 450F. Line four sheet pans (or just work in batches) with silpat or parchment. Note: My oven takes forever to preheat, but if yours doesn’t, you can wait until the dough is finished before you turn on the inferno.

2. Mix together flour, seeds, salt, and baking powder. Stir in the olive oil. Then stir in the water slowly until a dough forms. You may not need it all, you may need more. I needed all the water, but not more. Knead a few times on the counter to form a smooth ball. Should come together fairly quickly. Cover with a towel and let rest for 15 minutes.

3. After resting, diving into four pieces. Roll each piece thin. It should be about the length of the sheet pan. Don’t worry about the shape – you will just be breaking it into pieces later.

4. Bake each pan for about 7 minutes, flip, then 7 minutes more. At this point, break into pieces and bake for another five minutes if needed. These crackers are supposed to be crispy.

5. Let cool completely and store in an airtight container for up to 2 weeks.

Eat and enjoy!

11 Comments

Filed under cracker, savory

Basil Olive Oil Gelato – Where Have You Been All My Life?

I know what you are thinking. “She’s lost her mind. Gone completely coo coo. Basil olive oil gelato? Huh?”

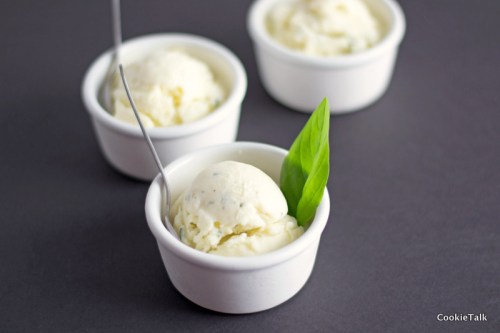
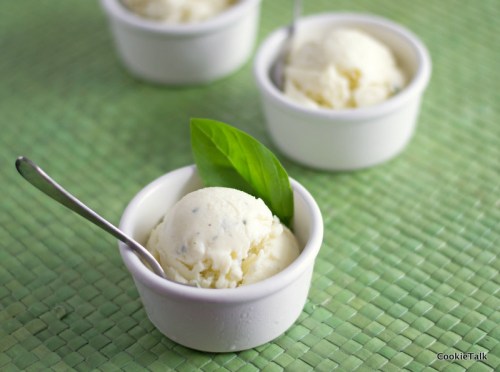
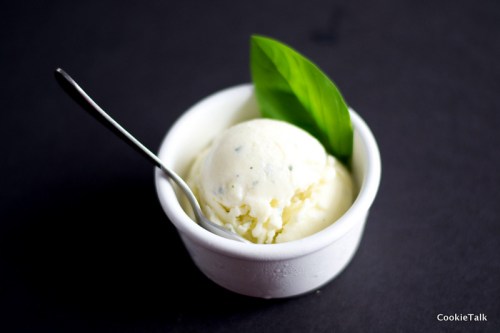
Oh it is so good. After one bite you’ll wonder why you haven’t had it before.The basil makes it a bit minty and the olive oil adds a fruity and peppery side. Combine the two and flavors explode in your mouth. It’s refreshing. It’s sweet, but not too sweet. It’s unique and it is delicious. We first had this at a local restaurant and now it has become one of our favorite flavors.

I did a lot of research trying to find a recipe that would be as close to the real gelato (Italian style ice cream) I once had in Italy. It’s hard to find here, and it is hard to find solid info on how exactly gelato should be made. Two things are certain: gelato has less fat than American style ice cream and has less air. That combination gives you more bang for your buck with each bite. The flavor is more concentrated.

Now, as for the whether or not gelato should have eggs is rather dependent upon the region. Either way, it should have far fewer eggs (4 yolks is about the max per batch) and it should not have cream. When researching recipes, those that had too many yolks and cream were out. Yes, I’m certain those recipes would have been delicious, that’s not the point. That would have made it American style ice cream. I’m going for Italian here.

I was a bit surprised to find many recipes use corn starch as a thickener instead of egg yolks. Corn starch doesn’t exactly bring “tasty” to mind. But, it does make sense. Egg yolks have a strong flavor and they distract from the flavor of the gelato, in this case, basil and olive oil. The best part, in my humble opinion, about using corn starch is that you don’t have to worry about tempering those eggs. Sure, it’s not that difficult, but it does make for a much more relaxing experience when you aren’t worried about curdling your eggs and checking the temperature frequently. It. Was. Easy.

I actually rarely make ice cream because when all is said and done, it’s not cheaper to make it at home and it can be tedious. Egg yolks and cream add up. This gelato was not expensive and it was so much easier to make. So I’m hooked.  I will be using this recipe as my base for other flavors.

I finally decided on this pistachio recipe from Saveur. I obviously didn’t add the pistachios. I steeped a vanilla bean and basil in the milk overnight, then added olive oil the next day. To finish I folded in minced basil. I’m so happy with how it turned out. At first I was worried it was too much olive oil, but after freezing the flavor is perfect. It is very easy to adjust to your liking.

It’s very important to use a good extra virgin olive oil here, otherwise you won’t taste it. And if you can’t taste it, what’s the point?

Basil Olive Oil Gelato

Modified from Saveur

Yield: 6 cups of gelato

Difficulty: Easy to Medium

Time: 20 mins to make mixture; chill overnight; 20 to 30 minutes in ice cream maker

Special Equipment: Ice cream maker

Ingredients

  • 4 cups whole milk, divided
  • 1 cup sugar
  • 3 TB cornstarch
  • 1 vanilla bean, split
  • 4 to 6 fresh basil leaves, divided, leaving 2 to 4 whole and the rest finely minced
  • 1/4 cup good extra virgin olive oil, plus additional 2 TB if needed
  • Tiny pinch of salt

Directions

1. Heat 3 cups of milk to a simmer. Remove from heat. Meanwhile, mix the remaining 1 cup milk with the sugar and corn starch.

2. Stir sugar mixture into the hot milk. Return to heat and cook, stirring constantly (using a spoon not a whisk!), for 8 to 10 minutes. Mixture will thicken, but not much.

3. Stir in 2 to 4 whole basil leaves and the vanilla bean. Pour into heat proof bowl. Let cool slightly, stirring frequently, then cover and chill completely overnight.

4. The next day, remove the basil leaves and vanilla. Add in 1/4 cup of olive oil and a pinch of salt. Mix according to your ice cream makers instruction, stopping after about 10 minutes to taste. Add additional olive oil if desired. Flavor will be less pronounced as it freezes.

5. After the mixture is done in the ice cream maker, fold in your minced basil and freeze. Enjoy!

9 Comments

Filed under frozen treat

Christmas in July: Gingerbread Ice Cream Sandwiches

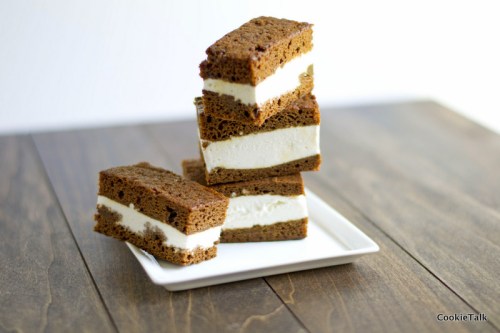
I know it isn’t quite July, but close enough. I assume you have planned out your 4th of July menu? No? Well, dessert is now decided. It’s easy, delicious, and a bit surprising: gingerbread ice cream sandwiches.

Gingerbread need not be reserved for just Christmas.  But no one really wants a rich, spicy cake when it is 100 degrees out. Gingerbread just seems way too heavy all by its lonesome. But freeze it and add some ice cream? Well, that is a whole different ball game.

This treat is fast and easy to make. You do have to turn your oven on, but only for 30 minutes, tops, including preheating.  It doesn’t have to be perfect (I think it looks better if it is not), can be cut to any size you want, and you can even use whatever ice cream you want. Although I think vanilla is best, but that’s just me.

Thanks to Gourmet Live Blog for suggesting this in the first place. Apparently June 5th is “National Gingerbread Day.” Yes, that does make perfect sense. I just don’t know why.

This recipe is also a one bowl wonder. One more reason to love it, right?

P.S. Did you notice I have a Facebook page now? Yes, I know, way to join the 21st Century. Just click “Like” over there on the right and join in the fun!

One year ago: Blackberry Buttermilk Cake

Gingerbread Ice Cream Sandwiches

From Gourmet Live

Yield: One half sheet pan of cake; sandwiches will depend on how you make them

Difficulty: Easy

Time: 10 minutes to make batter; 15 minutes to bake; 10 minutes to spread ice cream and cut into sandwiches

Ingredients

  • 1/2 cup butter, melted
  • 3/4 cup packed brown sugar
  • 1/2 cup molasses (not blackstrap)
  • 1 large egg
  • 1 1/2 tsp ground ginger
  • 1 tsp baking soda
  • 1/2 tsp salt
  • 1/2 tsp cinnamon
  • 2 cups AP flour
  • 2/3 cup boiling water
  • 1 1/2 qt ice cream (vanilla is my preference)

Directions

1. Preheat oven to 350F. Butter a half sheet pan (cookie sheet) and then line with parchment.

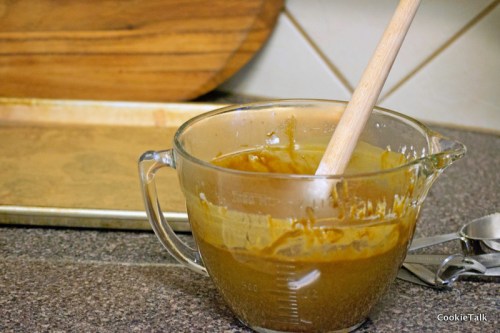
2. In a large bowl, mix together the butter, brown sugar, molasses, and egg. Then add the ginger, baking soda, salt, cinnamon and flour. Mix until combined. It will be a bit thick at this point. Add your boiling water and stir. It will thin to a nice cake batter.

3. Spread on your sheet pan. Try to make it even, but not a huge deal if it isn’t perfect. Bake for 12 to 15 minutes or until toothpick comes out clean. Let cool completely. To speed things up, put it in the freezer.

4. Let your ice cream soften at room temperature. It will be easier to spread when it is soft.

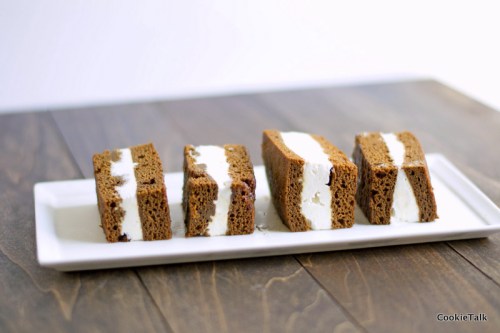
5. Cut the entire sheet in half crosswise, basically into two squares. One will be your top, one will be your bottom. Spread the ice cream on one side. Top with the other. Freeze until ice cream is set again. Cut into desired sizes and shapes. Yes, a cookie cutter would be just fine here. You’ll just have to eat the scraps though. So terrible, huh?

6. Freeze until ready to eat. You can wrap them in parchment and freeze or just use a freezer bag. They keep quite nicely.

Enjoy!

153 Comments

Filed under cake, frozen treat

Cinnamon Vanilla Granola

I complain about the heat all summer long. It’s just what I do. Normally I’d be whining about how it is 95 out, but it is hotter in other parts of the country so I’ll just keep my pretty little mouth shut. And being the perfectly reasonable person that I am, I still turn my oven on during the hottest time of the day to make yummies that bake for over an hour, like granola. I mean, 250F isn’t that hot for an oven, so what’s the big deal?


I know it would be better for my electric bill to scale back on the oven use over the hot summer months, but I still need my treats. And granola is a staple in this house, usually with dried fruit. We are never without it. I sprinkle it on my yogurt. My hubby takes it to work everyday for a snack. We eat it as cereal. We take it with us whenever we travel. So, you see, I can’t just stop making granola because it is hot outside. I could stop whining, but what fun would that be?

Put into jars for easy little homemade gifts! 

One year ago: Best Ever Banana Bread

Cinnamon Vanilla Granola

Inspired from Alton Brown

Yield: About 6 to 8 cups depending on the nuts you use

Difficulty: Really Easy

Time: 10 minutes to prep; 1 hour 15 minutes to bake

Ingredients

  • 3 cups old fashioned rolled oats (not quick cooking)
  • 2 1/2 cups chopped nuts (I usually use a combination of almonds and walnuts, but anything goes here)
  • 1/2 cup ground flaxseed
  • 1 TB cinnamon
  • 1/2 cup brown sugar
  • 1/2 cup honey, maple syrup, or a combination
  • 1/4 cup olive oil
  • 1 tsp vanilla
  • Pinch of salt
  • Dried fruit, optional. (I prefer cranberries or cherries)

Notes: I’ve made this recipe so many different ways over the years. It is very flexible and you can add or delete things to make it yours. You can adjust the sugar to suit your needs: more will obviously make it sweeter but will also cause it to clump together more, kind of like bars. Less will make it looser, which isn’t bad either, but I’ve found it is harder to snack on that way. Olive oil may seem strange but it is a better fat than canola oil and I think the taste is better. Flaxseed is optional, but a great way to add some heart goodness to your food without knowing it is there! If you omit it, I’d add another 1/2 cup of nuts or oats. It is pretty sweet by itself but is a wonderful compliment to tangy greek yogurt.

Directions

1. Preheat oven to 250F. Prepare one or two sheet pans. One if you want your granola to clump together a bit more (this is what I do) or two if you want it to be looser and roast a bit more.

2. In a large bowl combine the oats, nuts, flaxseed, cinnamon, and brown sugar. Toss together to combine well.

3. In a small bowl combine the oil, honey or maple syrup, vanilla, and pinch of salt. Whisk together.  Pour over the oat mixture and stir until well combined.

4. Spread onto sheet pan. Bake for 1 hour and 15 minutes. Your house will smell intoxicating. No need for candles today!

5. Let cool in the sheet pan. If you want really big clumps, don’t touch it till it is cool. It will then break nicely into large pieces (if you used just one pan). If you want it to be more cereal like, let it cool for just a minute then take a spatula and start stirring it up. You can add dried fruit at this point, but I usually don’t add the fruit until right before serving. I may use fresh fruit, especially this time of year, or dried fruit.

What’s your favorite granola? I  need some ideas to mix it up a bit!

Enjoy!

9 Comments

Filed under baking, granola

Spice Coffee Cake

The Daring Bakers’ April 2012 challenges, hosted by Jason at Daily Candor, were two Armenian standards: nazook and nutmeg cake. Nazook is a layered yeast dough pastry with a sweet filling, and nutmeg cake is a fragrant, nutty coffee style cake.

While the Nazook looked utterly amazing and mouthwatering, I had no time to make it this month due to my crazy busy schedule right now. (This is the part where you pity me, of course). Thankfully, the nutmeg cake rocked and I’m so glad Jason introduced us to it! It’s incredibly easy and quick to make and tastes delightful, especially with a cup of coffee (huh, wonder if that’s why it’s called a coffee cake?). It  has a crust like a cheesecake and texture like well, a dense cake. No icing or glaze needed but I’m sure that wouldn’t hurt things. Don’t let it’s simple exterior fool you. The flavor is quite complex.

This cake would be easy to personalize to meet your taste buds. I didn’t find the nutmeg overwhelming but I do love nutmeg. I also added a pinch of cinnamon. Nutmeg and cinnamon are just meant to be together, in my humble opinion. But if they aren’t your favorite spices, just add whatever suits you. This cake has a beautiful caramel taste. The edges get a little more done than the center but that was actually my favorite part. A little bit chewier and caramel-y.

Did I mention it was quick? Less than 20 minutes, maybe closer to 10 but I wasn’t really counting, to pull together and about 40 minutes to bake. I love quick recipes that taste awesome, don’t you?

Nutmeg Cake

  • 1 cup milk
  • 1 tsp baking soda
  • 2 cups (280 gm/10 oz) AP Flour
  • 2 tsp  baking powder
  • 2 cups  (400 gm/14 oz) brown sugar, firmly packed
  • 3/4 cup (170 gm/6 oz) butter, unsalted, cubed
  • 1/2 cup walnut pieces, or any nut of your choosing. I used pecans.
  • 1 to 1-1/2 teaspoons ground nutmeg
  • 1 tsp cinnamon
  • 1 egg

1. Preheat your oven 350°F.
2. Mix the baking soda (not baking powder) into the milk. Set aside.
3. Put the flour, baking powder, and the brown sugar into your food processor (mixer will work too). Pulse until uniformly mixed.
4. Toss in the cubed butter. Pulse until uniformly mixed into tan colored crumbs.
5. Pour HALF of the crumbs into your springform (9”/23cm) pan. Press out a crust using your fingers and knuckles.
6. Mix in the nutmeg and cinnamon
7.  Add the egg, mix until combined.
8. Pour in the milk and baking soda mixture. Continue to mix until a slightly lumpy tan batter is formed.
9. Pour the batter over the crust in the springform pan.
10. Gently sprinkle the nut pieces over the batter.
11. Bake in a preheated oven for 30-40 minutes. It’s ready when the top is golden brown, and when a toothpick comes out clean. It took 40 minutes in my oven, but I started checking at 30 minutes.
12. Let cool for a minute or two, then run a knife around the pan. Remove the outer part and let cool. If you let it cool in the pan it may stick. Make coffee and enjoy!

8 Comments

Filed under baking, breakfast, cake, Daring Bakers

Chocolate Chip Hazelenut Biscotti

Biscotti, how I love thee!

Ok, I know, I’ve been out of commission for what, six weeks now? I have lots of good reasons, and probably a few that aren’t so great. First, I’m taking a couple of online writing classes, which is the biggest reason I’m not blogging since I’m busy writing for a grade. Second, everything that can break seems to have broken, including my Kitchen Aid Stand Mixer (insert tears here).  That will be a separate post.

In the meantime…I’m making bread by hand and making other doughs with my hand mixer (also a Kitchen Aid…). Biscotti was perfect for the hand mixer, other than me being annoyed at having to stand there holding it. Yeah, I know, I’ve gotten lazy with my big, (sort of) powerful stand mixer. I have to actually pay close attention now! Can you imagine? Hmph.

This is an easy recipe and is actually the same as the Cinnamon Hazelnut Biscotti, but I took out the cinnamon and added espresso and hazelnuts. I originally had espresso in the title but that was bordering on obnoxiously long. And you could really use this recipe as a base for whatever you wanted. And for me, biscotti really hits the spot first thing in the morning when you are sitting down for coffee after a good workout or yard work. It’s a great way to start your day.

Chocolate Chip Hazelnut Biscotti

adapted from Bon Appetit Desserts

  • 3 cups unbleached AP Flour
  • 1 TB baking powder
  • 1/2 tsp salt (I prefer sea salt)
  • 2 tsp espresso powder (optional, but adds a nice touch)
  • 1 cup hazelnuts, toasted and husked*
  • 3/4 cup sugar
  • 1/2 cup (1 stick) butter, somewhere in between room temperature and cold.
  • 1 tsp vanilla extract
  • 3 large eggs, room temp
  • 1 1/2 cups chocolate chips

*To husk the hazelnuts: spread in a single layer on a sheet pan and bake in oven at 350F for about 10 minutes until very fragrant. Cover with a towel. Cool slightly and then rub together.   The skins will come off fairly easily.  Don’t fret if you don’t get all the skins. A little won’t hurt.

1. Preheat oven to 350F. Prepare two baking sheets with either silpat or parchment. Whisk together flour, baking powder, salt, and cinnamon. Set aside.

2. Chop hazelnuts in food processor until slightly chunky. How chunky depends on your preference.

3. Place butter, sugar, vanilla, and zest in stand mixer and mix until light and fluffy, about 3 to 5 minutes. Add eggs one at a time and mix until combined. Scrape the bowl after each addition. Add flour mixture. When flour is almost completely mixed, fold in the chopped hazelnuts and chocolate chips.

4. Divide the dough in half and place on prepared sheet pans. Flatten dough into an even rectangle. If you want to cut them diagnol, keep it narrow and long. If you want to cut just straight, make it wider. Bake for 20 to 25 minutes until golden on the edges. Remove from oven (but keep oven on),  let cool slightly and carefully move to a cutting board. Slice slightly on the diagonal. Return pieces to the sheet pan. Bake about 10 minutes. Flip pieces, bake 10 minutes more, or until desired crispiness. Careful that they don’t burn, but also make sure they are golden enough to be crunchy. Make coffee, and enjoy!


8 Comments

Filed under Cookies

Mini King Cakes

Today is Mardi Gras. A splurge day before you must behave until Easter. Or something like that.

Mardi Gras has a rich history, particularly in New Orleans. I have been to New Orleans, pre-Katrina, but I was there during the off season and it was still crazy. Did you know that Mardi Gras originated in Mobile, AL? I’d always assumed New Orleans!

I’d never had a King Cake before, but essentially it is brioche (the “cake”) and gold, green, and purple sprinkles. Williams-Sonoma did a fun blog post on King Cakes describing the sugars as “…purple for justice, green for faith, and gold for power.” Those are some seriously loaded sugars.  Newer versions of King Cake include various fillings, such as cream cheese and praline. And in true Alabama fashion, their version of the King Cake is deep fried. I would expect nothing less.

I’m sure you’ve heard of hiding a prize inside the King Cake. In past years it would be jewels (the wealthy), beans (the poor), almonds, and in most recent years…a plastic baby. The plastic baby really creeps me out for some reason. I mean, it’s a piece of plastic in your cake! I just find that odd, so I omitted that part. Forgive me. But the main point of the prize is that whoever gets the prize is in charge of bringing the King Cake next year. I don’t mind making them again. They were easy and very tasty.

I found my recipe from King Arthur Flour but you could really use any brioche recipe, add some lemon and nutmeg, glaze it, sprinkle some sugars and voila! King Cakes! This brioche recipe is a little bit “cak-i-er” and less “bread-i-er” than other brioche and it was fast and easy to make. Less than four hours including bake and rising time! Can’t beat that.

If you don’t have gold, green, and purple sugars, make your own. Just add a little food coloring to your sugar. Easy. I had gel food colors so I put a dab on a toothpick, spritzed with water, and added to the sugar. It doesn’t take much at all.

Mini King Cakes

Yield: 10 to 12 mini King Cakes

Time: about 4 hours, including baking and rising

Difficulty: Easy

One Year Ago: Chocolate Souffle

Recipe from King Arthur Flour

Dough

  • 1/2 cup (8 TB) butter, melted
  • 3/4 cup lukewarm milk
  • 2 large eggs + 1 large egg yolk, white reserved
  • 1/4 cup sugar
  • 1/4 cup dry milk
  • 1 1/4 tsp salt
  • 1/4 tsp ground nutmeg
  • 1 tsp grated lemon rind
  • 3 1/2 cups AP Flour
  • 2 1/2 tsp instant yeast

Icing

  • 1 cup confectioners’ sugar
  • ½ tsp vanilla or lemon extract (I used Fiori di Sicilia, but careful – a little goes a long way)
  • 1 TB + ½ to 1 tsp milk, enough to make a thick but pourable glaze

Topping

  • yellow, purple, and green sparkling sugars

Directions

1. Combine all ingredients for dough into mixer. Mix with dough hook for 5 minutes on speed 1 until dough comes together. Increase to speed 3 until dough forms a smooth ball. You may need to sprinkle more flour into the dough. I had to add about an extra 1/2 cup because the dough was just too soft. It should be soft and slightly sticky, but still have some shape. If it is just a sloppy mess, you will have a hard time with it. Sprinkle one teaspoon at a time and let mix completely before adding more. This step may take 15 minutes total.

2. Let dough rise, covered, for about one hour in a warm place, like your oven with the light on (but oven turned off!). See before and after rising:

3. Scale into 12 equal pieces (I did 10 since I only have 10 brioche pans). Shape into rolls. This will be very easy to do since the dough is easy to work with. Place into greased muffin tins or brioche pans.

4. Let rise for another hour (but not in your oven this time) covered loosely with a towel. While the dough is rising, preheat your oven to 350F.

5. After rising, combine the reserved egg with  about a tablespoon of water, mix thoroughly, and brush on the cakes. Bake the cakes for 35 to 45 minutes, tenting if they brown too fast. Check the temperature about the 30 minute mark. It should read at least 180F  when they are ready.

6. To make the glaze, just combine all the glaze ingredients together, adding more milk if needed. After the cakes have cooled, dip in the glaze and sprinkle with sugars. Eat!

Check out more bread recipes at Wild Yeast.

6 Comments

Filed under bread, cake

Love and Whoopie….Pies

Red velvet whoopie pies with a raspberry marshmallow center. Does that say Valentine’s Day or what? I finally decided to jump on the Valentine’s Day band wagon and make something with red velvet.  It is one of my favorite cakes, after all, and I’ve had red velvet on my To Bake list for, oh, a year maybe?

And at this point I am retyping my entire post, minus the paragraph above, since WordPress was so kind to crash and not register my last save! Don’t you just hate it when technology doesn’t do exactly what you want it to do?

There, just saved. Still good.

I think I said something along the lines of every day is special, no need to just use Valentine’s Day as an excuse, and yada yada yada. Maybe I was being too mushy and WordPress decided to intervene? Well, hmph.

And just saved again. Still good.

These are really tasty “cookies” with an identity crisis (I mean, they are essentially small cakes, with pie in the name, and we consider them cookies?). Chocolatey, cakey, and yummy. What more could you ask for in a cookie? Oh, that they are easy? Done. (Save).

Happy Valentine’s Day!

Red Velvet Whoopie Pies modified from Epicurious

Yield: about 2 dozen

Time: about 1 hour, including bake time

Difficulty: Easy

One Year Ago: Granola Bars

Cookie (Cake)

  • 2 cups all-purpose flour
  • 1/4 cup  unsweetened (natural) cocoa powder (not Dutch process)
  • 1/2 teaspoon baking soda
  • 1/2 teaspoon salt
  • 1 stick (1/2 cup) unsalted butter, softened
  • 1 cup brown sugar
  • 1 large egg
  • 1 teaspoon vanilla
  • 1 teaspoon distilled white vinegar
  • 2/3 cup well-shaken buttermilk
  • 1 (1-ounce) bottle red food coloring (2 tablespoons) OR 1 tsp gel food coloring dissolved in 2 TB water
1. Preheat oven to 350°F. Line two baking sheets with parchment paper or silpat. Sift your cocoa powder, then whisk together flour, cocoa powder, baking soda, and salt in a bowl.
2. Beat butter, sugar, and vanilla with an electric mixer until combined well and fluffy, about 5 minutes. Beat in egg, scrape the bowl, and then the vinegar.
3. Reduce speed to low and alternately mix in flour and buttermilk in batches, beginning and ending with the flour until combined.
4. Add the red food coloring and mix on low speed until thoroughly combined.
5. Spoon 1 tablespoon mounds of batter 2-inches apart on lined baking sheets.
6. Bake, switching positions of baking sheets halfway through baking, until rounds are puffed and set (check with a toothpick), 8 to 10 minutes.
7.  Spread about 1 tablespoon of icing (two choices below) on flat-side of half the rounds; top with remaining rounds, flat side down, to form whoopie pies.

Marshmallow Icing from Smitten Kitchen

This is the one I used. No refrigeration needed. Made a lot, so you could cut the recipe in half.

  • 2 large egg whites
  • 1/2 cup sugar
  • 1/4 cup light corn syrup
  • 2 tablespoons water
  • 1 1/2 teaspoons pure vanilla extract OR chambord
  • pinch of salt

Combine icing ingredients in a metal or glass bowl set over a saucepan of simmering water and beat with a handheld electric mixer at high speed until frosting is thick and fluffy, 6 to 7 minutes. Remove bowl from heat and continue to beat until slightly cooled. Add food coloring if desired. Use frosting the day it is made. It will still be good the next day, just won’t be as fluffy.

Cream Cheese Icing from Epicurious

  • 8 ounces cream cheese, softened
  • 1/2 stick (1/4 cup) unsalted butter, softened
  • 1 teaspoon fresh lemon juice
  • 1/2 teaspoon vanilla
  • 1/8 teaspoon salt
  • 2 cups confectioners’ sugar

Beat together cream cheese, butter, lemon juice, vanilla, salt, and sugar until creamy, 1 to 2 minutes.

Leave a comment

Filed under cake, Cookies