Category Archives: Cookies

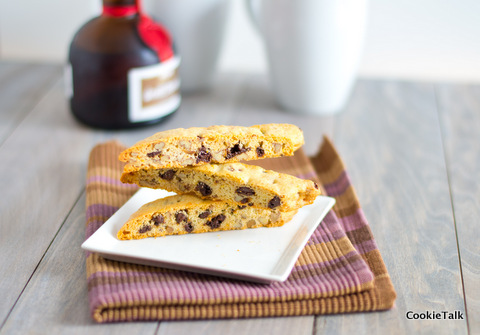
Boozy Biscotti

The title may be a wee bit deceiving. Yes, these biscotti have booze in them, but not enough to really call them boozy. But it got your attention, didn’t? Yup, thought so!

You have probably figured out by now that I like biscotti, considering this is my third biscotti post (check out the others here and here). I find it hard not to like biscotti. It’s sweet, but not too sweet, crunchy, and goes so perfectly with that morning cup of coffee. I’m a sucker for anything that goes well with coffee (as well as anything that goes well with wine, but that’s another story for another day).

This recipe just took front and center as my favorite. And I found that they held up better than other biscotti when slicing. Of course, that could be attributed to my finally being patient enough to let the biscotti cool sufficiently before slicing. In the past I tried to rush (I know, I know) and sliced too soon, resulting in crumbly slices. (Sheepishly hangs head).

Another reason I like these so much is because orange and chocolate go splendidly together. I’ve always thought it a strange combination but darn is it tasty! I used Grand Marnier, but feel free to use OJ or another orange liqueur.  The recipe is as easy as any other cookie recipe. Would be perfect to take to work, or obviously, a coffee with the girls.

Chocolate Orange Biscotti

Adapted from Bon Appetit Desserts

One year ago: Cheesecake Deconstructed

Yield: About 3 dozen

Difficulty: Easy

Time: 10 minutes or less to prepare; 20 minutes to chill; 1 hour total to bake, plus 20 minutes to rest in between

Ingredients

  • 2 cups plus 2 TB unbleached AP flour
  • 1 1/2 tsp baking powder
  • 1/4 tsp salt
  • 3/4 cup sugar
  • 1/2 cup (1 stick) butter
  • 2 TB Grand Marnier
  • 1 TB orange zest (don’t skip this or you won’t get that orange-y flavor)
  • 2 large eggs
  • 1 cup pecans, toasted and chopped
  • 6 oz bittersweet or semisweet chocolate, chopped or use chips

Directions

1. Line two sheet pans with parchment or silpat.

2. Whisk together flour, baking powder, and salt in a bowl. Set aside.

3. Using an electric mixer, cream together the butter, sugar, zest, and Grand Marnier until light and fluffy, 3 to 4 minutes. Beat in eggs one at a time, blending completely after each addition.

4. Reduce speed to low and add flour mixture. Mix until almost combined and then add the pecans and chocolate. Mix until just combined.

5. Gather dough into two balls, wrap in plastic and freeze for 20 minutes.

6. While dough is chilling, preheat your oven to 350F.

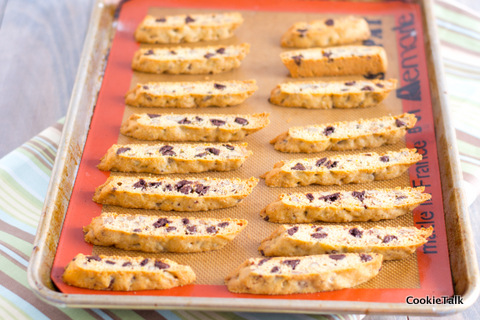
7. After dough is chilled, place each piece on prepared sheet pan. Roll (or pat) into a long log, about 14 inches long and 2 inches wide. Bake until barely golden, about 30 minutes.

8. Remove from oven and place on racks to cool for 20 minutes. Carefully move the logs to a cutting board. Cut on a diagonal into 1/2 inch slices. Move pieces back to sheet pan, standing up right. Bake another 30 minutes, or until dry to the touch and golden. Cool completely before dunking in coffee.

9. Store in airtight container. They will keep for several days. Enjoy!

3 Comments

Filed under Cookies

Parmesan Herb Crackers

Today I went to a Change of Command ceremony. For you non-military peeps, that’s when a new boss takes over for an old boss. It’s very traditional and symbolic. I love attending these ceremonies because they just make me proud to be part of the military.  Before I left I had written a draft post about how good crackers are hard to find in stores and how easy they are to make at home.


Now I feel compelled to share with you the words of wisdom I heard from the outgoing commander, a man who has been a pleasure to know these past couple of years. My husband worked for him the first year we were here before moving on to another job.

He said a lot of great things but what really stood out was this piece of advice: Do your job. That sounds pretty simple, right? But think about it for a second. How often are you worrying about what someone else is doing instead of just focusing on what you should be doing? It happens a lot, especially for Perfectionists like Me. We’ve all worked with someone who was a slacker and we had to pick up their slack. Think about how easier your job would be if the slacker just did their job! And think for a second about the job you have to do. If you are spending all your time worrying about what the person next to you is doing, what’s happening to the job you are doing? It suffers. This doesn’t just happen at the office. It happens everywhere and in every aspect of life.

So do your job and do it the best that you can. Everything else will work itself out. Can’t ask for much more, right?

Thanks, Peaches. We’ll miss you!


Why, yes, I did drink that wine in this photo. I couldn’t let it go to waste. One of the downsides of using wine as a photo prop! 

One year ago: Peanut Butter Swirl Brownies

Parmesan Herb Crackers

Inspired from Pastry Affair and NYT

Yield: Several dozen 1 inch crackers

Difficulty: Easy

Time: 20 minutes to prep, 20 minutes to bake

Ingredients

  • 1 1/2 cups white whole wheat flour
  • 1/4 tsp baking powder
  • 3/4 tsp salt
  • 1/2 cup finely grated parmesan
  • 1 TB fresh herbs, chopped
  • 3 TB cold butter
  • 1/4 cup +2TB  milk, divided
Procedure

1. Preheat oven to 400F. Prepare two baking sheets with silpat or parchment.

2. You can use either a food processor, a stand mixer with a paddle attachment, a pastry cutter, or your hands! I think the food processor works best but mine broke while making these the first time. It is not a good year for small appliances in my kitchen.

3. Using your tool of choice, mix together the dry ingredients. Add  the parmesan and herbs. Cut your butter into small cubes and mix with the dry ingredients until it resembles fine cornmeal.

4. Add in the 1/4 cup of milk. If the mixture is still dry, add one tablespoon at a time until the dough comes together nicely. It should not be wet, but should form a ball easily.

5. If it is warm in your kitchen, and it probably is considering how hot the whole country is right now, wrap the dough in plastic and chill for about 30 minutes. This will make it easier to roll. When you are ready to rock and roll, divide the dough in half.  You should not need any additional flour for dusting, but if you do, use as little as possible. Roll to 1/8″ or smaller. The most I have the patience for is 1/8″ but you will have crispier crackers if you can get them thinner. Using your rolling pin to help, roll some of the dough onto the pin and transfer to a baking sheet. Using a pizza cutter, cut the dough into 1 inch squares (no need to separate, they will not rise or spread). It is much easier to cut on the baking sheet than try and move all those little crackers to the sheet! If you want bigger crackers, by all means knock yourself out. Do the same with the second half of the dough.

6. Bake for 15 to 20 minutes, depending on your oven and how crispy you want your crackers. I wanted mine crispy so I baked mine a little longer.

7. Let cool completely. They will crisp up as they cool. Enjoy with cheese, olives, and wine for a delightful snack!

Notes: You can use any cheese you want, just make sure it is finely shredded so it mixes in with the dough. If you don’t like herbs, feel free to leave them out. I liked the white whole wheat flour here because it gives that nice nutty wheat flavor, but still easy to work with like white flour. You can find it in most grocery stores now.


2 Comments

Filed under Cookies

Chocolate Chip Hazelenut Biscotti

Biscotti, how I love thee!

Ok, I know, I’ve been out of commission for what, six weeks now? I have lots of good reasons, and probably a few that aren’t so great. First, I’m taking a couple of online writing classes, which is the biggest reason I’m not blogging since I’m busy writing for a grade. Second, everything that can break seems to have broken, including my Kitchen Aid Stand Mixer (insert tears here).  That will be a separate post.

In the meantime…I’m making bread by hand and making other doughs with my hand mixer (also a Kitchen Aid…). Biscotti was perfect for the hand mixer, other than me being annoyed at having to stand there holding it. Yeah, I know, I’ve gotten lazy with my big, (sort of) powerful stand mixer. I have to actually pay close attention now! Can you imagine? Hmph.

This is an easy recipe and is actually the same as the Cinnamon Hazelnut Biscotti, but I took out the cinnamon and added espresso and hazelnuts. I originally had espresso in the title but that was bordering on obnoxiously long. And you could really use this recipe as a base for whatever you wanted. And for me, biscotti really hits the spot first thing in the morning when you are sitting down for coffee after a good workout or yard work. It’s a great way to start your day.

Chocolate Chip Hazelnut Biscotti

adapted from Bon Appetit Desserts

  • 3 cups unbleached AP Flour
  • 1 TB baking powder
  • 1/2 tsp salt (I prefer sea salt)
  • 2 tsp espresso powder (optional, but adds a nice touch)
  • 1 cup hazelnuts, toasted and husked*
  • 3/4 cup sugar
  • 1/2 cup (1 stick) butter, somewhere in between room temperature and cold.
  • 1 tsp vanilla extract
  • 3 large eggs, room temp
  • 1 1/2 cups chocolate chips

*To husk the hazelnuts: spread in a single layer on a sheet pan and bake in oven at 350F for about 10 minutes until very fragrant. Cover with a towel. Cool slightly and then rub together.   The skins will come off fairly easily.  Don’t fret if you don’t get all the skins. A little won’t hurt.

1. Preheat oven to 350F. Prepare two baking sheets with either silpat or parchment. Whisk together flour, baking powder, salt, and cinnamon. Set aside.

2. Chop hazelnuts in food processor until slightly chunky. How chunky depends on your preference.

3. Place butter, sugar, vanilla, and zest in stand mixer and mix until light and fluffy, about 3 to 5 minutes. Add eggs one at a time and mix until combined. Scrape the bowl after each addition. Add flour mixture. When flour is almost completely mixed, fold in the chopped hazelnuts and chocolate chips.

4. Divide the dough in half and place on prepared sheet pans. Flatten dough into an even rectangle. If you want to cut them diagnol, keep it narrow and long. If you want to cut just straight, make it wider. Bake for 20 to 25 minutes until golden on the edges. Remove from oven (but keep oven on),  let cool slightly and carefully move to a cutting board. Slice slightly on the diagonal. Return pieces to the sheet pan. Bake about 10 minutes. Flip pieces, bake 10 minutes more, or until desired crispiness. Careful that they don’t burn, but also make sure they are golden enough to be crunchy. Make coffee, and enjoy!


8 Comments

Filed under Cookies

Love and Whoopie….Pies

Red velvet whoopie pies with a raspberry marshmallow center. Does that say Valentine’s Day or what? I finally decided to jump on the Valentine’s Day band wagon and make something with red velvet.  It is one of my favorite cakes, after all, and I’ve had red velvet on my To Bake list for, oh, a year maybe?

And at this point I am retyping my entire post, minus the paragraph above, since WordPress was so kind to crash and not register my last save! Don’t you just hate it when technology doesn’t do exactly what you want it to do?

There, just saved. Still good.

I think I said something along the lines of every day is special, no need to just use Valentine’s Day as an excuse, and yada yada yada. Maybe I was being too mushy and WordPress decided to intervene? Well, hmph.

And just saved again. Still good.

These are really tasty “cookies” with an identity crisis (I mean, they are essentially small cakes, with pie in the name, and we consider them cookies?). Chocolatey, cakey, and yummy. What more could you ask for in a cookie? Oh, that they are easy? Done. (Save).

Happy Valentine’s Day!

Red Velvet Whoopie Pies modified from Epicurious

Yield: about 2 dozen

Time: about 1 hour, including bake time

Difficulty: Easy

One Year Ago: Granola Bars

Cookie (Cake)

  • 2 cups all-purpose flour
  • 1/4 cup  unsweetened (natural) cocoa powder (not Dutch process)
  • 1/2 teaspoon baking soda
  • 1/2 teaspoon salt
  • 1 stick (1/2 cup) unsalted butter, softened
  • 1 cup brown sugar
  • 1 large egg
  • 1 teaspoon vanilla
  • 1 teaspoon distilled white vinegar
  • 2/3 cup well-shaken buttermilk
  • 1 (1-ounce) bottle red food coloring (2 tablespoons) OR 1 tsp gel food coloring dissolved in 2 TB water
1. Preheat oven to 350°F. Line two baking sheets with parchment paper or silpat. Sift your cocoa powder, then whisk together flour, cocoa powder, baking soda, and salt in a bowl.
2. Beat butter, sugar, and vanilla with an electric mixer until combined well and fluffy, about 5 minutes. Beat in egg, scrape the bowl, and then the vinegar.
3. Reduce speed to low and alternately mix in flour and buttermilk in batches, beginning and ending with the flour until combined.
4. Add the red food coloring and mix on low speed until thoroughly combined.
5. Spoon 1 tablespoon mounds of batter 2-inches apart on lined baking sheets.
6. Bake, switching positions of baking sheets halfway through baking, until rounds are puffed and set (check with a toothpick), 8 to 10 minutes.
7.  Spread about 1 tablespoon of icing (two choices below) on flat-side of half the rounds; top with remaining rounds, flat side down, to form whoopie pies.

Marshmallow Icing from Smitten Kitchen

This is the one I used. No refrigeration needed. Made a lot, so you could cut the recipe in half.

  • 2 large egg whites
  • 1/2 cup sugar
  • 1/4 cup light corn syrup
  • 2 tablespoons water
  • 1 1/2 teaspoons pure vanilla extract OR chambord
  • pinch of salt

Combine icing ingredients in a metal or glass bowl set over a saucepan of simmering water and beat with a handheld electric mixer at high speed until frosting is thick and fluffy, 6 to 7 minutes. Remove bowl from heat and continue to beat until slightly cooled. Add food coloring if desired. Use frosting the day it is made. It will still be good the next day, just won’t be as fluffy.

Cream Cheese Icing from Epicurious

  • 8 ounces cream cheese, softened
  • 1/2 stick (1/4 cup) unsalted butter, softened
  • 1 teaspoon fresh lemon juice
  • 1/2 teaspoon vanilla
  • 1/8 teaspoon salt
  • 2 cups confectioners’ sugar

Beat together cream cheese, butter, lemon juice, vanilla, salt, and sugar until creamy, 1 to 2 minutes.

Leave a comment

Filed under cake, Cookies

Day 10 of Bakers Dozen: Chewy Ginger Snaps

We’ve made it to the home stretch! Can you believe Christmas is less than a week away? This time of year always flies by. I’m almost done with my holiday shopping, just have a few last minute items to pick up and the last of my mailings went out today. Now it is time to just kick back and relax a bit!

Gingersnaps are probably one of the most recognized holiday cookies. I’d always preferred sugar cookies over ginger cookies but I may have been persuaded with this recipe. The perfect amount of fresh ginger, chewy (not a fan of crunchy), and well, I think they look pretty. I think Santa agrees!

This recipe came from Alton Brown, Good Eats 3. It’s a really amazing book and would make a great gift for a foodie. And Amazon is selling it at half the price I paid for it. We were lucky enough to meet Alton at one of his book signings this past fall, but you had to buy the book from the store to get a ticket. Which of course meant buying it at full price. It’s a steal at $18! I also got the Sugarplums recipe out of this book. And the marshmallows. Can’t say I don’t use my cookbooks, right?

These cookies are easy, which is how Cookies for Santa should be. You don’t want the added stress of complicated cookies this time of year. Chopping the ginger was the most time consuming part. I omitted the candied ginger because I knew that would be too much ginger for my taste buds, but added extra fresh ginger, 4 tsp instead of 2 tsp.  And the fresh ginger makes a huge difference. Don’t omit that. It takes the cookie to a whole new level.

I used a tablespoon scoop and baked the cookies for 12 minutes to get them perfectly chewy. If you prefer a crisper cookie, just bake longer, about 15 minutes. Enjoy!

Ginger Snaps

Adapted from Alton Brown

Yield: about 30 cookies

Difficulty: Easy

Ingredients

  • 9 1/2 ounces all-purpose flour (about 1 1/4 cup)
  • 1 1/2 teaspoons baking soda
  • 1 tablespoon ground ginger
  • 1/2 teaspoon ground cardamom
  • 1/2 teaspoon ground clove
  • 1/2 teaspoon kosher salt
  • 7 ounces dark brown sugar (just under 1 cup)
  • 5 ounces unsalted butter, room temperature (1 stick + 1 tsp)
  • 3 ounces molasses, by weight (1/4 cup)
  • 1 large egg, room temperature
  • 4 teaspoons finely grated fresh ginger
  • 4 ounces finely chopped candied ginger (optional – if you add candied ginger reduce fresh ginger to 2 tsp)
  • coarse sugar for sprinkling on cookies (optional)

Note: I’ve provided conversions in case you don’t have a scale, but I can’t vouch for the accuracy.

Directions

1. Preheat the oven to 350 degrees F.

2. In a medium mixing bowl whisk together the flour, baking soda, ginger, cardamom, clove and salt.

3. Place the brown sugar and butter into the bowl of a stand mixer fitted with the paddle attachment and beat on low speed until light and fluffy,3 minutes. Scrape the bowl. Add the molasses, egg and fresh ginger and beat on medium for 2 minutes. Add the crystallized ginger, if using, and using a rubber spatula, stir to combine. Add the dry ingredients to the wet and mix with paddle until well combined.

4. Using a 1 TB cookie scoop, drop the dough onto a parchment lined half sheet pan approximately 2-inches apart. Sprinkle with coarse sugar. Bake on the middle rack of the oven for 12 minutes for slightly chewy cookies or 15 minutes for more crisp cookies. Rotate the pan halfway through cooking.

5. Remove from the oven and allow the cookies to stay on the sheet pan for 30 seconds before transferring to a wire rack to cool completely. Repeat with all of the dough. Store in an airtight container for up 10 days (trust me, they won’t last that long!). If desired, you may scoop and freeze the cookie dough on a sheet pan and once frozen, place in a resealable bag to store. Bake directly from the freezer as above.

4 Comments

Filed under Cookies

Day 7 of Bakers Dozen: Peppermint Meringues

If you’ve seen the cover of Bon Appetit this month, you’ve seen the beautiful peppermint meringues with the red background. It drew me in immediately! So festive! I had to mimic the red on red for the pictures.

Meringues have never been a favorite cookie of mine, mostly because in the past I’d only had store bought ones that were sickeningly sweet. These are sweet, but not quite the diabetic coma sweet of store bought versions. And much tastier with a beautiful airy yet crunchy texture.

These cookies aren’t quite as easy as the past few posts, but they certainly aren’t hard either. Meringue can be intimidating. Mine even turned out a little runnier than they should have been, but they still turned out great. I’m not sure what happened, honestly. I had perfect peaks and then when I added the powdered sugar as directed, it got runny. But they still piped fine and baked up without any issues.

Peppermint Meringues

From Bon Appetit

Yield: About 60 small cookies

Difficulty: Easy to Medium

Prep time: About 30 minutes hands on, 2 1/2 hours to bake

Ingredients

  • 3 large egg whites, room temperature
  • 1/8 teaspoon kosher salt
  • 1/3 cup sugar
  • 1/2 cup powdered sugar
  • 1/8 teaspoon peppermint extract
  • 12 drops red food coloring

1. Get all your gear ready before you start. Place a 1/2 inch tip in a pastry bag (or use a plastic bag), and have your food coloring and peppermint extract ready, as well as your sugars. Make sure your egg whites are room temperature – very important! Since it is cold most places right now, this may take a couple of hours. Line two baking sheets with parchment or silipat.

2. Preheat oven to 200°F. Line a baking sheet with parchment paper. Using an electric mixer, beat egg whites and salt on medium-high speed until white and foamy, about 1 minute. With mixer running, gradually add sugar in 3 additions beating for 2 minutes between each addition. Beat until firm peaks form, about 2 minutes longer. Add powdered sugar and peppermint extract; beat to blend, about 1 minute.

3. Dot coloring over surface of meringue; do not stir (the coloring will form swirls when piped). Spoon meringue into a pastry bag fitted with a 1/2″ tip. If using a plastic bag, cut corner after adding meringue to bag. Twist top; pipe 1″ rounds onto prepared sheet, spacing 1″ apart. They will not spread so they can be close together.

4. Bake meringues until dry, about 2 1/2 hours. Let cool completely, about 1 hour (meringues will crisp as they cool). These will only keep a couple of days. Store in an airtight container with parchment between layers to keep from sticking.

1 Comment

Filed under Cookies

Mini Pumpkin Trifle with Cranberry Sauce and Whipped Cream Cheese

If you aren’t sick of pumpkin yet, it is your lucky day! If you are sick of pumpkin, never fear, you will soon be sick of peppermint. I’m planning a “12 Days of Christmas” and can’t seem to get away from the peppermint. ‘Tis the season!

But one last  pumpkin post. Yes, it is technically after Thanksgiving and we are supposed to have moved on from said pumpkin. In my defense, I had these made long before Turkey Day, but in true holiday fashion, was just too darned busy to sit down and actually write. Somehow the week before Thanksgiving I had more commitments lined up than I cared for. Too often the holiday season blurs by us without being able to sit back and enjoy the finer things.

Like pumpkin.

The previous post was all about pumpkin bread. That recipe made two loaves, which I would have gladly eaten every last bite, but really don’t have the budget to go out and buy all new clothes in the next size up. And, as previously mentioned, I was hosting a bunch of ladies for our November social. I was in charge of the bread and dessert, everyone else brought the soup. Since the week was already beyond busy, I needed something quick, easy, and tasty. Cute didn’t hurt either. Enter the Mini Pumpkin Trifle.

I’ve found that when you get a bunch of women together, they don’t eat much. Well, dessert anyhow. Even though you know that we all want to devour dessert. Or is that just me? If so, I’m ok with that. I like my dessert. But for this occasion I kept it small and easy to eat.

It started as just some pumpkin bread with a little whip cream on top. But no, I had to add more to my week. I thought it needed some color. What goes great with pumpkin? Cranberry sauce of course. But then I worried there was no texture. It needed a crunch. And what goes with cranberry and pumpkin? Ginger shortbread.  And that is my life, adding more to my schedule than I probably need to. But hey, that’s what women do best, right? Right.

And look at how cute they turned out! I’m not sure if I was more excited to eat the dessert or use the dishes. Complete with mini spoons!

While this dessert has four components, it doesn’t need all four, and each part is very easy and can be made ahead of time. The first is the pumpkin bread from the previous post. I kept one loaf out, froze the other and then thawed it out on the counter. Tasted just as fresh as day one.

The next part is cranberry sauce. This is the same cranberry sauce I use at Thanksgiving every year. I left out the cornstarch and instead smashed the cranberries which thickened the sauce. It can be made two days in advance. Maybe more but I’ve never tried!

I took a shortbread cookie from Martha Stewart. The recipe calls for cutting out the shortbread into shapes, and since I just wanted small slices of shortbread, I knew this would work great. I added ginger until the taste was right.

Must smell good….my pup was very curious!

And the whip cream – insanely easy. I wanted to use Mascarpone, but had some cream cheese leftover from something (who knows what, that seems like an eternity ago!). Either would work great.

So there you have it. Four recipes all combined into one great little dessert. Assemble however you see fit. Since my dishes  were so tiny, I just did one layer of each, but if you have bigger bowls more layers would be great. I assembled several hours before my event and chilled. The less you need to do before guests arrive, the better.

Yield: Depends on your serving size. Will make around 20 small dishes.

One Year Ago: Pumpkin Brioche & French Toast

Difficulty: Easy!

Pumpkin Bread

Cranberry Sauce

Adapted from Emeril (bam!)

  • 2 cups cranberries (fresh or frozen)
  • Juice and zest of 1 orange (fine zest)
  • 1/4 cup Port (any sweet wine will work, in a pinch you could use cranberry juice but hold back on the sugar if it is sweetened)
  • 1/2 cup sugar (add more later if desired)
  • 1 tsp cinnamon

Add all ingredients to pan and bring to boil. Reduce to simmer and smash cranberries. Sauce will thicken. Let cool and chill for later use.

Ginger Shortbread

Adapted from Martha Stewart

*Note: the original recipe calls for cranberries in the cookie. You could probably skip the sauce and just make these cookies as is and it would still be great I’m sure. The ginger was very subtle, so if you like a stronger ginger taste, add more. Best if made at least one day in advance.

  • 1 cup (2 sticks) unsalted butter, room temperature
  • 3/4 cup sifted confectioners’ sugar
  • 1 teaspoon pure vanilla extract
  • 2 cups sifted all-purpose flour
  • 1/2 teaspoon salt
  • 1 1/2 tsp ground ginger

1. Preheat oven to 325F. Butter an 8×8 (or 9×9) baking pan and then line with parchment overhanging.

2. Cream butter, sugar and vanilla in mixer about three minutes. You want light and fluffy, but not too light and fluffy.

3.In a separate bowl whisk together the flour, salt, and ginger. Add to butter mixture and mix until dough ball forms. Press into prepared pan.

4. Bake until slightly golden on edges, about 20 minutes. Let cool and cut.

Mascarpone Cream

Mascarpone Cream

  • 1 cup chilled whipping cream
  • 6 tablespoons mascarpone cheese or cream cheese (cream cheese should be at room temp, but not mascarpone)
  • 2 tablespoons sugar
  • 1/4 teaspoon vanilla extract
Using electric mixer, beat cream, mascarpone, sugar, and vanilla in large bowl until peaks form. Can be made a few hours ahead, but should be day of.

1 Comment

Filed under baking, Cookies, quick bread

Monster Cookies

The name of these cookies could mean several things. They could be called “monster” because traditionally they are large. Very large. They could be called monster because they have a little bit of everything in them (oats, peanut butter, chocolate chips, just to name a few). Or they could be called monster because of the sheer number of calories, which we will chose to ignore. Whatever the reason, they rock.


I’m from the midwest and these cookies are something I remember from my childhood. They were always obnoxiously large and they were always delicious. My dear hubby, who grew up on both the West and East Coast, had never heard of them before.

*gasp*

So when my BFF  mentioned she was making monster cookies, I had a craving for them and I had to enlighten my hubby to this treat. It had been years since I enjoyed one. And they tasted just like I remembered. Happiness!

They are incredibly easy to make. You might spend a few extra minutes gathering up your entire pantry, but hey, it’s worth it.

And because Halloween is right around the corner, what is more appropriate than monster cookies? They are a nice change from chocolate chip cookies, without feeling that you are cheating on said cookie.

Monster Cookies

Courtesy of my BFF

Full Recipe – Makes several dozen
  • 9 cups oats (old fashioned oats, not quick cooking)
  • 2 TB baking soda
  • 2 cups granulated sugar
  • 2.5 cups brown sugar
  • 1 cup (2 sticks) unsalted butter, room temp
  • 1 TB vanilla extract
  • 6 eggs, room temperature
  • 1 TB corn syrup
  • 28 oz peanut butter
  • 12 oz M&Ms
  • 12 oz chocolate chips

Half Batch – Still makes quite a bit

  • 4 1/2 cups oats (old fashioned oats, not quick cooking)
  • 1 TB baking soda
  • 1 cup granulated sugar
  • 1 1/4 cups brown sugar
  • 1/2 cup (1 stick) unsalted butter, room temp
  • 1 1/2 tsp vanilla extract
  • 3 eggs, room temperature
  • 1 1/2 tsp corn syrup
  • 14 oz peanut butter
  • 6 oz M&Ms
  • 6 oz chocolate chips
*Note: there is no flour in these cookies.
1) Preheat oven to 350F.
2) Mix oats and baking soda in separate bowl. Set aside.
2) Cream butter, sugars, and vanilla until light and fluffy, about 5 minutes. Add eggs, one at a time, scraping bowl after each addition.
3) Add  corn syrup and peanut butter, scraping the bowl.
4) Add oat mixture, mix until blended.
5) Add chocolate chips and M&Ms. You can add them in the mixer, but they might break. Fold them in if you don’t want them to break.
6) Use whatever size scoop works best for you.
7) Bake time will vary depending on the size of the cookie. You want to get these a little more done so they stay together. Bake until golden is a good rule. The larger cookie took about 20 minutes. The slightly smaller ones (3 TB scoop) took about 13 minutes. Do a test batch with just a couple cookies first to check the bake time.
Let cool. Eat.
I baked two at monster size. Only two would fit on a half sheet pan. Yup, two.

2 Comments

Filed under Cookies

Have You Met My Friend, Chocolate Chip Cookie?

It’s here! It’s finally here! What, you ask? The one year anniversary (or birthday?) of Cookie Talk. Yes, folks, I’ve survived one year of blogging. I’ve learned so much, particularly about photography, and it’s been great hearing all the comments and suggestions. Blogs are such a wonderful way to share and connect with others. So thank you for sticking with me!

And what to do for the 1st Anniversary? Cookies, of course. Not just one cookie, but three cookies. To be fair, I’ve done one before, it was one of my very first posts, the Best Chocolate Chip Cookie Ever, which is a copycat of the Levain Bakery from Lisa Michele. I’ve been making this cookie for about two years, feeling as though no other chocolate chip cookie could ever take it’s place. But all over the food world I see two other popular recipes: The New York Times recipe from Jacques Torres, and the Neiman Marcus “$250,000” cookie, or however much the rumor goes.

I was curious, and thus, came the challenge. I’d make all three chocolate chip cookies and the hubby and I, as well as a few of our more-than-willing friends and co-workers (“Hey, want to taste some cookies?” is a great way to win some friends), would do a blind taste test. It’s a rough job blogging. Really, tasting all these cookies was such hard work! Fine, don’t believe me.

The blind tasting for hubby and I was actually challenging, but probably not in a way that will garner any sympathy. We knew what went into each cookie and what each one looked like. But we tried to make it as objective as possible and even went so far as to blindfold one while the other took notes. But it was still pretty easy to guess which cookie we were tasting.

I learned a lot from this experiment, and was a bit surprised as well. I’m also working on my own chocolate chip cookie recipe, combining our favorites from each. But that’s a post for another day. Making the perfect cookie doesn’t happen overnight.

And the winner is (drum roll)…… The New York Times Jacques Torres, with Levain as a very close second. In fact, my initial favorite was Levain, barely, because I just couldn’t accept that my favorite cookie was being replaced. The more I ate the NYT cookie (yes, I’ve had several, which is not good for the waist line. See the sacrifices I make?) the more I liked it and the more I realized the Levain wasn’t as special as I thought it was. It was like learning you and your best friend have grown apart and now you have a new best friend who is much cooler and more compatible. It hurts a little. Until you have another cookie.

Now, I must point out that I have never had a true Levain cookie, or a Jacques Torres cookie, or a Neiman Marcus cookie. The Levain is a copycat recipe, which could completely change the results. So it isn’t a completely true competition, but hey, we’re doing the best we can. Someday I hope to go to New York and have Jacques Torres and Levain all in the same day. Probably with a tummy ache on the side.

Now, let’s talk about the differences in these cookies. All three are basic chocolate chip cookies: flour, sugar, baking soda and powder, butter, chocolate.  But they are all very different cookies, as you can see in the picture above. I used the same scoop, 3 TB, for each cookie and they baked very differently. The first is the Torres cookie, the second Levain, and the third Neiman Marcus.

Let’s talk first about the least favorite: The Neiman Marcus. Really, this cookie had no business attempting to compete against the other two. It’s not even in the same category. Two people did say it was their favorite, but most didn’t even like it all that much. The only redeeming factor was the chocolate-y-ness of it (and also that was by far the fastest to make), which came from the insane amount of instant coffee. It almost tasted like a Coffee Chocolate Chip cookie. But it was kind of dry, almost crunchy, and really not that special. It had the least amount of butter, only 1 egg, and was mostly brown sugar, which should have been a good thing. But it just didn’t measure up. Sorry, Neiman Marcus, your cookie isn’t even worth $2.50.

Next, the runner up, the Levain Copycat. After I made this recipe for the umpteenth time, I noticed Lisa Michele had updated her recipe to include less flour and more brown sugar, which is exactly what we thought it needed after tasting the NYT recipe. I had always used less flour than she suggested, and I always add vanilla. I feel it is necessary in a chocolate chip cookie. This is a great overall cookie. It is cakey and well balanced between dough and chocolate. If you were forced to eat this cookie for the rest of your life, you’d still be darned happy. It does dry out quite a bit the next day, which is one of the reasons it was forced into second place, but a few seconds in the microwave can help fix that.

And finally, the star of the Cookie World, the New York Times recipe courtesy of Jacques Torres. This cookie is a real show stopper. It is everything you want in a chocolate chip cookie and then some. And I didn’t even use the chocolate “discs” as the recipe suggests, which I can only imagine would make it even more delightful. This cookie had a lower brown sugar to granulated sugar ratio than the Neiman Marcus, but for some reason the brown sugar really stood out in the Jacques Torres cookie.  I don’t know why it stood out more in this cookie. I’m baffled. I’m also completely baffled at how it baked. I fully expected a bigger rise on this cookie due to the cold butter and the extra baking powder. But it didn’t. It spread and wasn’t cakey at all like the Levain. Have I mentioned I’m baffled? This goes against my basic knowledge of baking. Anyone care to help me out here? It must have something to do with the ratio of butter to flour to leavening agents. Or maybe it is because it is made with bread flour and cake flour? Help. Where is Alton Brown when I need him? I need to watch his Chocolate Chip Cookie episode again!

And back to the cookie. It’s crunchy on the outside. Gooey on the inside. A rich chocolate flavor with a caramel tasting dough. Oh, and if that wasn’t enough, how about sprinkling some sea salt on top to take you right over the edge into Chocolate Chip Cookie Heaven? Yup, that’s a winning cookie.

Let’s take another look at the cookies:

New York Times/Jacques Torres

Levain Copycat

Neiman Marcus

This was a fun experiment. It’s interesting to see how slightly different measurements can create a completely different cookie.  So what’s your favorite chocolate chip cookie and why?

Tips and Pointers: For each recipe I used Guittard chocolate chips, light brown sugar, unsalted butter, fine sea salt, King Arthur Flour, and a 3 TB scoop. I also could not bake and eat all these cookies at the same time, nor do I have enough friends to share all this dough. I recommend scooping each dough out, freezing the dough balls, and then baking when you are ready. If you freeze the dough and then try to scoop, you are likely to hurt your shoulder. Trust me, I learned the hard way. This also ensures that you can always have fresh baked cookies on a moments notice…which might not be a good thing.

One Year Ago: Chocolate Peanut Butter Whoopie Pies

Neiman Marcus

  • 1/2 cup (1 stick) butter, softened
  • 1 cup light brown sugar
  • 3 tablespoons granulated sugar
  • 1 large egg
  • 2 tsp vanilla extract
  • 1 3/4 cup all purpose flour
  • 1/2 tsp baking powder
  • 1/2 tsp baking soda
  • 1/2 tsp salt
  • 1 1/2 tsp instant espresso powder (doesn’t sound like much, but it is!)
  • 1 1/2 cups chocolate chip cookies

1) Preheat oven to 300F. Cream the butter with the sugars using an electric mixer on medium speed until fluffy.

2) Beat in the egg and vanilla for another 30 seconds, or until combined.

3) In a mixing bowl, sift together the dry ingredients and beat into the butter mixture at low speed for about 15 seconds. Stir in espresso and chocolate chips.

4) Using your desired cookie scoop, drop onto a parchment lined cookie sheet (or silpat) about three inches apart. Gently press down to flatten. Bake about 20 minutes, or until brown. I think 20 minutes is too long and only baked for about 16 minutes.

Levain Copycat

  • 2 sticks ‘cold and cubed’ unsalted butter
  • 3/4 cup sugar
  • 3/4 cup brown sugar
  • 1 tablespoon good vanilla
  • 2 eggs
  • 3 1/4 to 3 1/2 cups AP flour – Spoon and Sweep method. I usually stick with 3 1/4 cup.
  • 3/4 teaspoon Kosher salt
  • 3/4-1 teaspoon baking powder (just under 1 teaspoon)
  • 1/4 tsp baking soda
  • 2 cups good quality semisweet chocolate chips or chunks
1)  Preheat oven to 350 degrees.
2)  In bowl of electric mixer fitted with paddle, cream together butter and sugars and vanilla until well blended and fluffy, 3 to 5 minutes.  Add eggs, one at a time.. and beat until well incorporated.
3)  Add flour, salt, baking soda, baking powder and mix until just combined. Gently fold in chocolate chunks, or add to the mixer at the very end on very low speed.
4)  Using a scoop, place each on sheet pan lined with parchment paper or silpat and bake in the preheated oven until very lightly browned, taking care not to over bake, about 14 – 16 minutes depending on your preference.

New York Times adapted from Jacques Torres

  • 2 cups minus 2 TB cake flour
  • 1 2/3 cup bread flour
  • 1 1/4 tsp baking soda
  • 1 1/2 tsp baking powder
  • 1 1/2 tsp coarse salt
  • 2 1/2 sticks unsalted butter
  • 1 1/4 cups light brown sugar
  • 1 cup plus 2 TB granulated sugar
  • 2 large eggs
  • 2 2/3 cups chocolate chips or discs
1)  Whisk together dry ingredients. Set aside.
2)  Cream together sugars and butter until very light, about 5 minutes. Add eggs, one at a time, mixing completely and scraping bowl after each addition. Reduce speed to low and very slowly add dry ingredients, mixing just until combined. Add chocolate very carefully.
3) Scoop cookies onto baking sheet and chill for 24 to 36 hours. Wrap tightly.
4)  Preheat oven to 350F. Bake cookies 14 to 18 minutes depending on the size, until golden but still gooey.
5) Eat immediately and have another.
17 Comments

Filed under Cookies

Cinnamon Hazelnut Biscotti

Biscotti is one of those words you just love to say…and it is one of those treats you love to eat! What could be better than a crunchy cookie dipped in coffee for an afternoon pick-me-up? Yum. I’ll take two, please.

Making biscotti is pretty basic. You make dough, shape the dough into logs, bake the logs, cut the logs, bake again. Easy! This is by far my favorite biscotti. I’ve made and had others, but I just keep coming back to this. Something about cinnamon and hazelnuts that seem to go well together.  And when the weather is cooperating (i.e. not so freakin’ humid) I also like to dip and/or drizzle with white chocolate. You know I have to throw chocolate in there somehow!

But today I just did biscotti without chocolate. I tried, but the chocolate just wasn’t cooperating. And the chocolate always wins. Temperamental stuff! I originally got this recipe from a friend (who originally suggested adding the white chocolate, which obviously makes her a genius!) and I lost that recipe. Thankfully, Bon Appetit saves the day again (going to have to change the name of the blog to Bon Appetit & Chocolate considering how many posts revolve around the two!) and had a “Hazelnut Cinnamon” biscotti recipe in their Desserts book, which is pretty darned close to the one I had before.

I adjusted the method and added more cinnamon. Their recipe only calls for 1/4 tsp, in which case it should just be called Hazelnut Biscotti. I love cinnamon and I want to taste it, so I added 2 tsp. Adjust according to your taste.

Cinnamon Hazelnut Biscotti

adapted from Bon Appetit Desserts

  • 3 cups unbleached AP Flour
  • 1 TB baking powder
  • 1/2 tsp salt (I prefer sea salt)
  • 2 tsp ground cinnamon
  • 1 cup hazelnuts, toasted and husked*
  • 3/4 cup sugar
  • 1/2 cup (1 stick) butter, somewhere in between room temperature and cold.
  • 1 TB orange zest
  • 1 tsp vanilla extract
  • 3 large eggs, room temp

*To husk the hazelnuts: spread in a single layer on a sheet pan and bake in oven at 350F for about 10 minutes. Let cool slightly, then take a tea towel and rub.  The skins will come off fairly easily. If not, bake a few minutes longer. Don’t fret if you don’t get all the skins. A little won’t hurt.

1. Preheat oven to 350F. Prepare two baking sheets with either silpat or parchment. Whisk together flour, baking powder, salt, and cinnamon. Set aside.

2. Chop hazelnuts in food processor until slightly chunky. How chunky depends on your preference.

3. Place butter, sugar, vanilla, and zest in stand mixer and mix until light and fluffy, about 3 to 5 minutes. Add eggs one at a time and mix until combined. Scrape the bowl after each addition. Add flour mixture. When flour is almost completely mixed, add the chopped hazelnuts. Mix just until combined.

4. Divide the dough in half and place on prepared sheet pans. Flatten dough into an even rectangle. If you want to cut them diagnol, keep it narrow and long. If you want to cut just straight, make it wider. Bake for 20 to 25 minutes until golden on the edges. Remove from oven,  let cool slightly and move to a cutting board (very carefully!). Slice into biscotti shapes. Place on sheet pan. Bake 10 minutes. Flip pieces, bake 10 minutes more, or until desired crispiness. Careful that they don’t burn. Make coffee, and enjoy!

5. If you are dipping in chocolate, melt about 8 oz chocolate, dip biscotti, let set, and then make coffee.  Sharing is optional.

2 Comments

Filed under Cookies